
Epson UST Projector Menu Settings
An overview of the Epson UST Projector Menu. Find the settings you need to change.
Have you already calibrated your projector but you think there may be some settings you’d like to change? And you’re scared to play around too much because you might irrevocably change something that totally ruins your calibration?!
Well, fear not, friend, I’ve gone through the menu and played around with each one and bring you the overview in this video:
PLEASE NOTE-I’m using an Epson UST 595wi. Some menus may be slightly different, especially if your projector does not have an interactive feature or is another brand. You can always Google for your specific projector’s user manual to read about your specific projector.
Use the timestamps in the description box to find each of the different options covered:
Image Menu
Color Mode (can help with clarity)
Brightness (can help with brightly lit rooms)
Contrast (can help make lines more stark)
Sharpness (can help make lines sharper),
Color Temp,
Reset (for only the Image Menu settings)
Signal Menu
Aspect Ratio (can help when squares measure as rectangles)
Settings Menu
Keystone (can help with rectangles that look like trapezoids)
Quick Corner (can help with fine tuning calibration)
Zoom (can help make the entire projected image bigger or smaller)
Image Shift (can help fine tune the projected image on your mat)
Pointer Shape,
Volume,
Mic Input Level,
Remote Receiver,
User Button,
Pattern (can help line up projector and mat in the center),
Reset (for only the Signal Menu settings)
Extended Menu-Different for Interactive vs Non-interactive
Easy Interactive Function (necessary when using USB-B and wanting to use the pens)
Display,
Closed Caption,
User's Logo
Projection (used to change the orientation of the projected image-WILL ALWAYS BE LANDSCAPE but it will flip the screen in several ways)
USB Type B (necessary when using USB-B for display),
Language (for changing the display language of your projector),
Reset (for resetting all of the Extended Menu settings)
Network Menu-largely unhelpful for us
Eco Menu
Power Consumption,
Light Optimizer,
Sleep Mode,
Sleep Mode Timer,
A/V Mute Timer,
Standby Mode,
ECO Display (all can be used in various ways to control your power consumption, does affect brightness and how fast your screen turns itself off),
Reset (reset the Eco Menu settings)
Info Menu
tells you about your projector, most helpful can be the
Resolution (so you can make your computer match the resolution, especially for duplicated displays),
and Lamp Hours (to see if you may be needing to replace your lamp soon)
Reset Menu
allows you to Reset all settings at once
Until next time, friends!

Using Quick Corners on an Epson UST
A cheat for Epson UST projector calibration-Quick Corners! Learn the hows and whys in this blog and video.
Two parts of pattern projecting are both critcal and daunting:
Choosing the right projector for your space/situation
Calibration
I have this page for helping you choose a projector.
And a few posts/videos to help with calibration-UST, ST, Amazon/Mini, How Close is “Close Enough”
AND today I’m bringing you a calibration cheat!
It only works on Epson USTs (my 410wi ST does not have Quick Corners but some other ST models might) but it’s very handy for those last minute adjustments that you just can’t seem to get.
As I say in the video, it’s important to do as much physical calibration as possible before using Quick Corners. Quick Corners works by turning off and on some pixels and warns you that it can degrade the image. We don’t want to rely too heavily on that because it can end up distorting the very image we are trying to calibrate!
But if you’ve been trying to get that last little bit of a corner lined up and you’re so close but not quite close enough, Quick Corners is a great option!
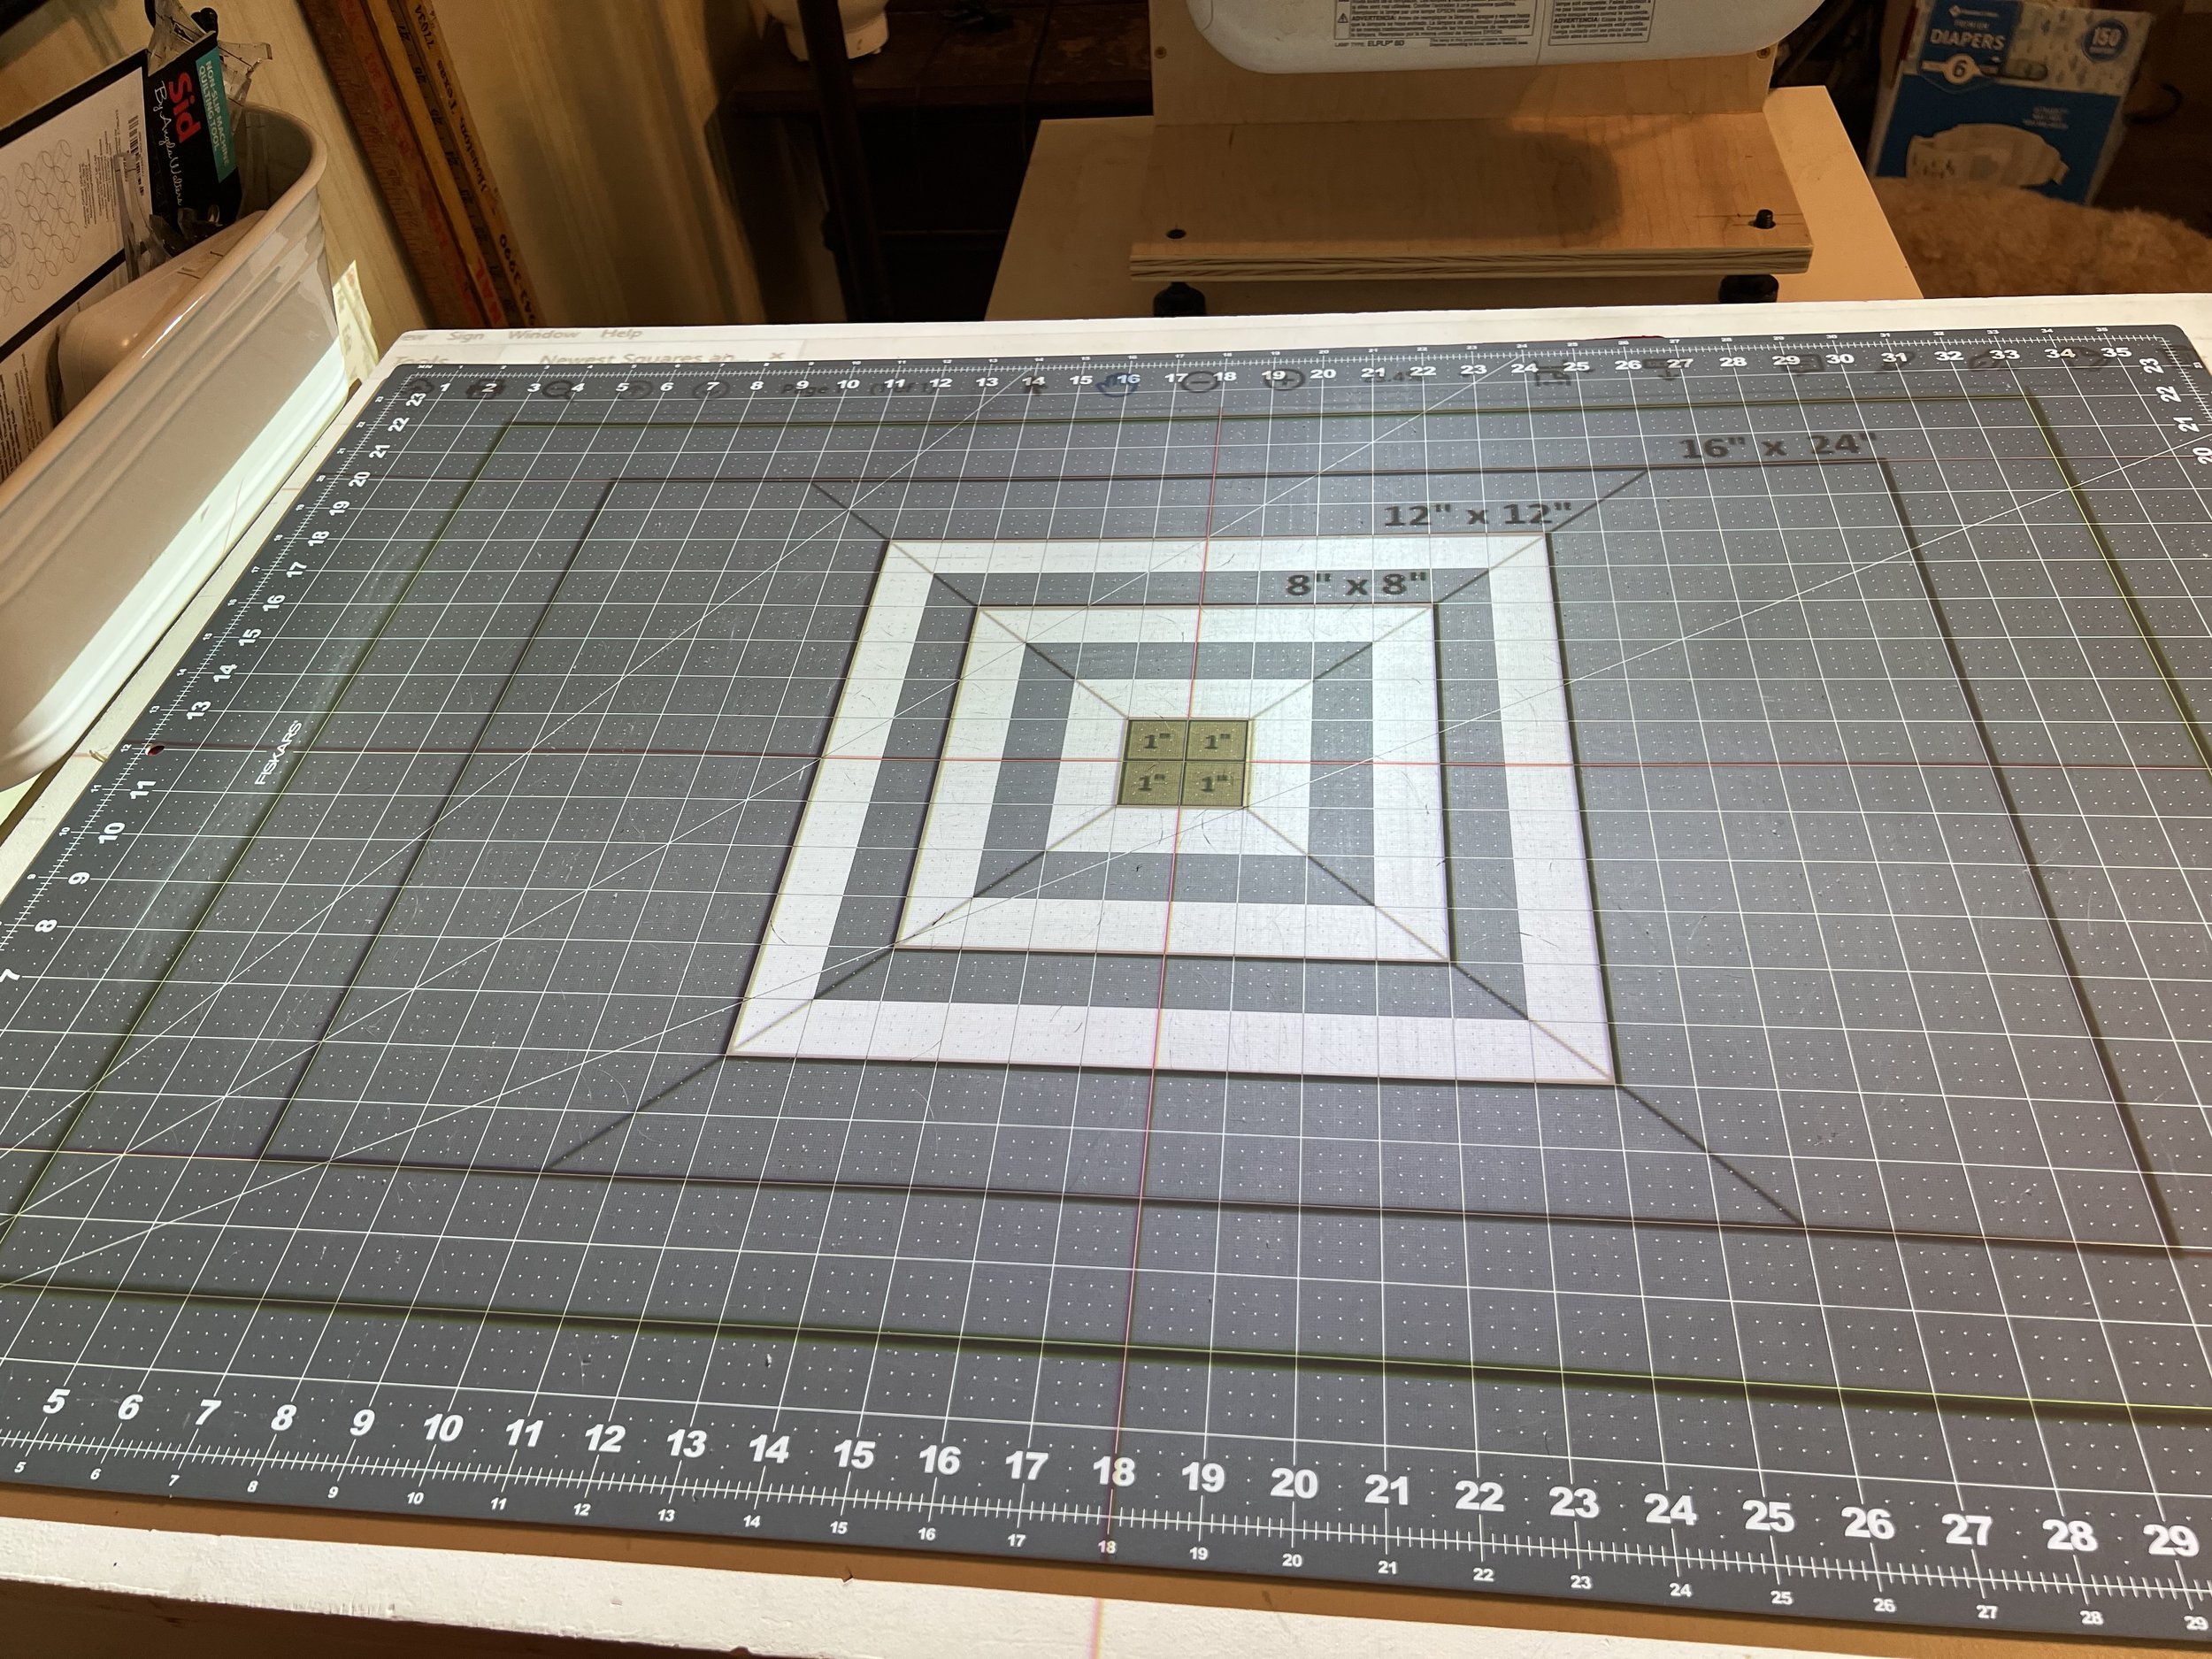
Slightly uncalibrated, check the corners
You access it by clicking Menu on your projector or remote and then scrolling to Settings.

Menu>Settings
Once you click Enter on Settings, it will highlight Keystone.

Menu>Settings>Keystone
Click Enter again and the Keystone menu opens. Scroll to Quick Corners.
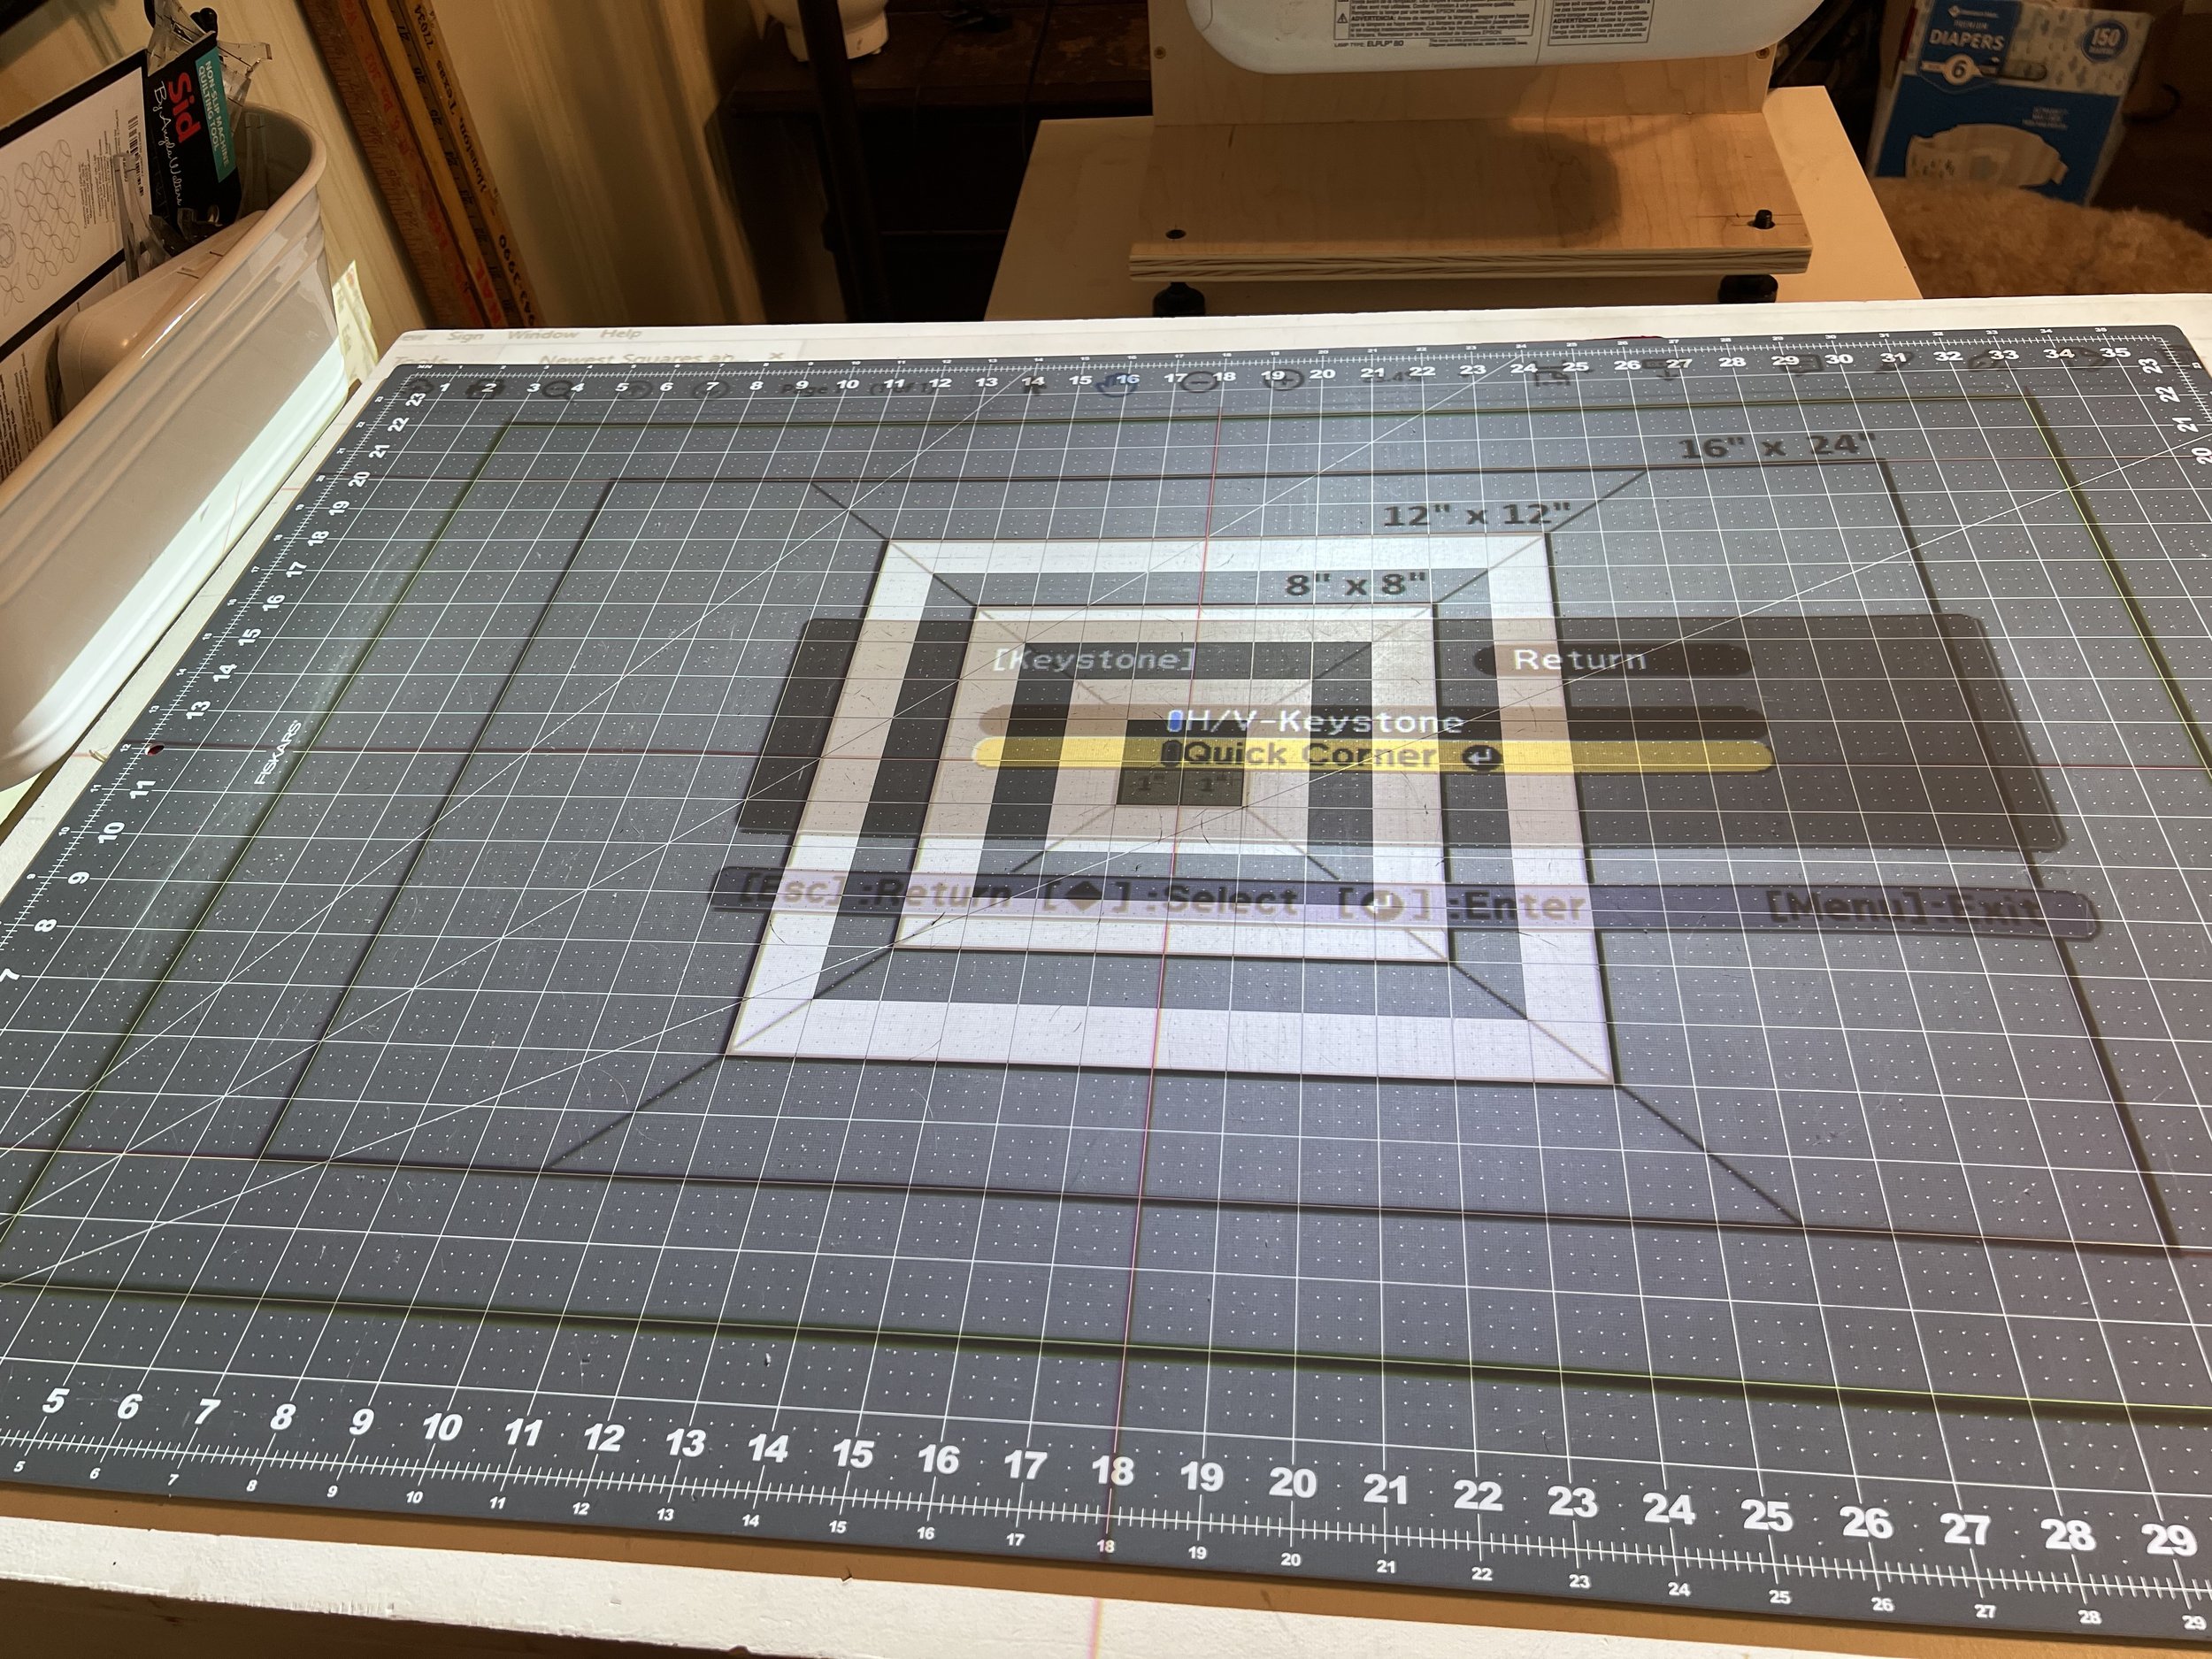
Keystone Setting
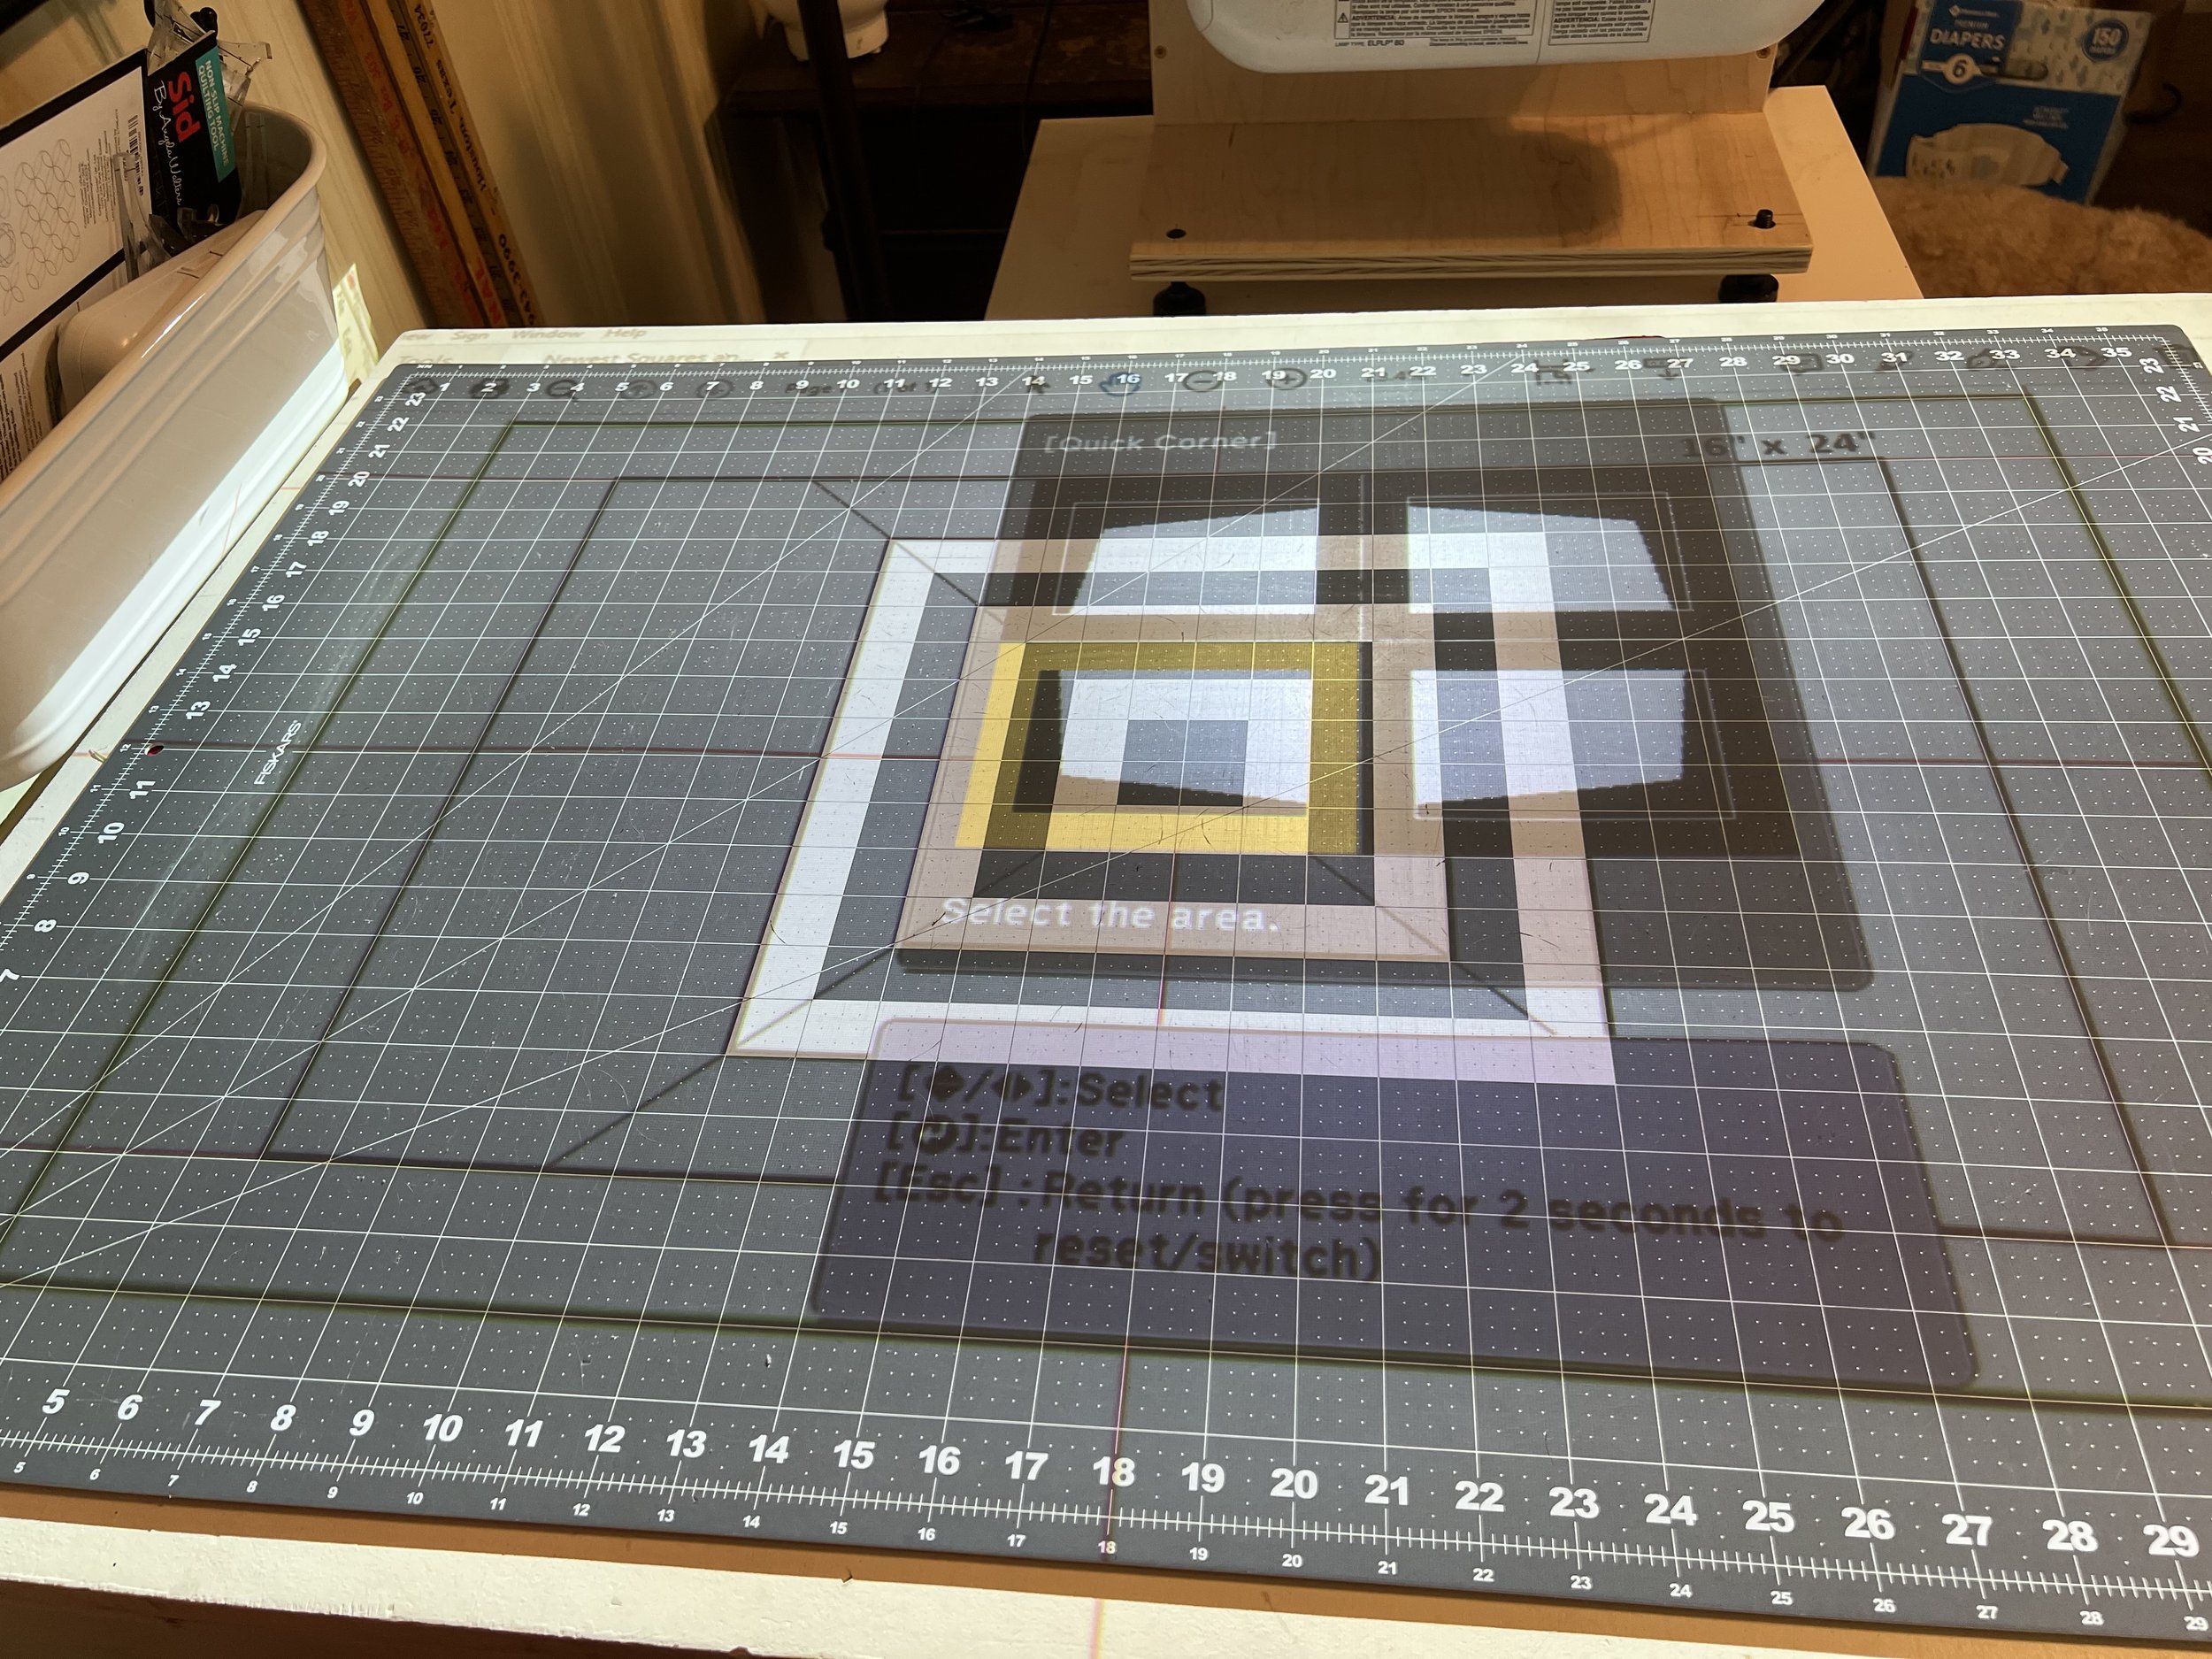
Enter into the Quick Corners and you’ll get this warning:
[Keystone]
If this setting is changed, the image may be distorted.
This is why we save it for a last resort. The less it has to adjust here, the better your image will be. Also, it just won’t allow you to make drastic changes.

Warning!
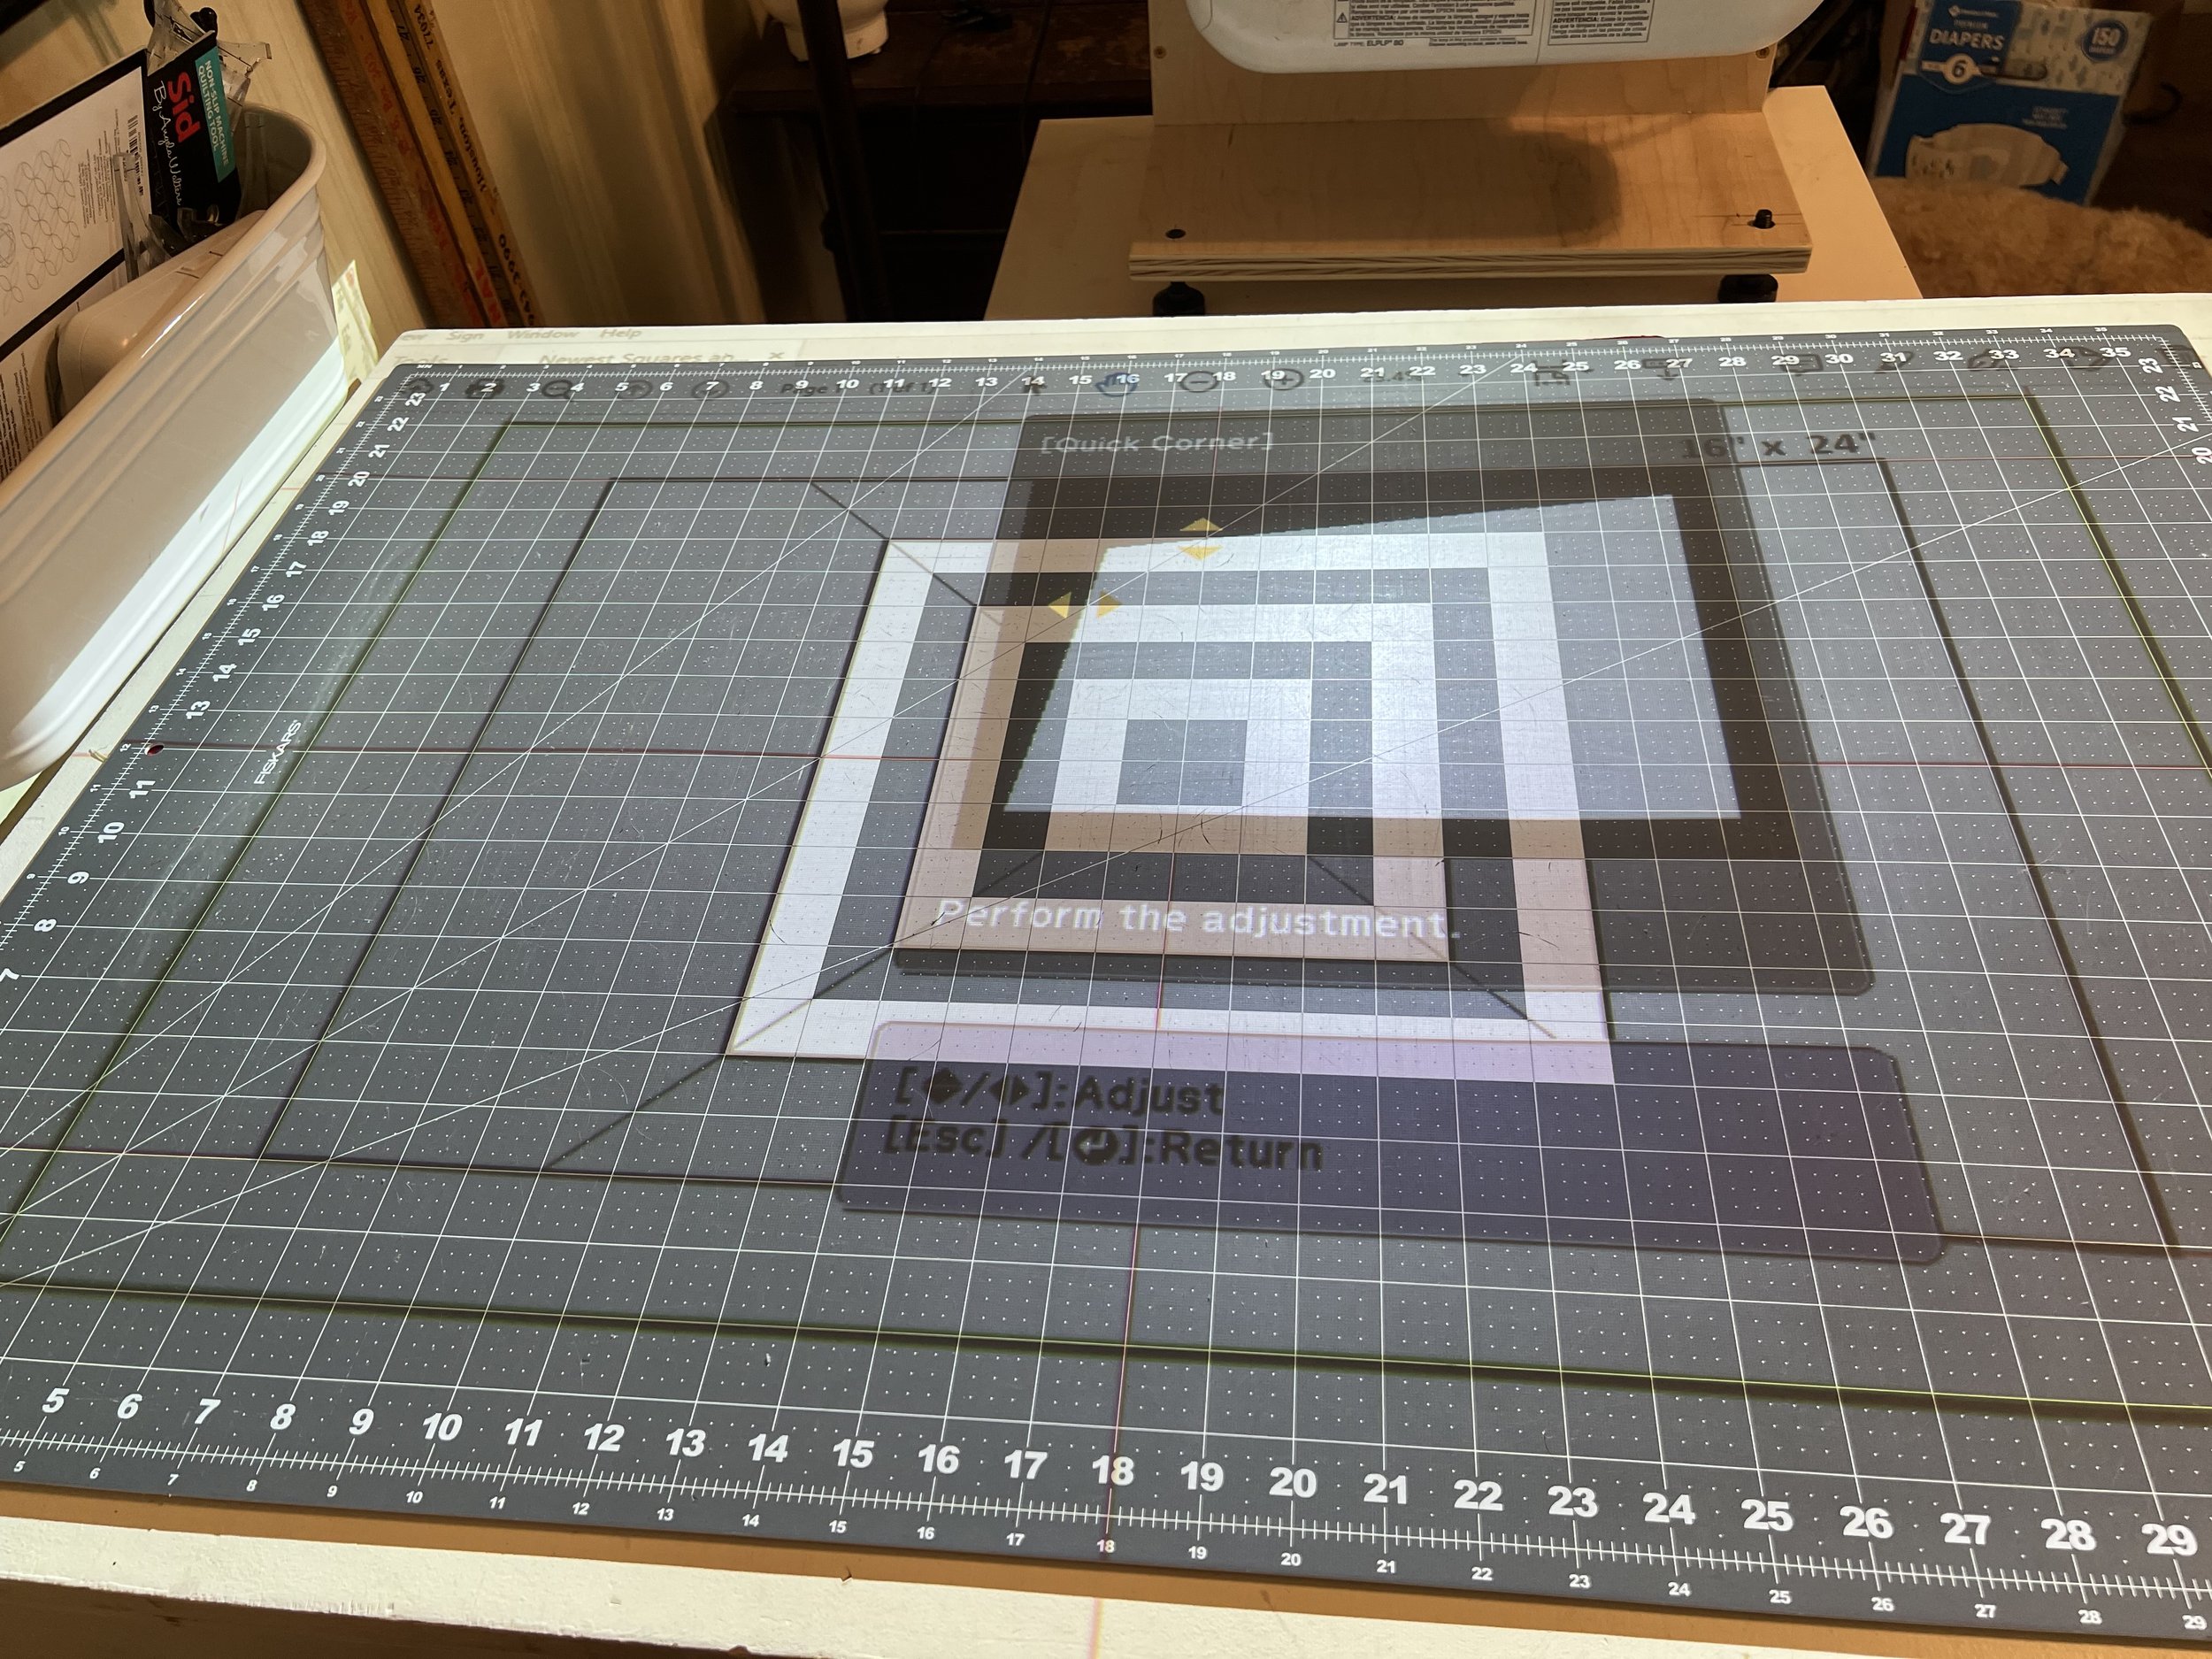
Click Enter one more time to finally enter the Quick Corner menu. It will highlight the top left corner by default.

Quick Corner Menu
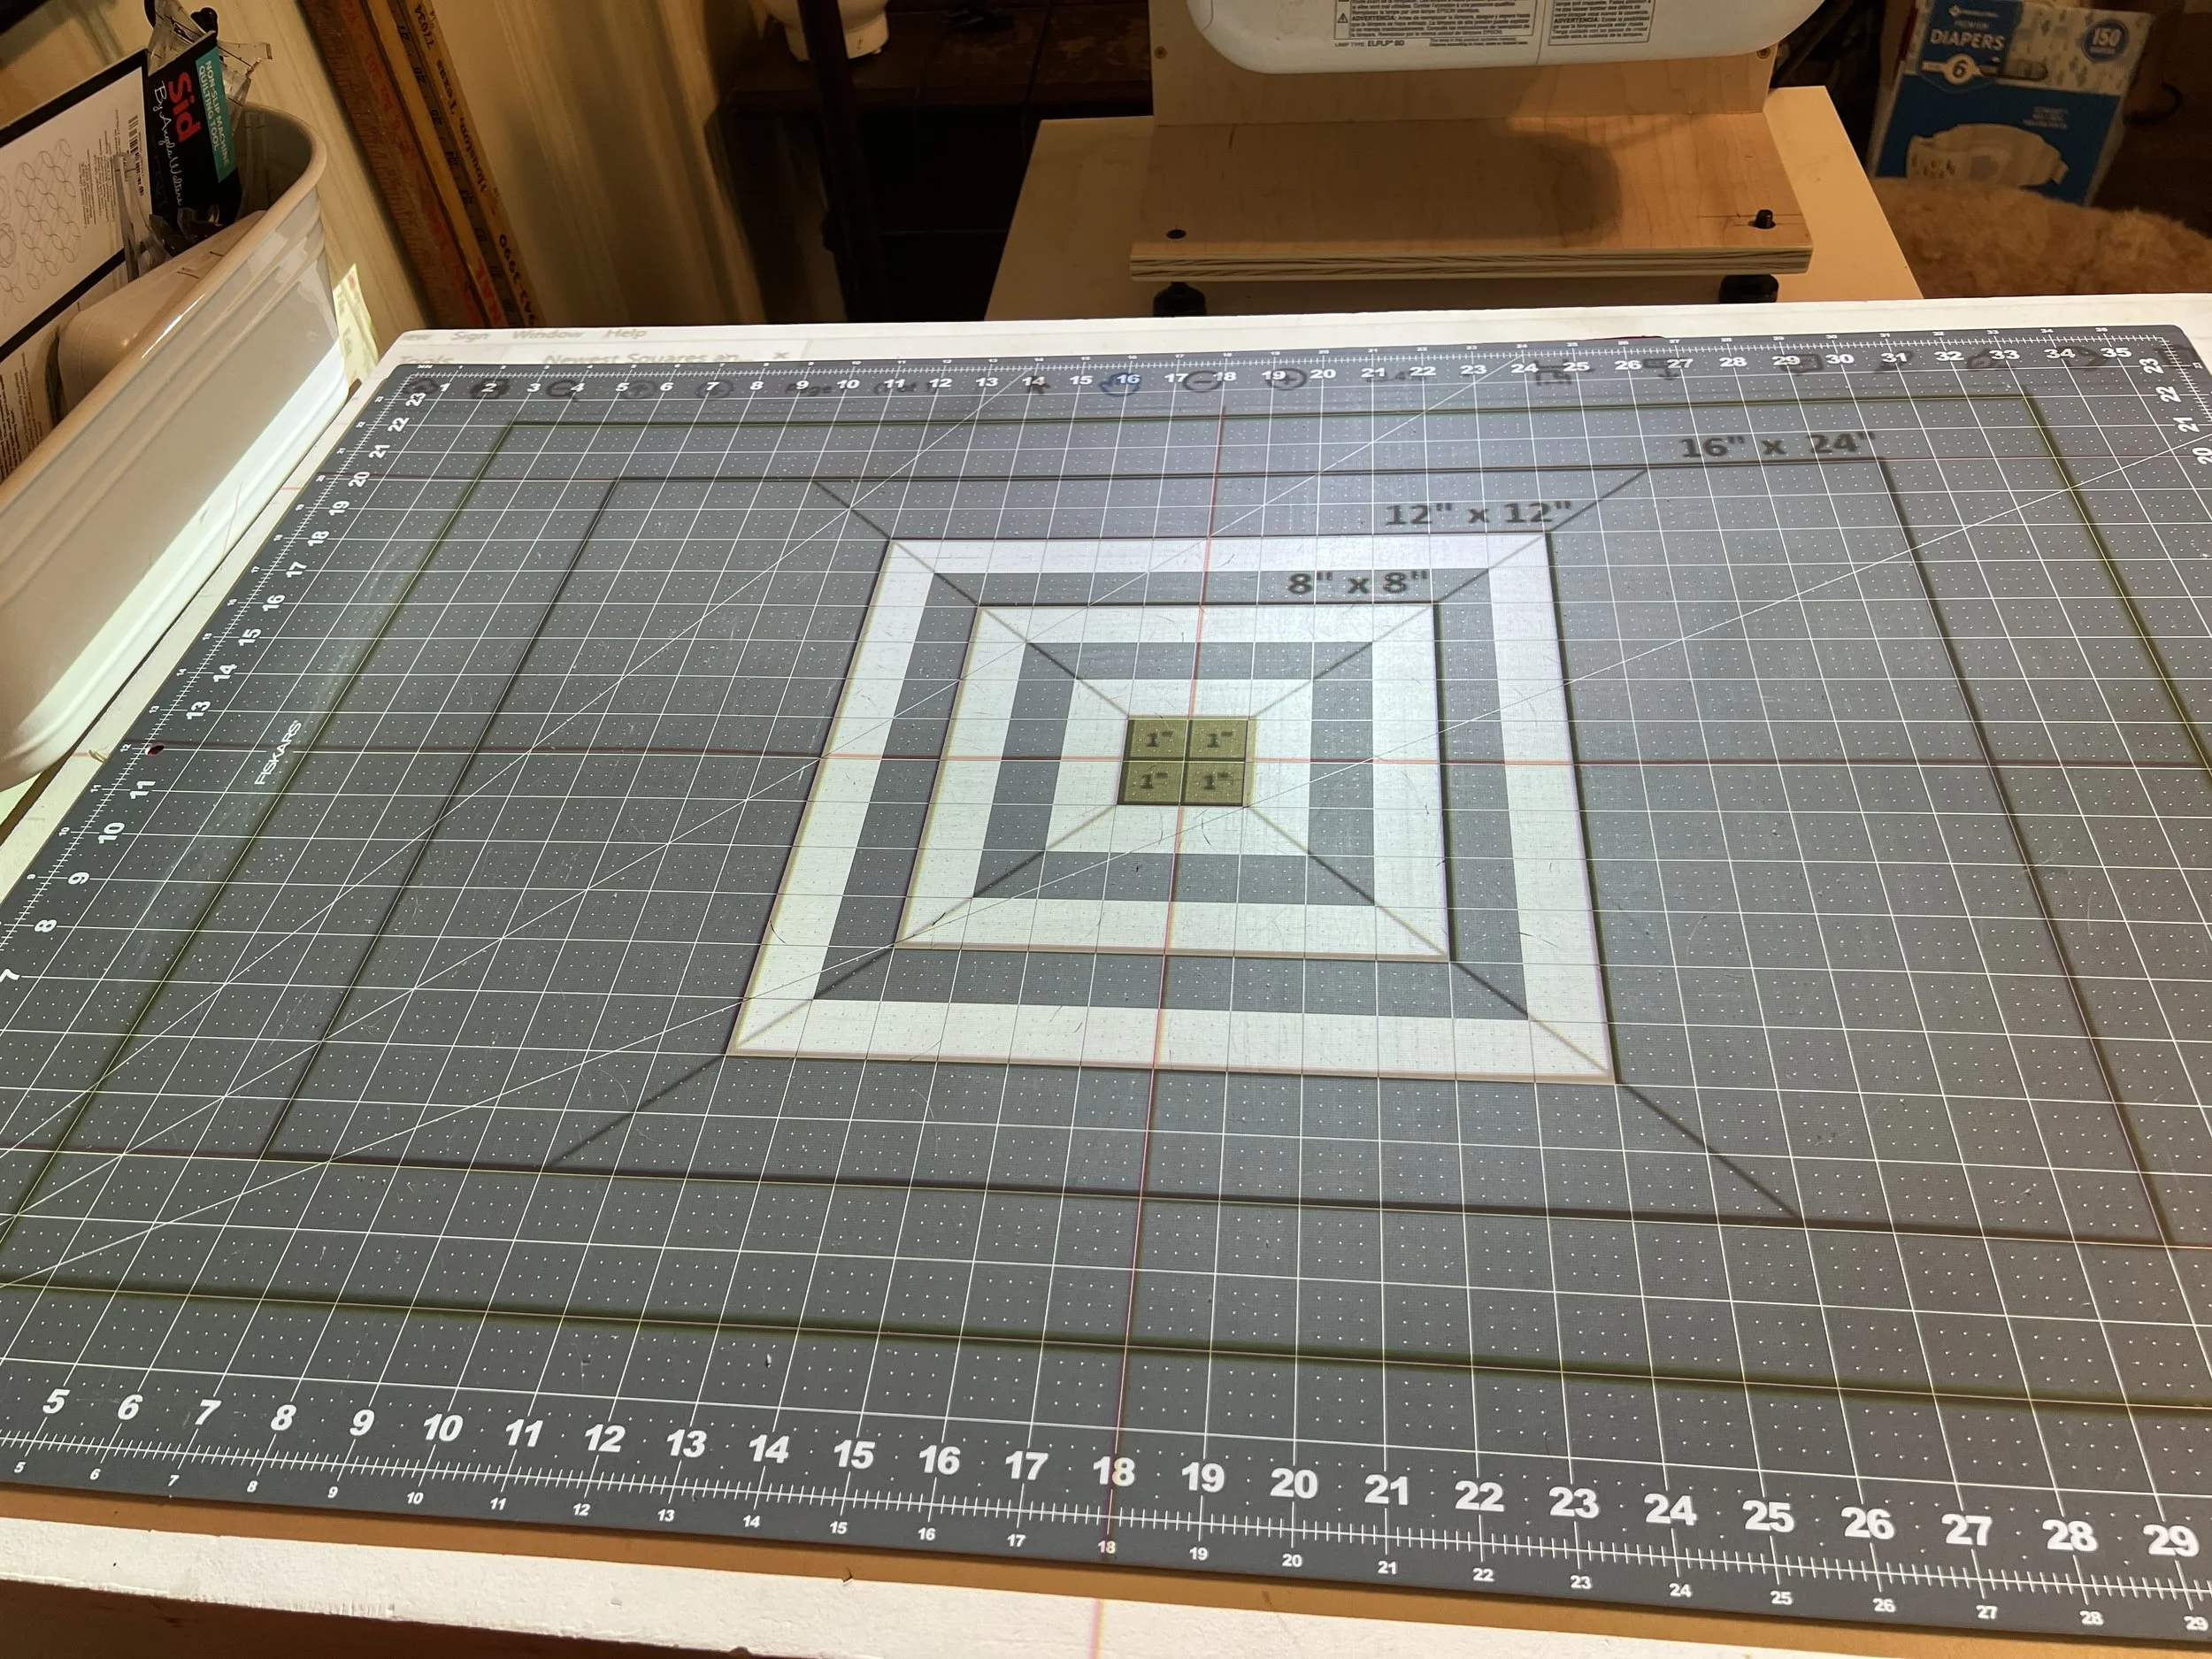
Click enter and then you can use the up and left arrows to slowly change where the top left corner’s point hits.
Corner chosen
When you’re happy, click Escape to go back to the Quick Corners menu and move over to the next corner.
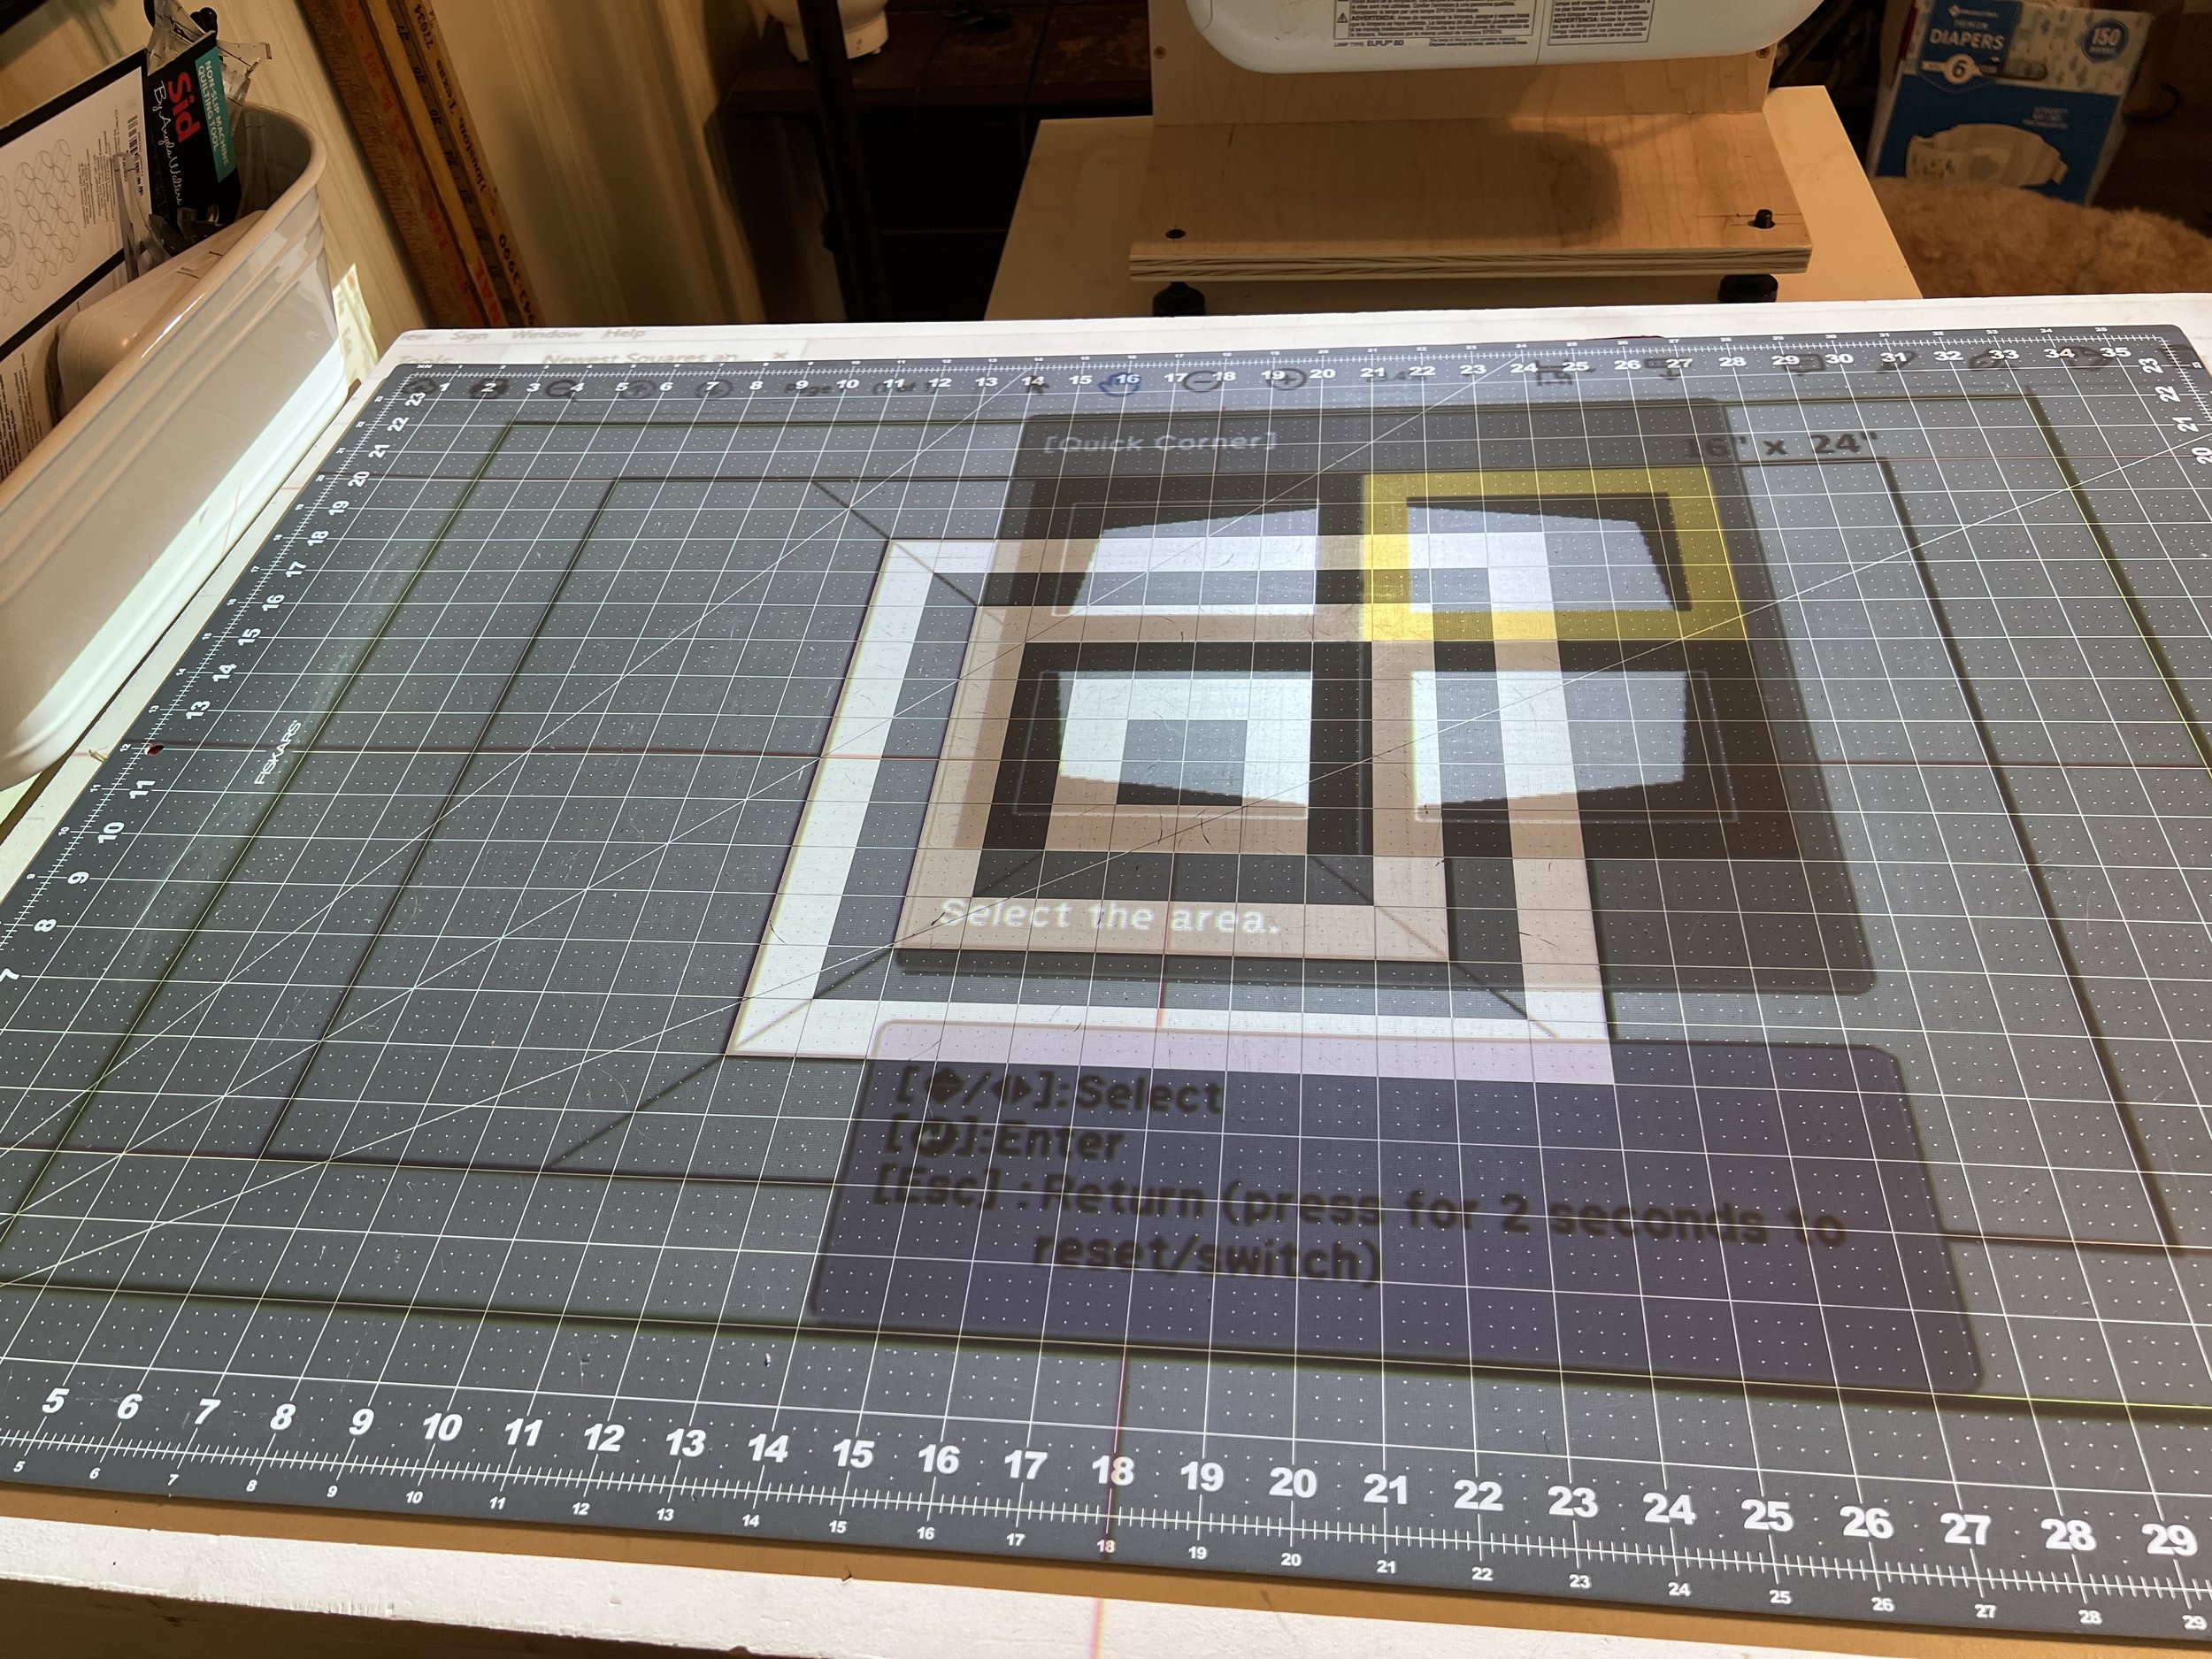
Do each corner
Continue until you’ve moved all the corners to be square and match your mat.

It’s OK if you don’t have to adjust every corner. In my example, I didn’t move the bottom left corner at all!
You can go back to each corner and adjust further if necessary. But once you’re done adjusting, Escape out of all the menus and you’ll be left with a beautifully calibrated image!
Ta-da!
Remember that the biggest way to set yourself up for success is a flat mat. If you’ve got wrinkles, press them down with your hand as best you can.
And don’t strive for perfection, 1/4” or less off your 16x24” box is 99% accurate and close enough for most sewing!
‘Till next time friends, happy pattern projecting!
Branalyn