
Using Quick Corners on an Epson UST
Two parts of pattern projecting are both critcal and daunting:
Choosing the right projector for your space/situation
Calibration
I have this page for helping you choose a projector.
And a few posts/videos to help with calibration-UST, ST, Amazon/Mini, How Close is “Close Enough”
AND today I’m bringing you a calibration cheat!
It only works on Epson USTs (my 410wi ST does not have Quick Corners but some other ST models might) but it’s very handy for those last minute adjustments that you just can’t seem to get.
As I say in the video, it’s important to do as much physical calibration as possible before using Quick Corners. Quick Corners works by turning off and on some pixels and warns you that it can degrade the image. We don’t want to rely too heavily on that because it can end up distorting the very image we are trying to calibrate!
But if you’ve been trying to get that last little bit of a corner lined up and you’re so close but not quite close enough, Quick Corners is a great option!
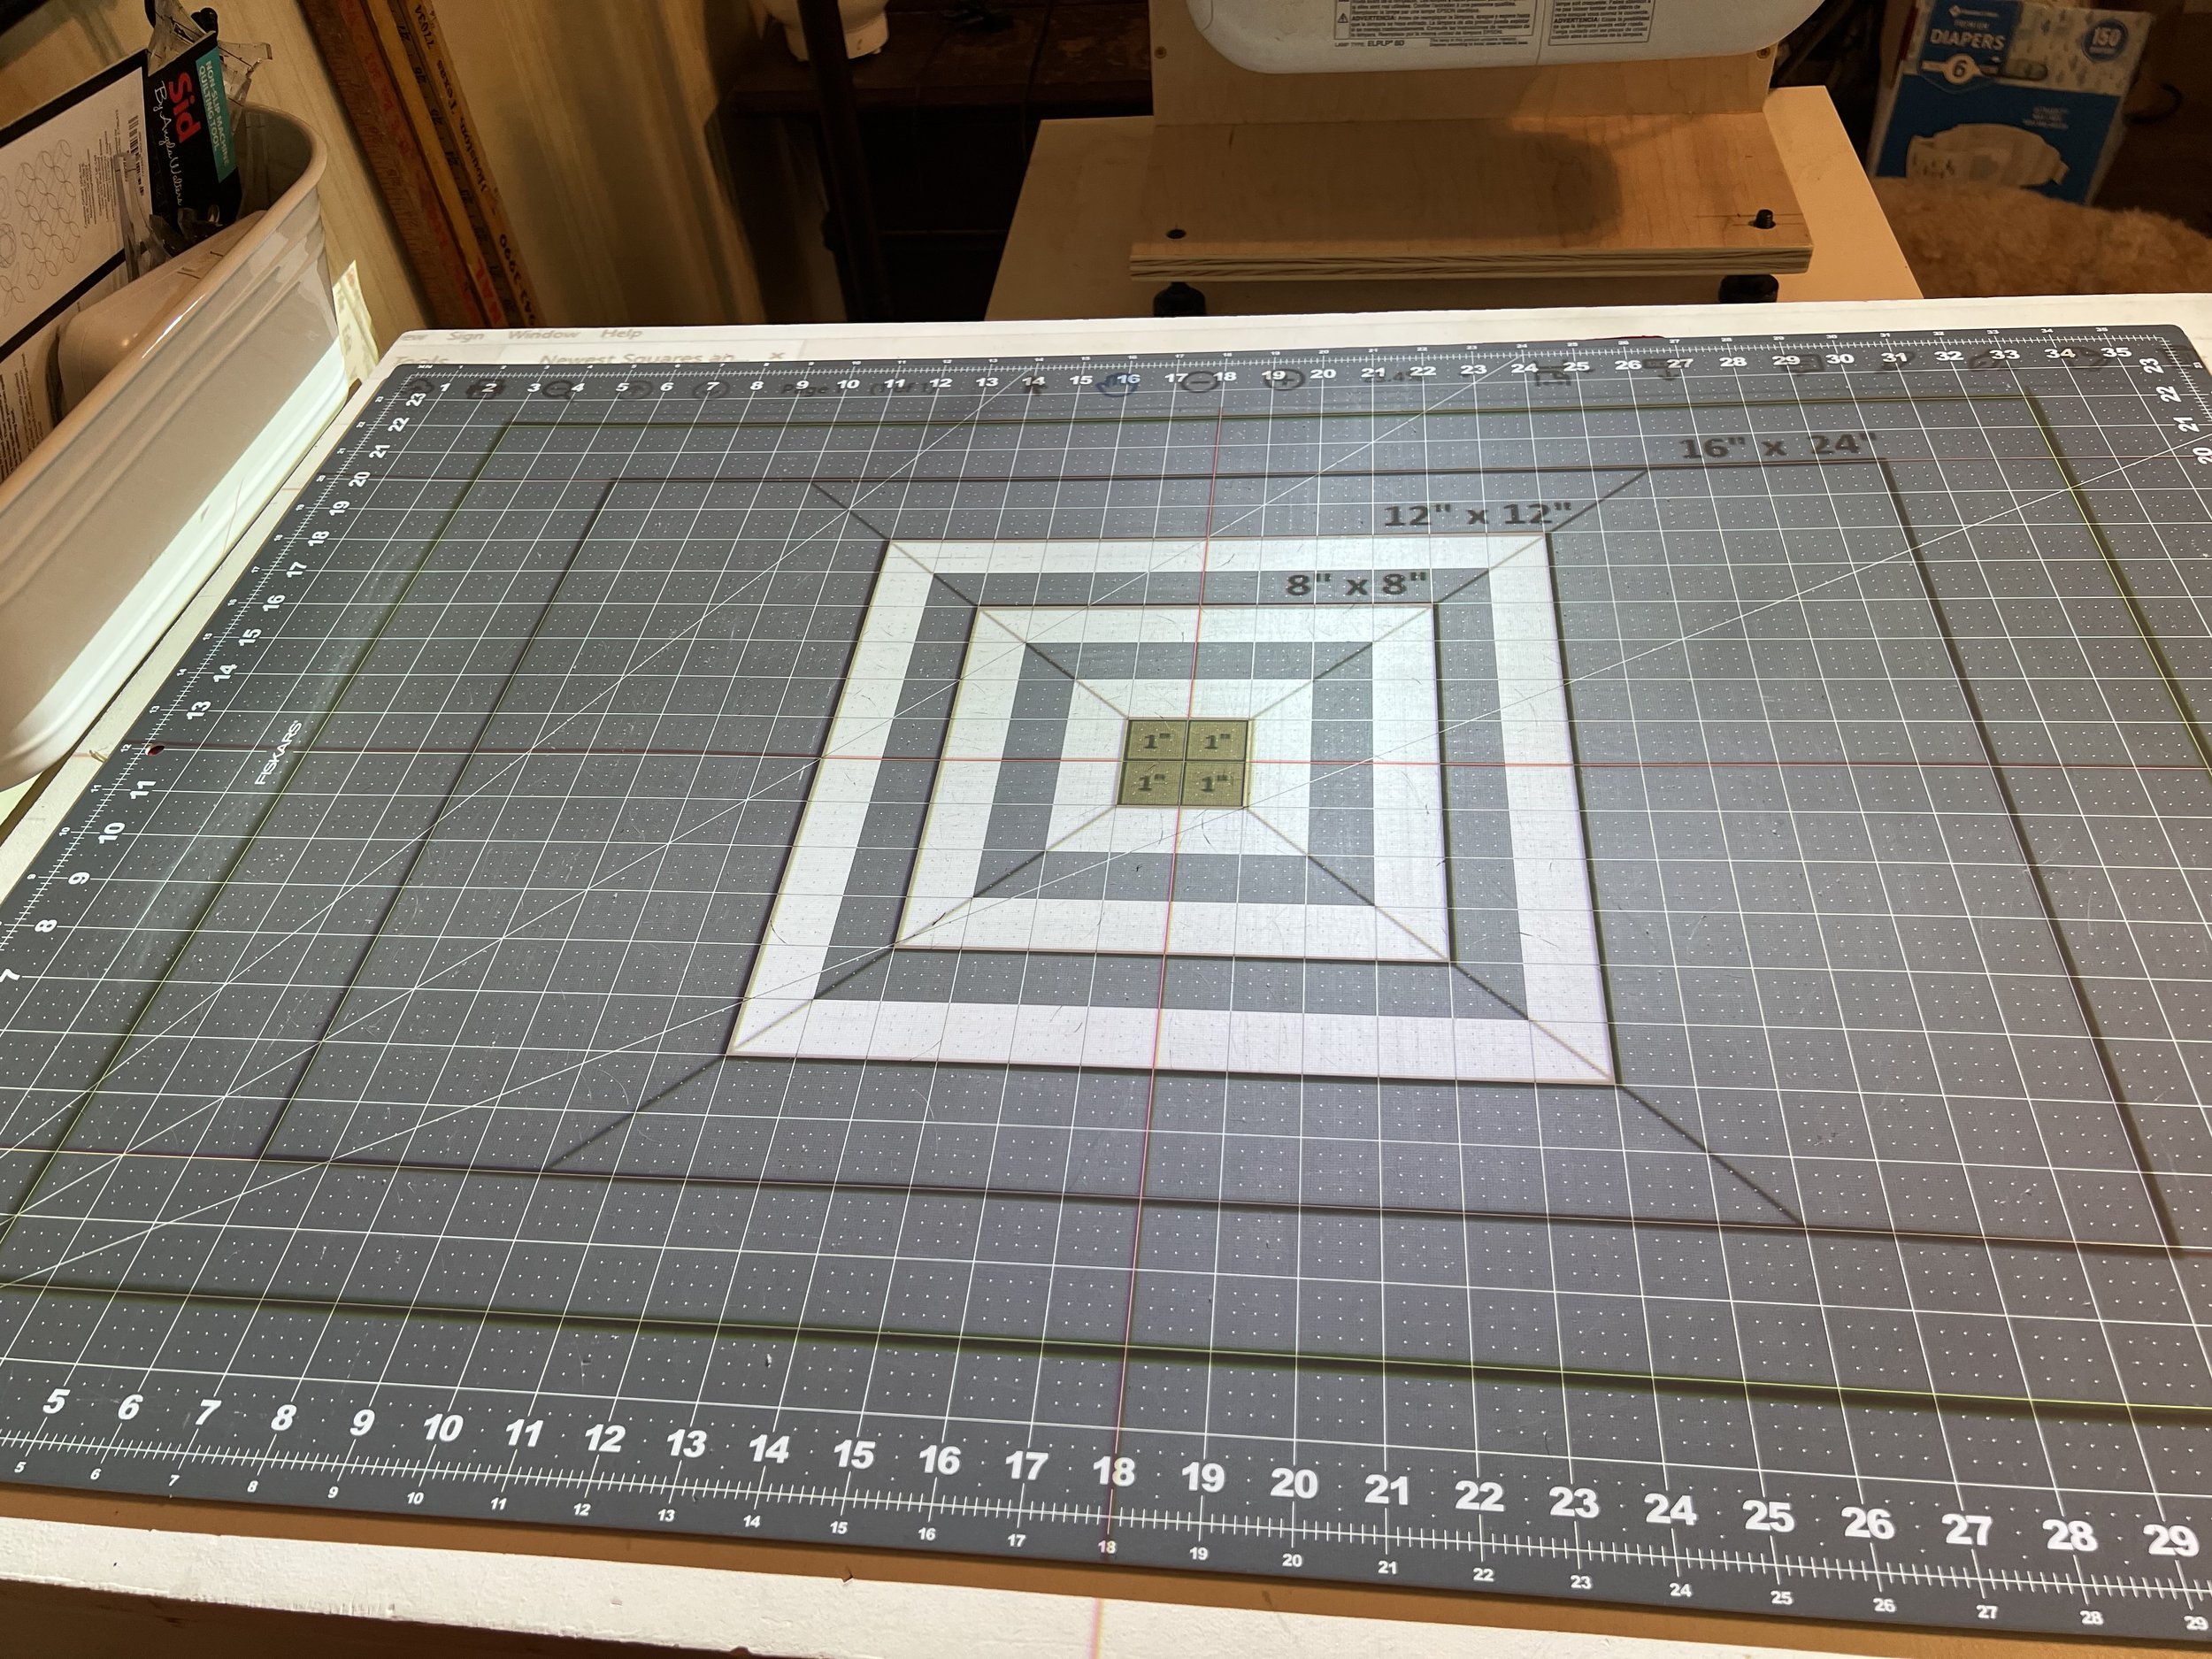
Slightly uncalibrated, check the corners
You access it by clicking Menu on your projector or remote and then scrolling to Settings.

Menu>Settings
Once you click Enter on Settings, it will highlight Keystone.

Menu>Settings>Keystone
Click Enter again and the Keystone menu opens. Scroll to Quick Corners.
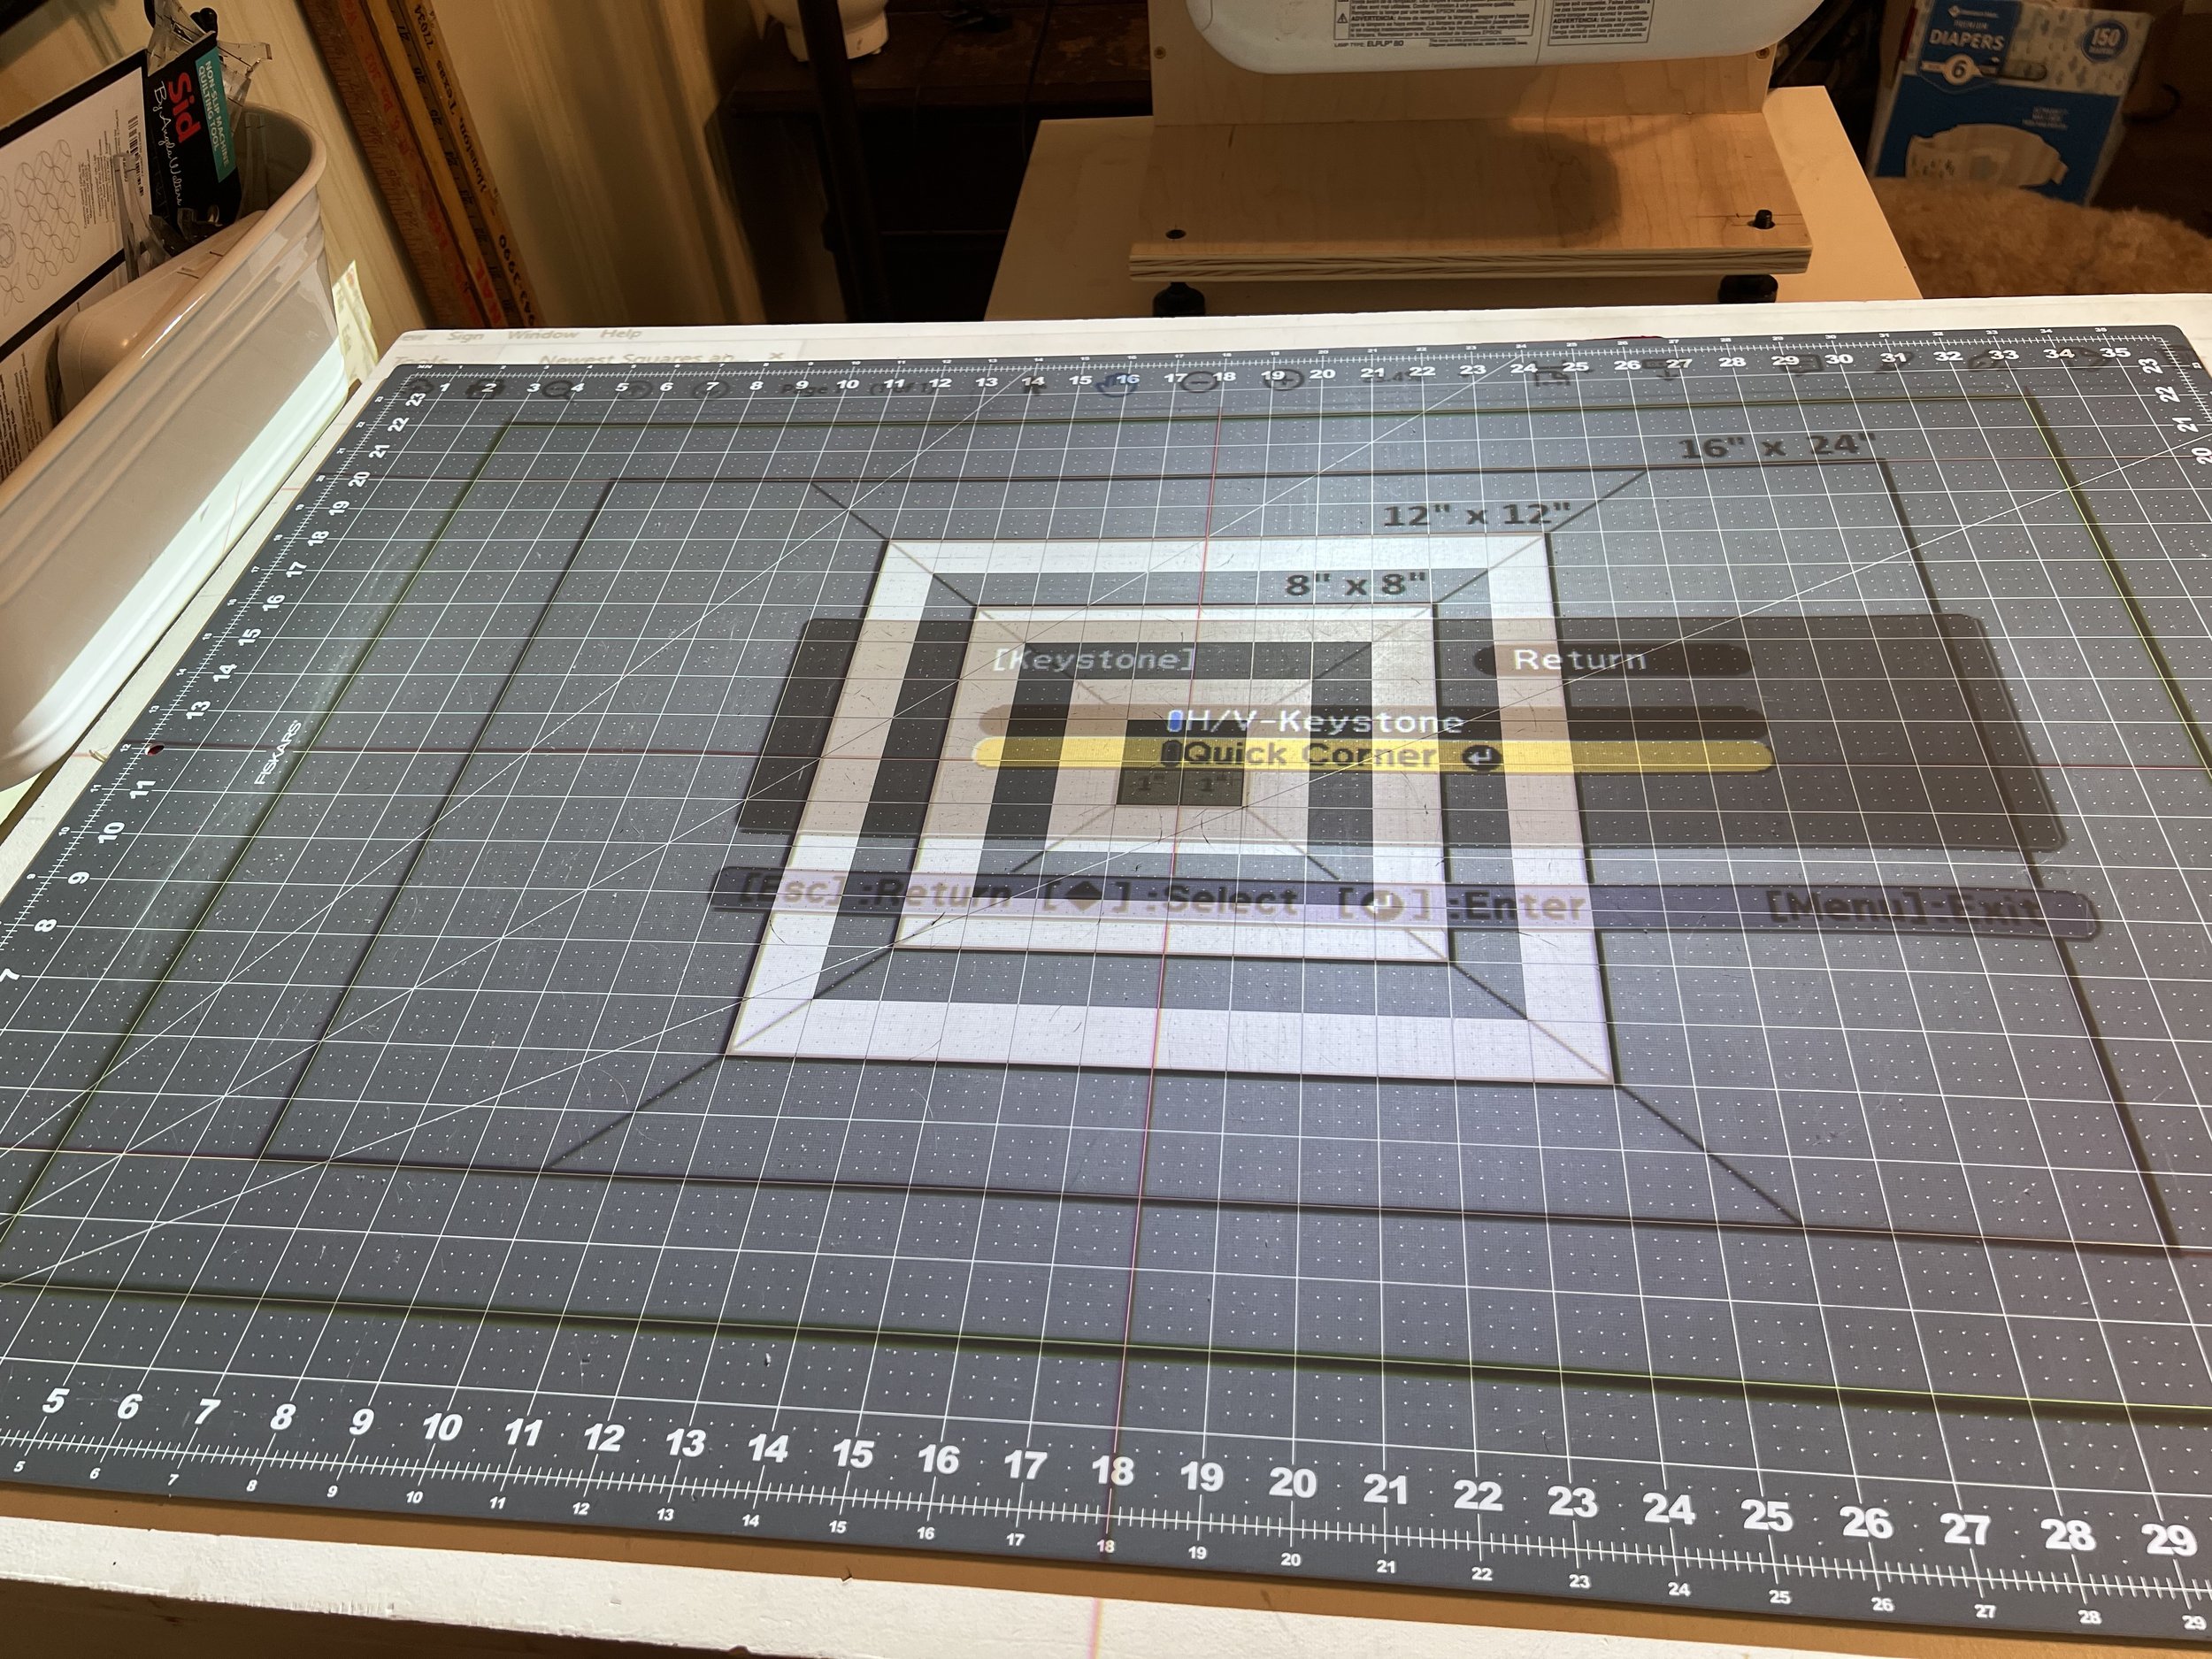
Keystone Setting
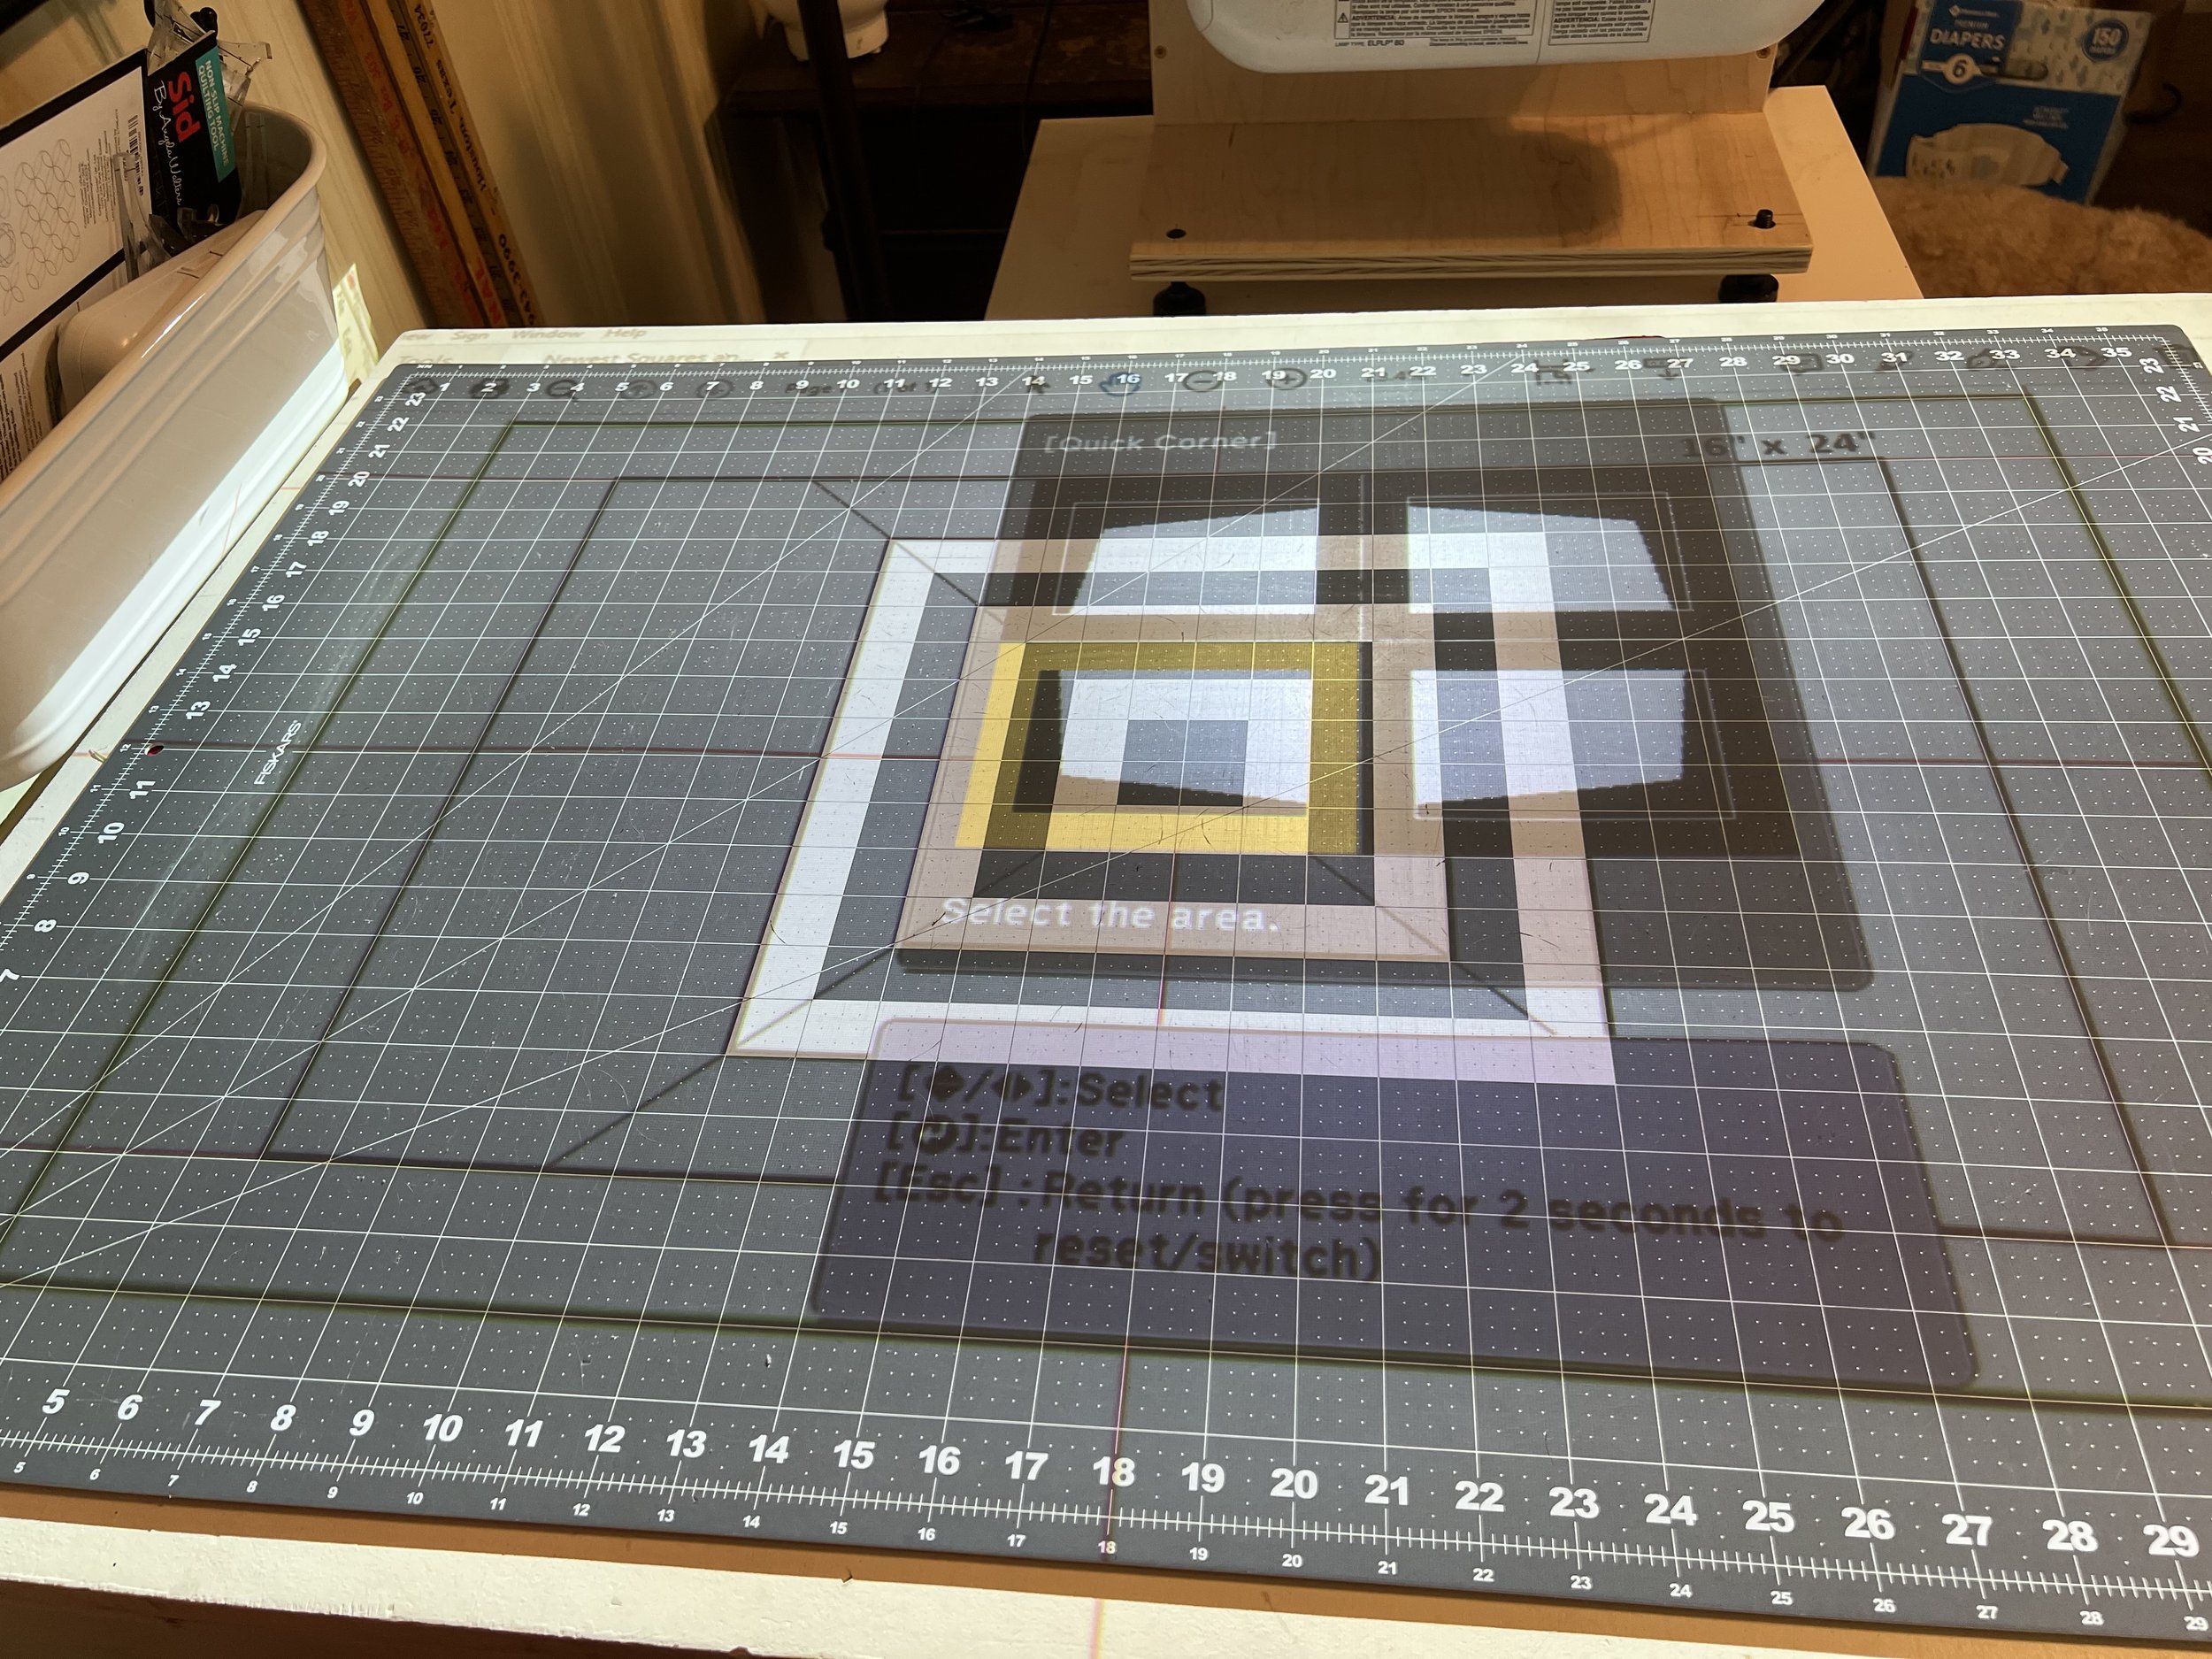
Enter into the Quick Corners and you’ll get this warning:
[Keystone]
If this setting is changed, the image may be distorted.
This is why we save it for a last resort. The less it has to adjust here, the better your image will be. Also, it just won’t allow you to make drastic changes.

Warning!
Click Enter one more time to finally enter the Quick Corner menu. It will highlight the top left corner by default.

Quick Corner Menu
Click enter and then you can use the up and left arrows to slowly change where the top left corner’s point hits.
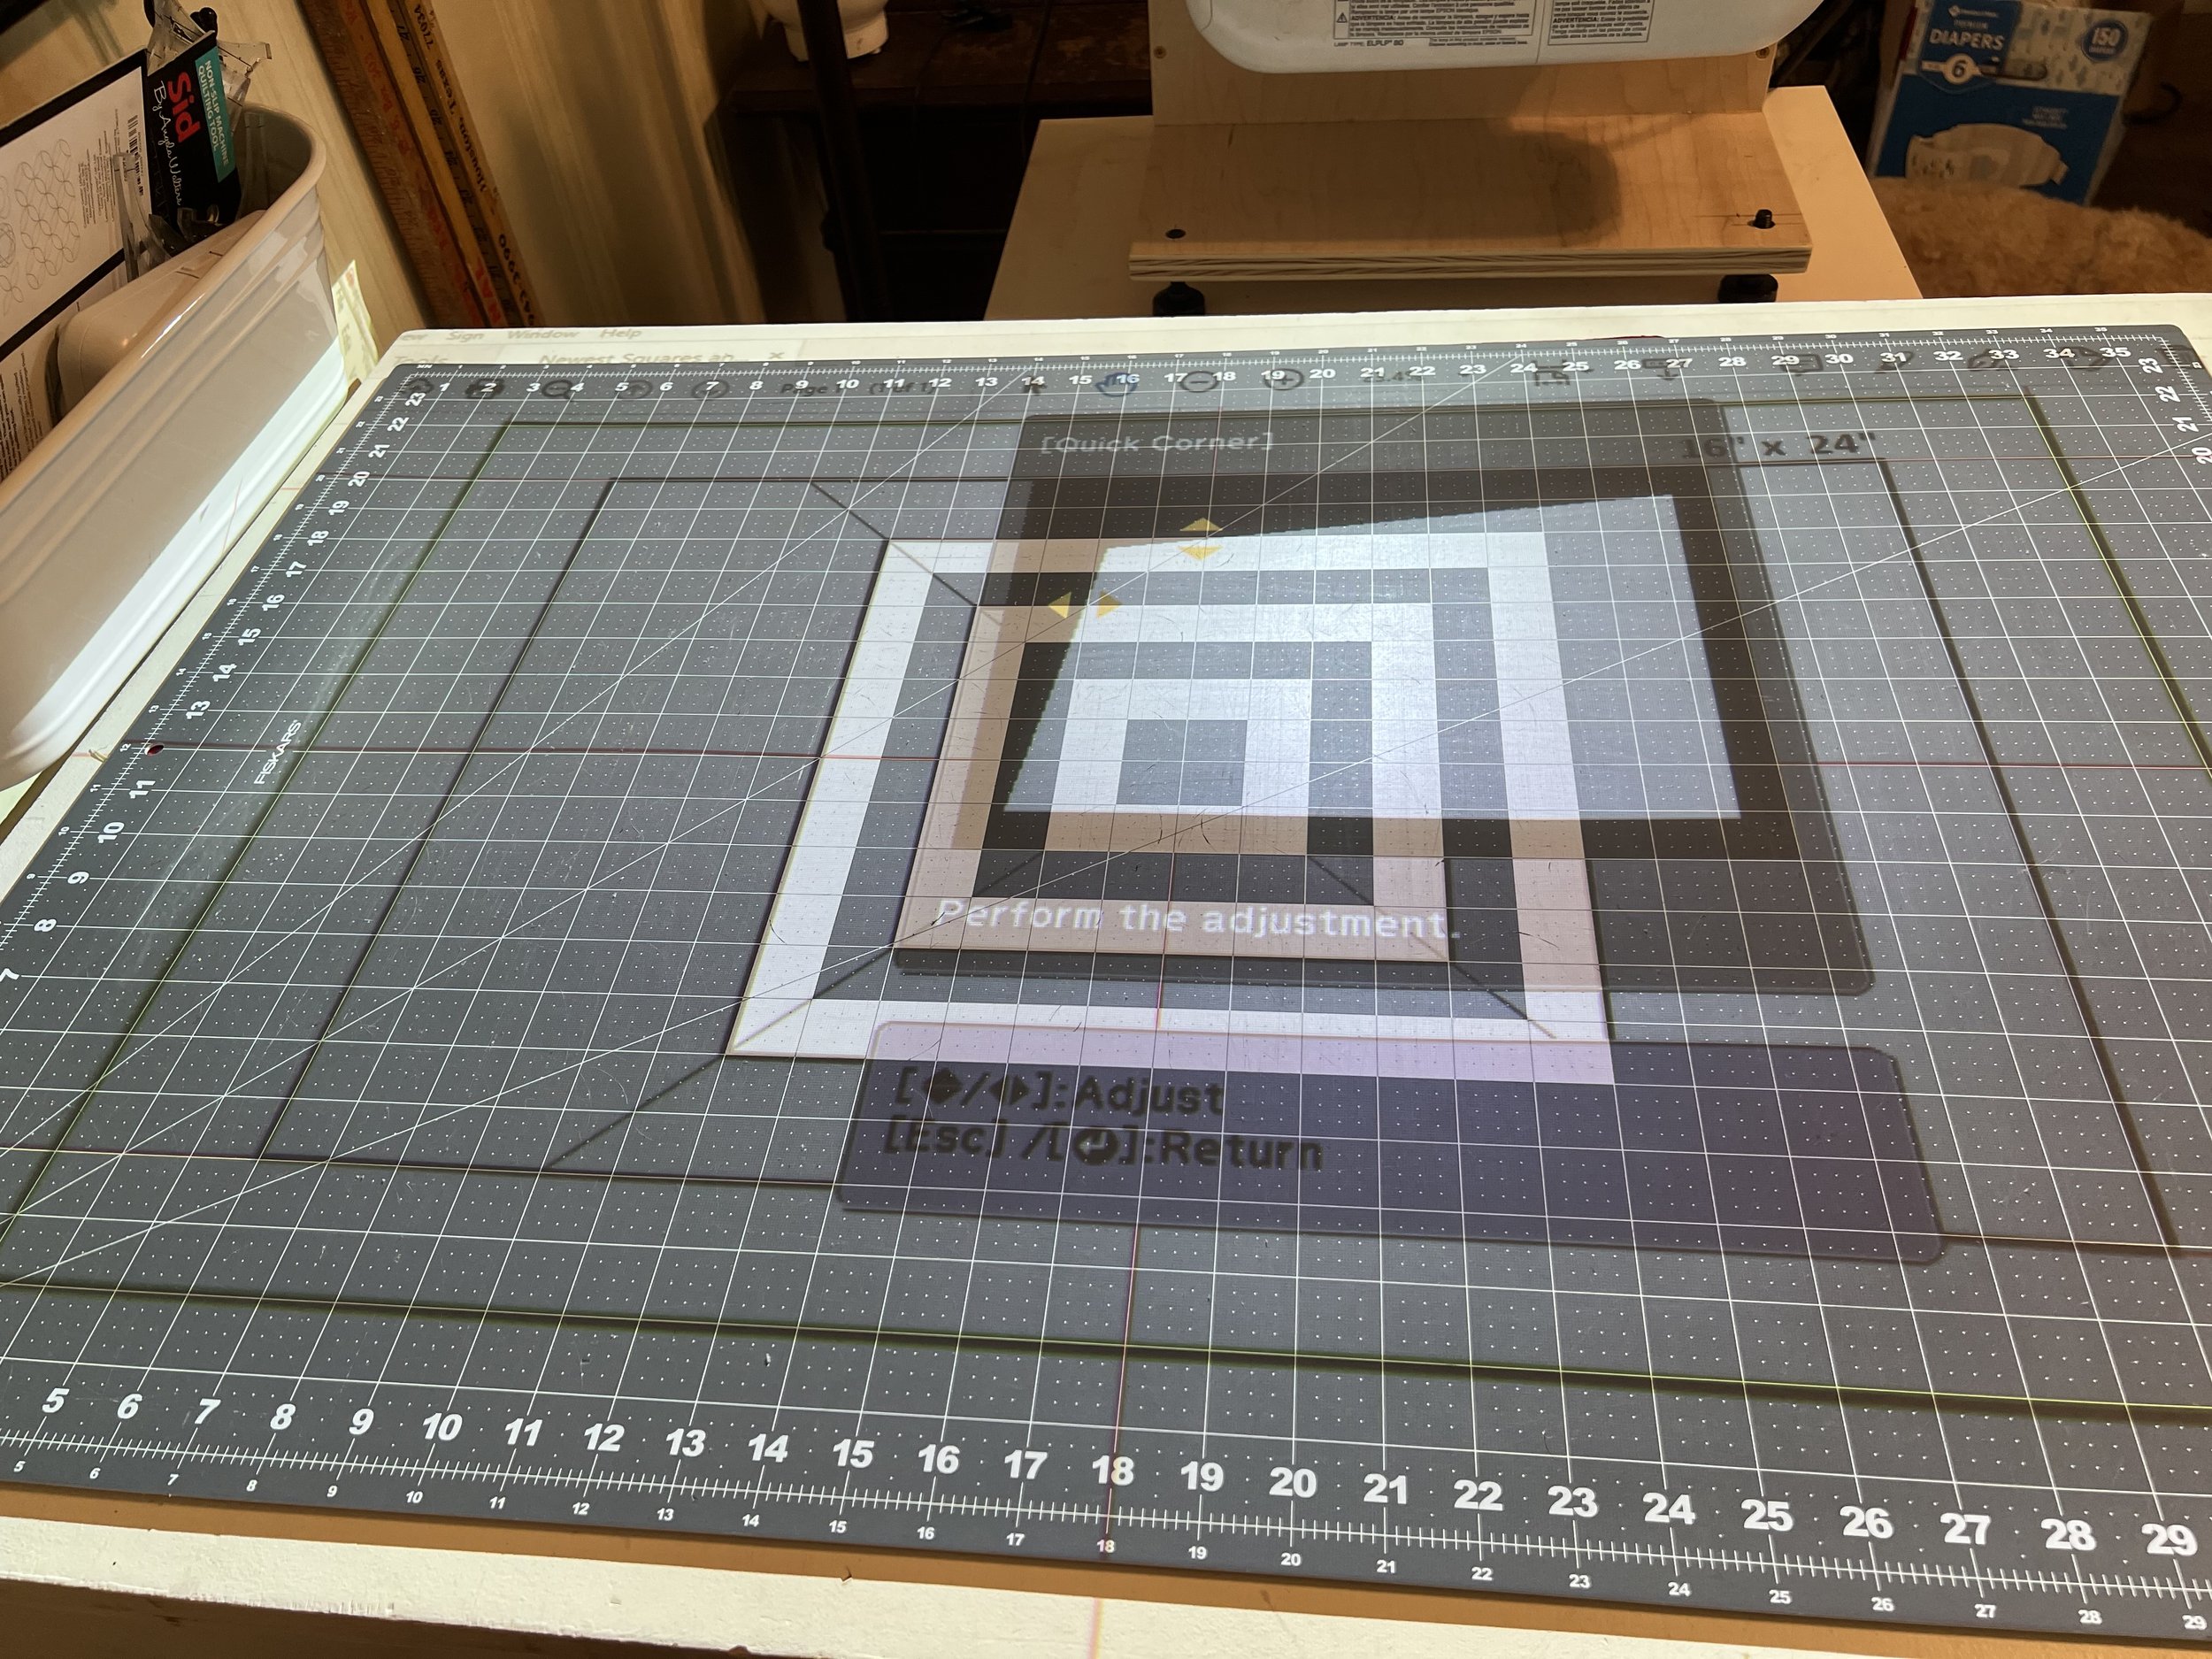
Corner chosen
When you’re happy, click Escape to go back to the Quick Corners menu and move over to the next corner.
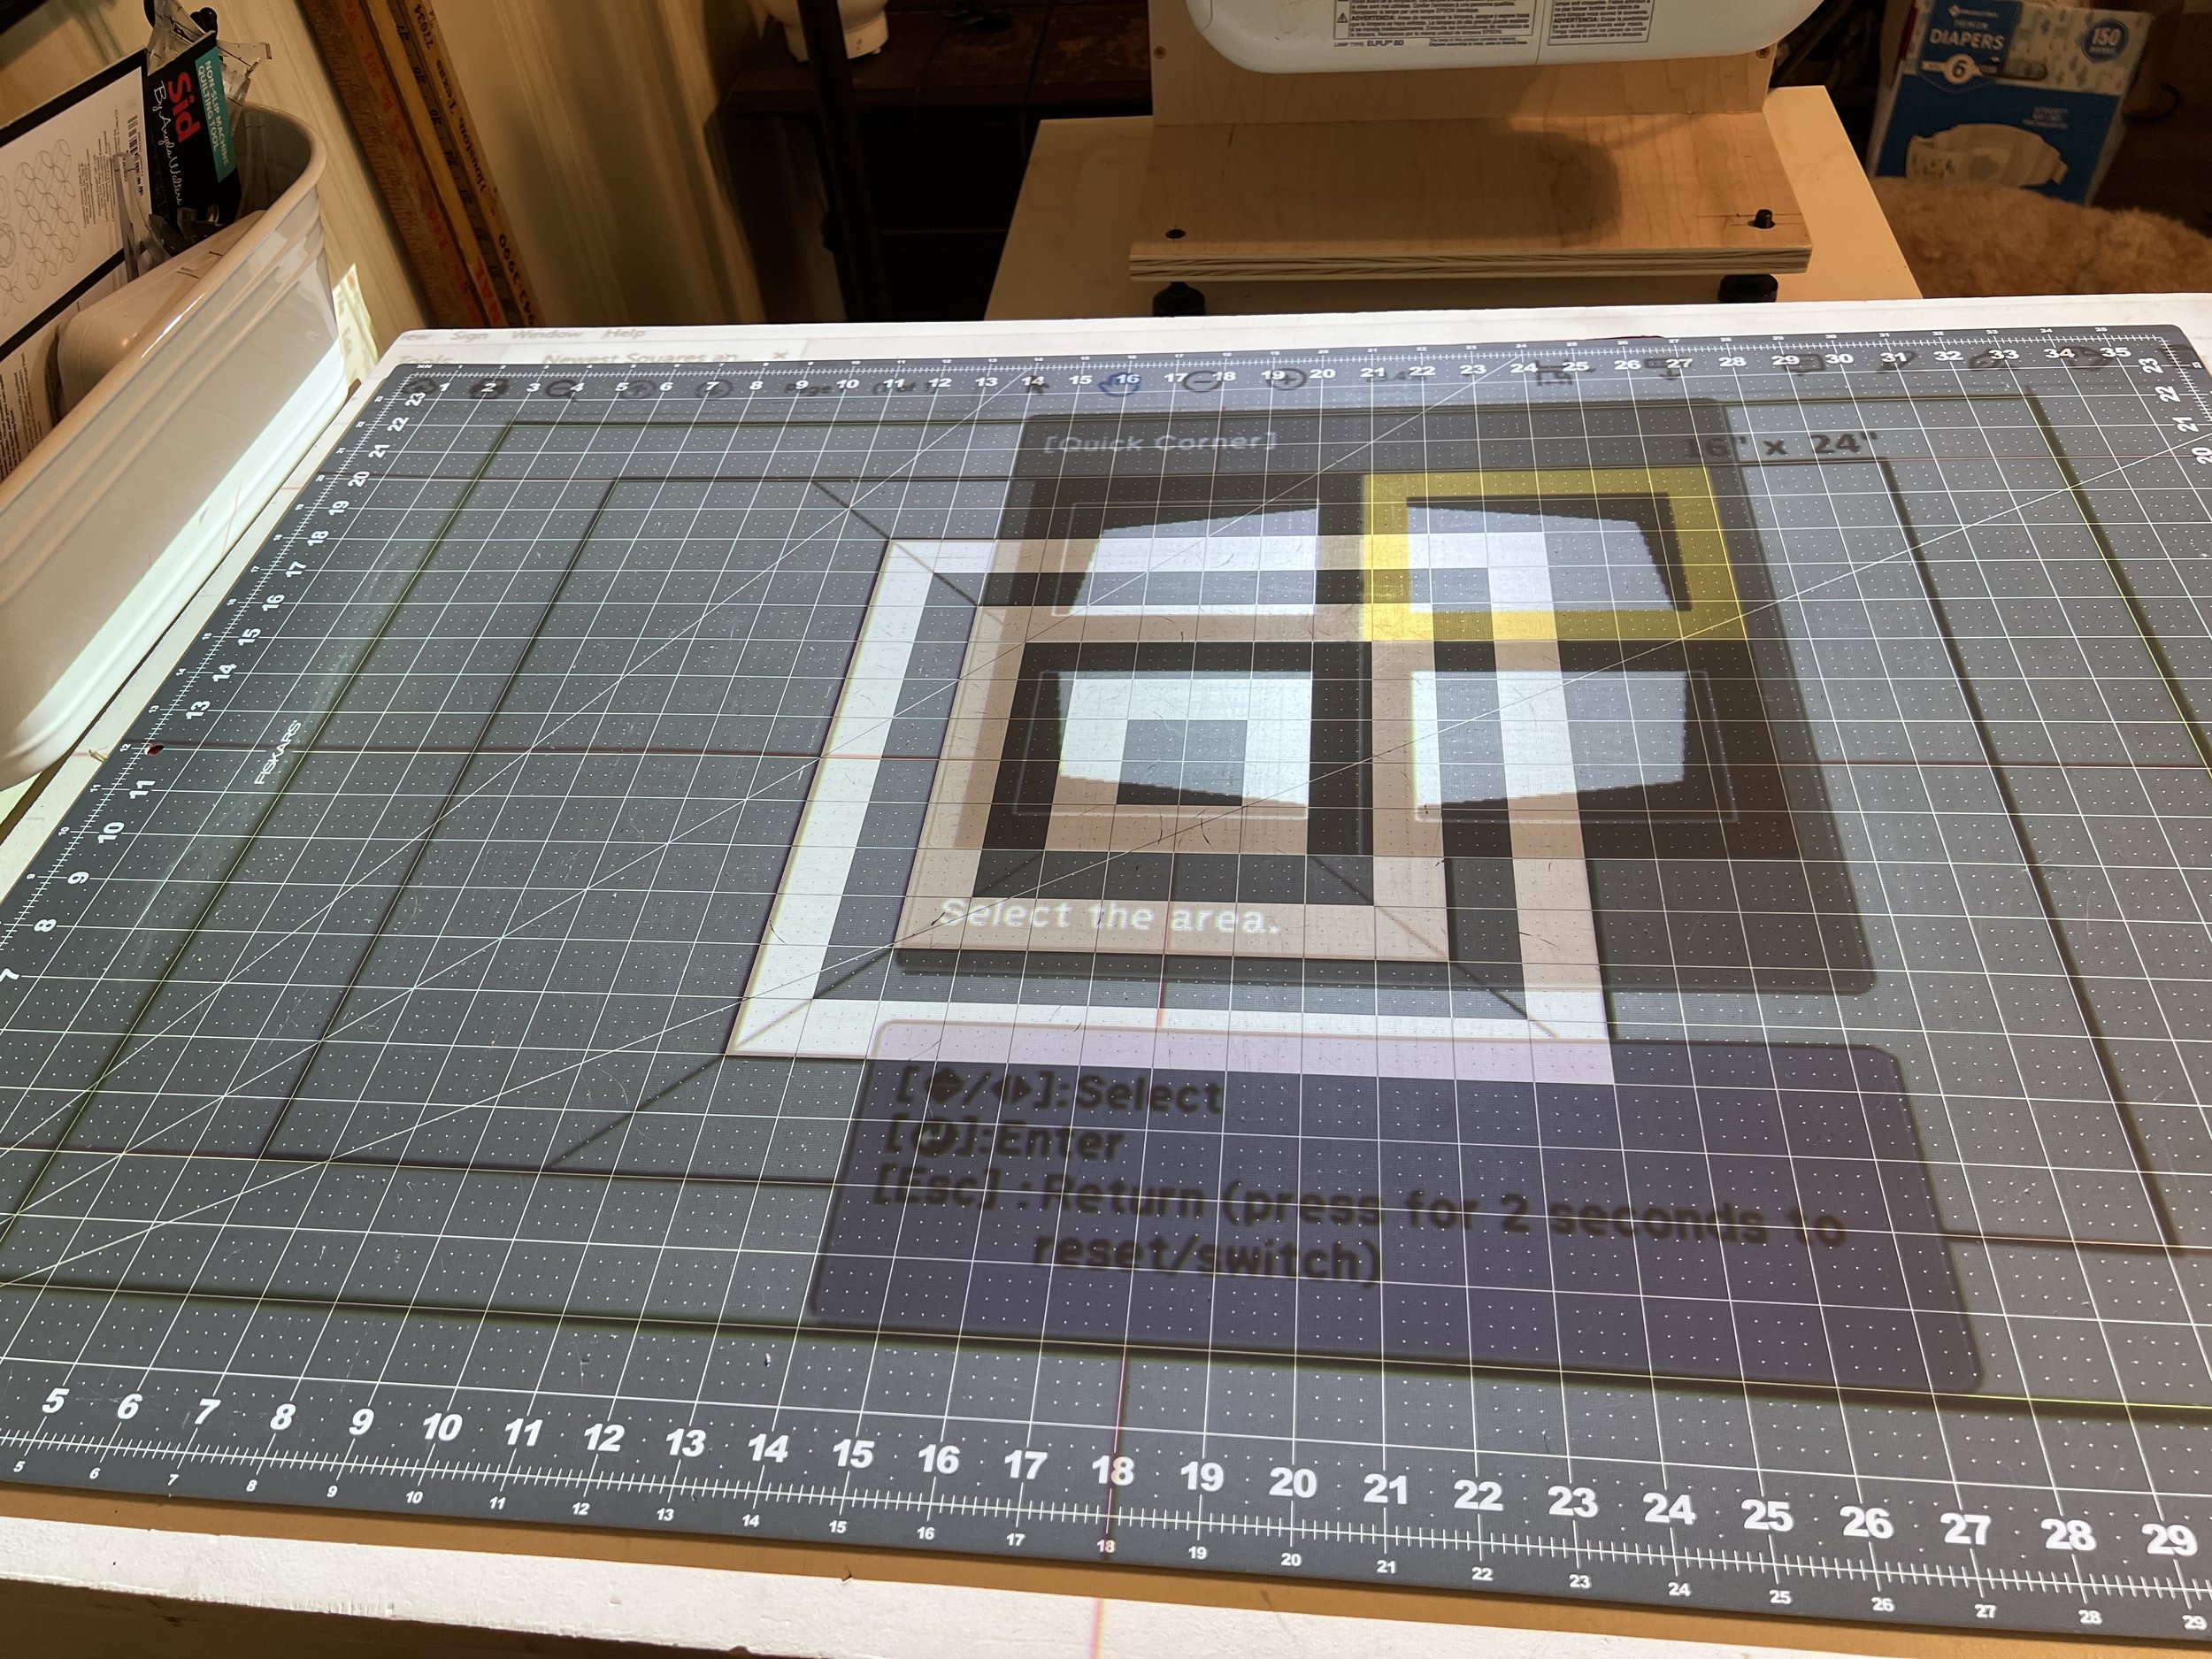
Do each corner
Continue until you’ve moved all the corners to be square and match your mat.

It’s OK if you don’t have to adjust every corner. In my example, I didn’t move the bottom left corner at all!
You can go back to each corner and adjust further if necessary. But once you’re done adjusting, Escape out of all the menus and you’ll be left with a beautifully calibrated image!
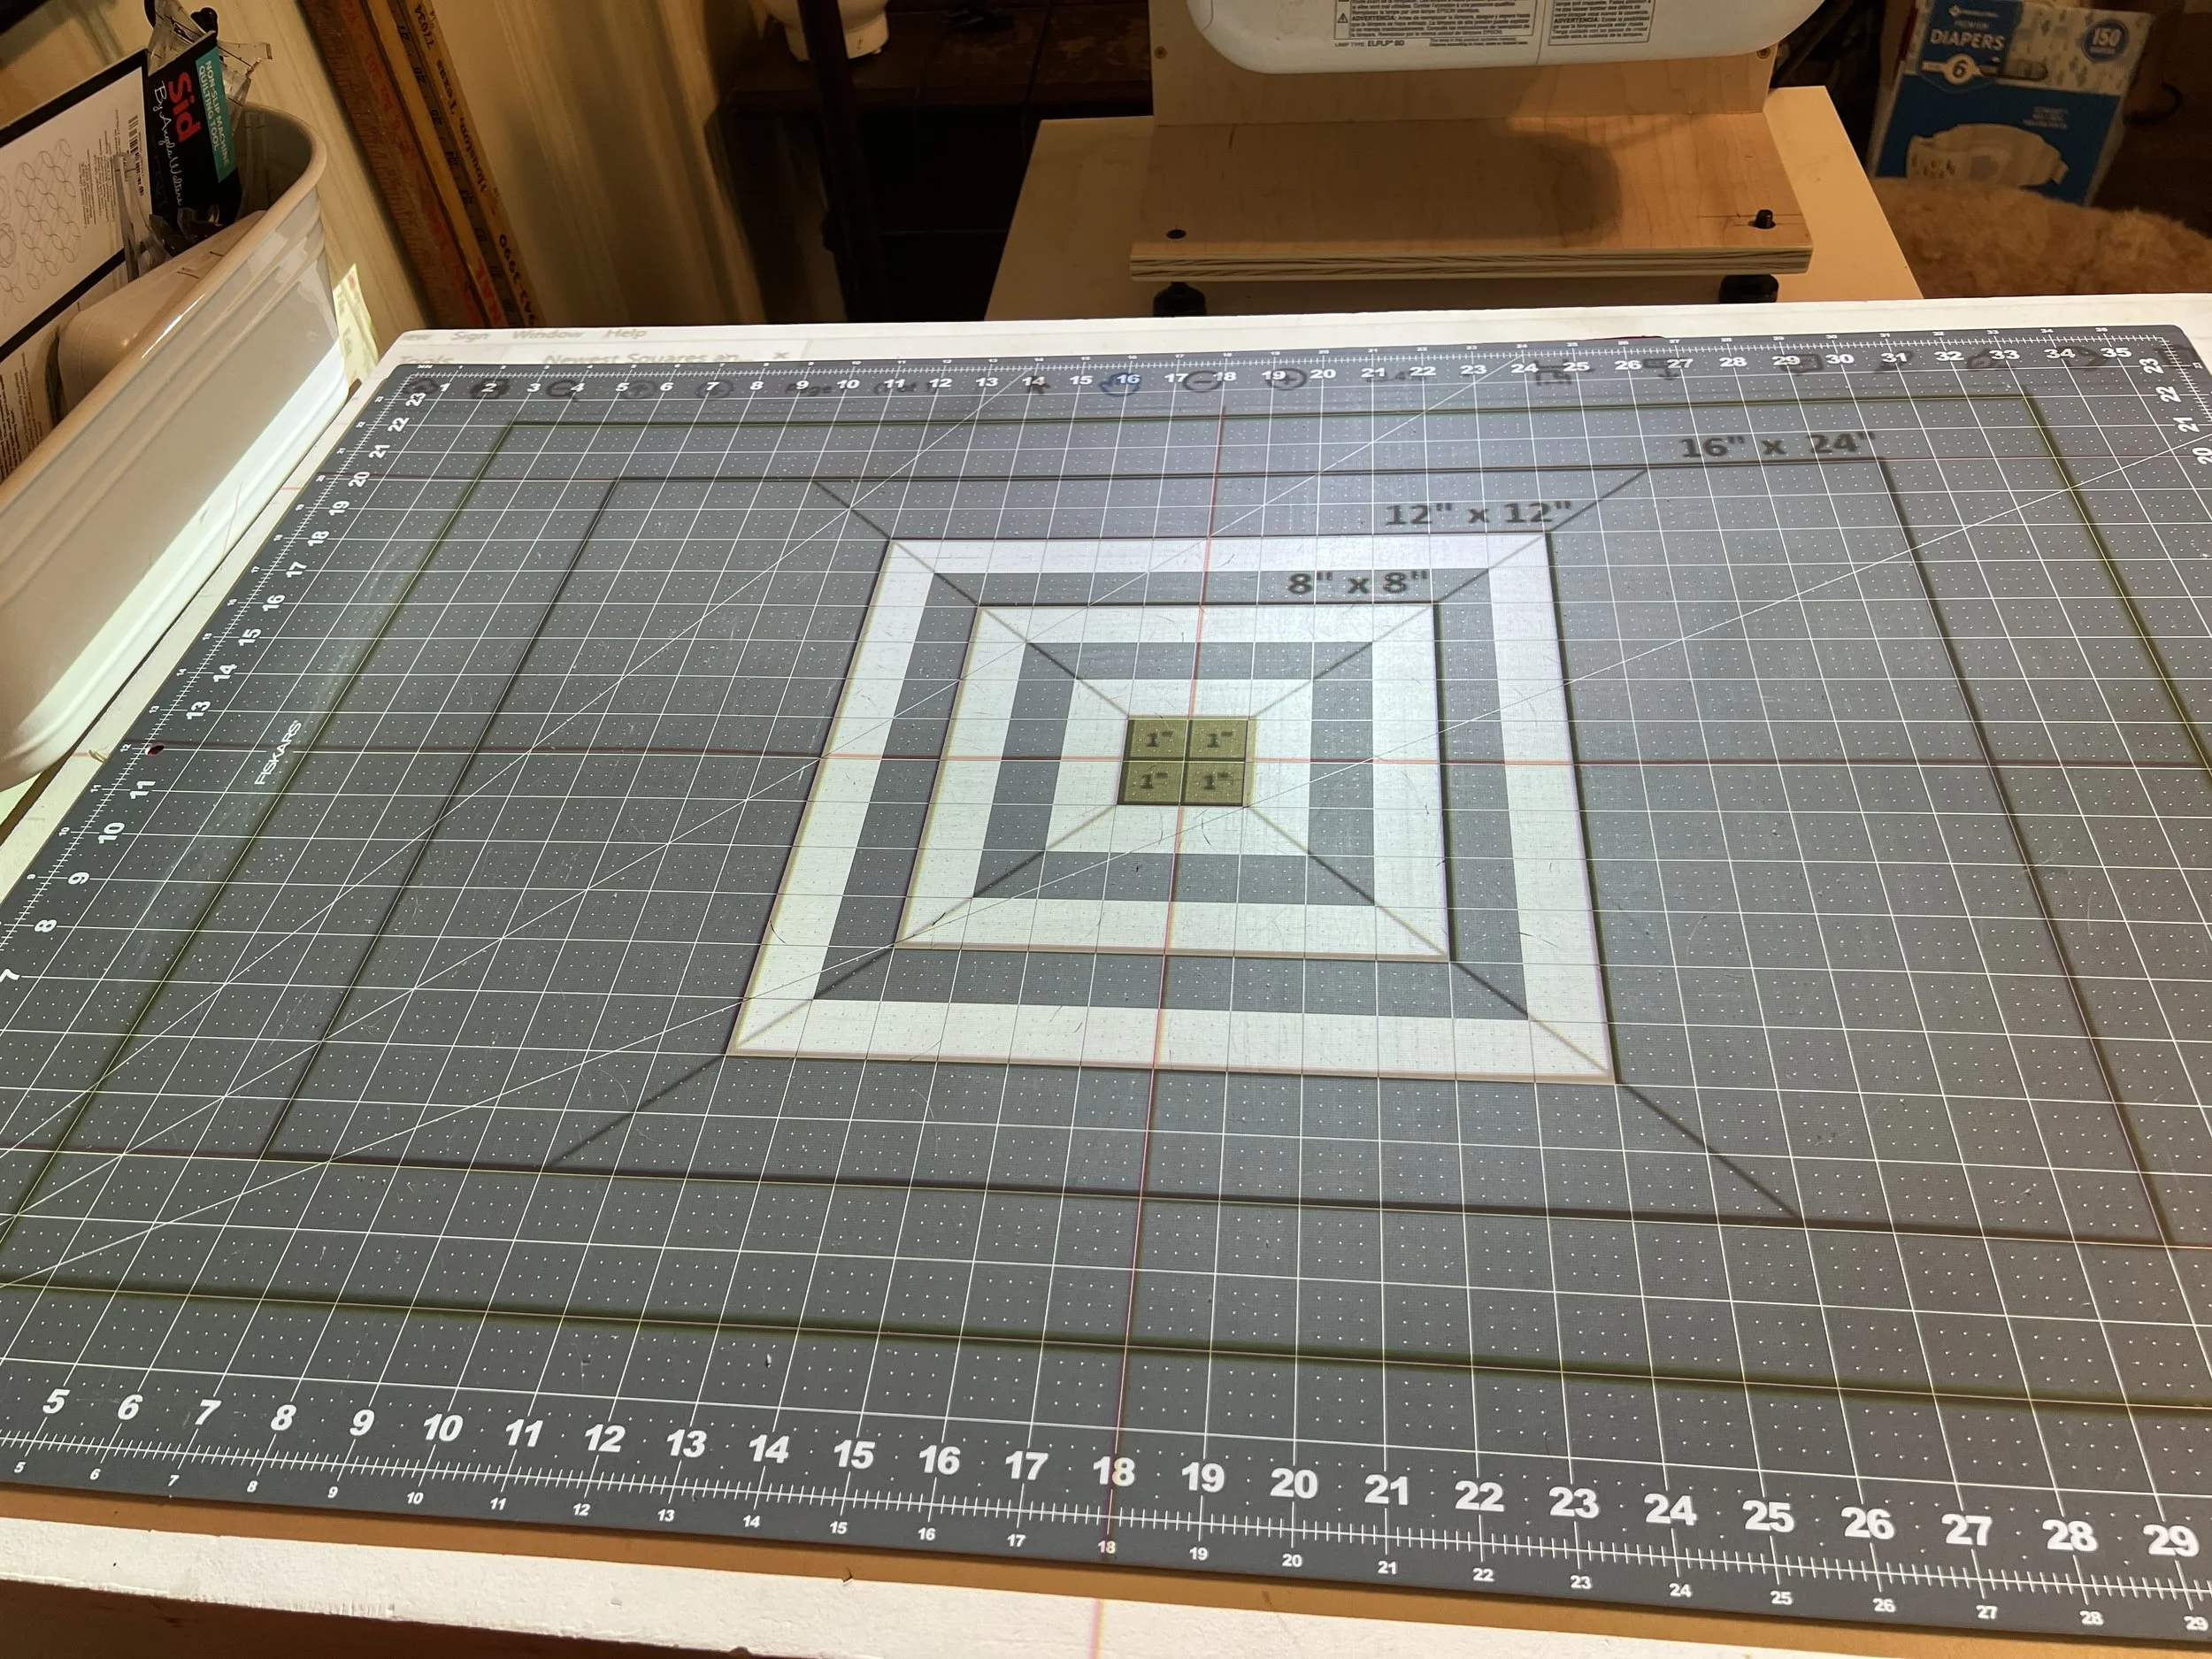
Ta-da!
Remember that the biggest way to set yourself up for success is a flat mat. If you’ve got wrinkles, press them down with your hand as best you can.
And don’t strive for perfection, 1/4” or less off your 16x24” box is 99% accurate and close enough for most sewing!
‘Till next time friends, happy pattern projecting!
Branalyn