

Using Quick Corners on an Epson UST
A cheat for Epson UST projector calibration-Quick Corners! Learn the hows and whys in this blog and video.
Two parts of pattern projecting are both critcal and daunting:
Choosing the right projector for your space/situation
Calibration
I have this page for helping you choose a projector.
And a few posts/videos to help with calibration-UST, ST, Amazon/Mini, How Close is “Close Enough”
AND today I’m bringing you a calibration cheat!
It only works on Epson USTs (my 410wi ST does not have Quick Corners but some other ST models might) but it’s very handy for those last minute adjustments that you just can’t seem to get.
As I say in the video, it’s important to do as much physical calibration as possible before using Quick Corners. Quick Corners works by turning off and on some pixels and warns you that it can degrade the image. We don’t want to rely too heavily on that because it can end up distorting the very image we are trying to calibrate!
But if you’ve been trying to get that last little bit of a corner lined up and you’re so close but not quite close enough, Quick Corners is a great option!
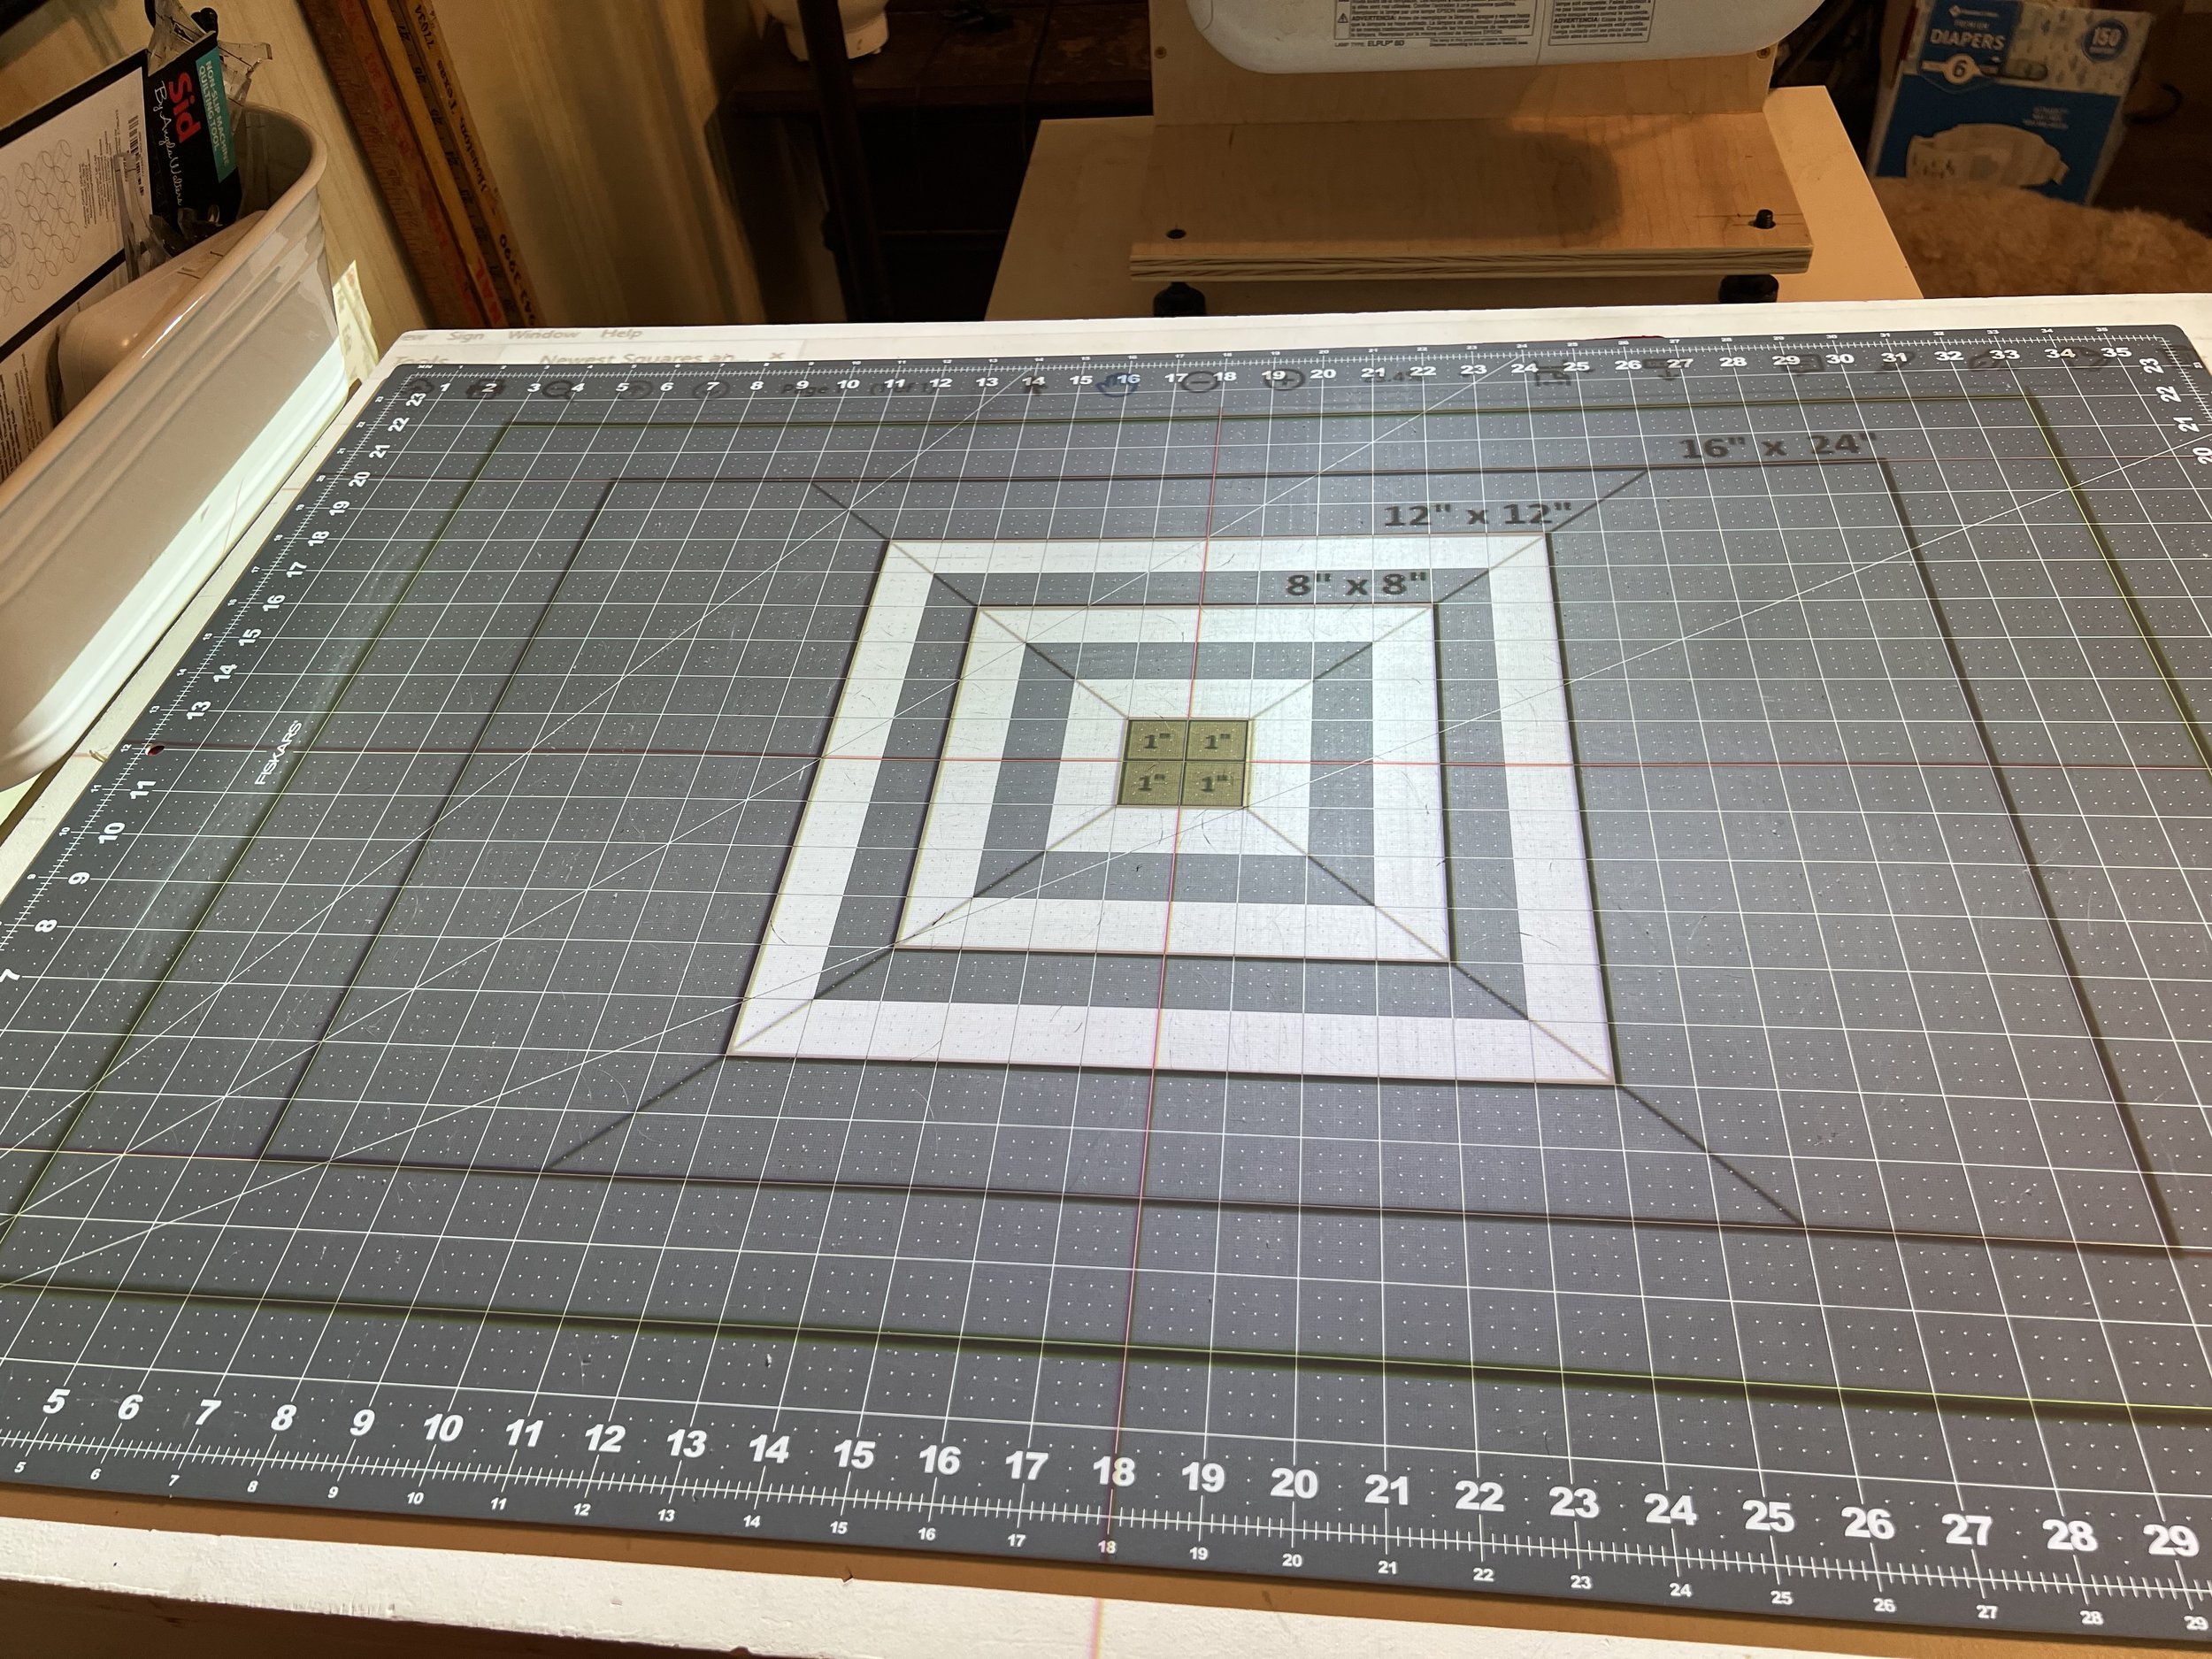
Slightly uncalibrated, check the corners
You access it by clicking Menu on your projector or remote and then scrolling to Settings.

Menu>Settings
Once you click Enter on Settings, it will highlight Keystone.

Menu>Settings>Keystone
Click Enter again and the Keystone menu opens. Scroll to Quick Corners.
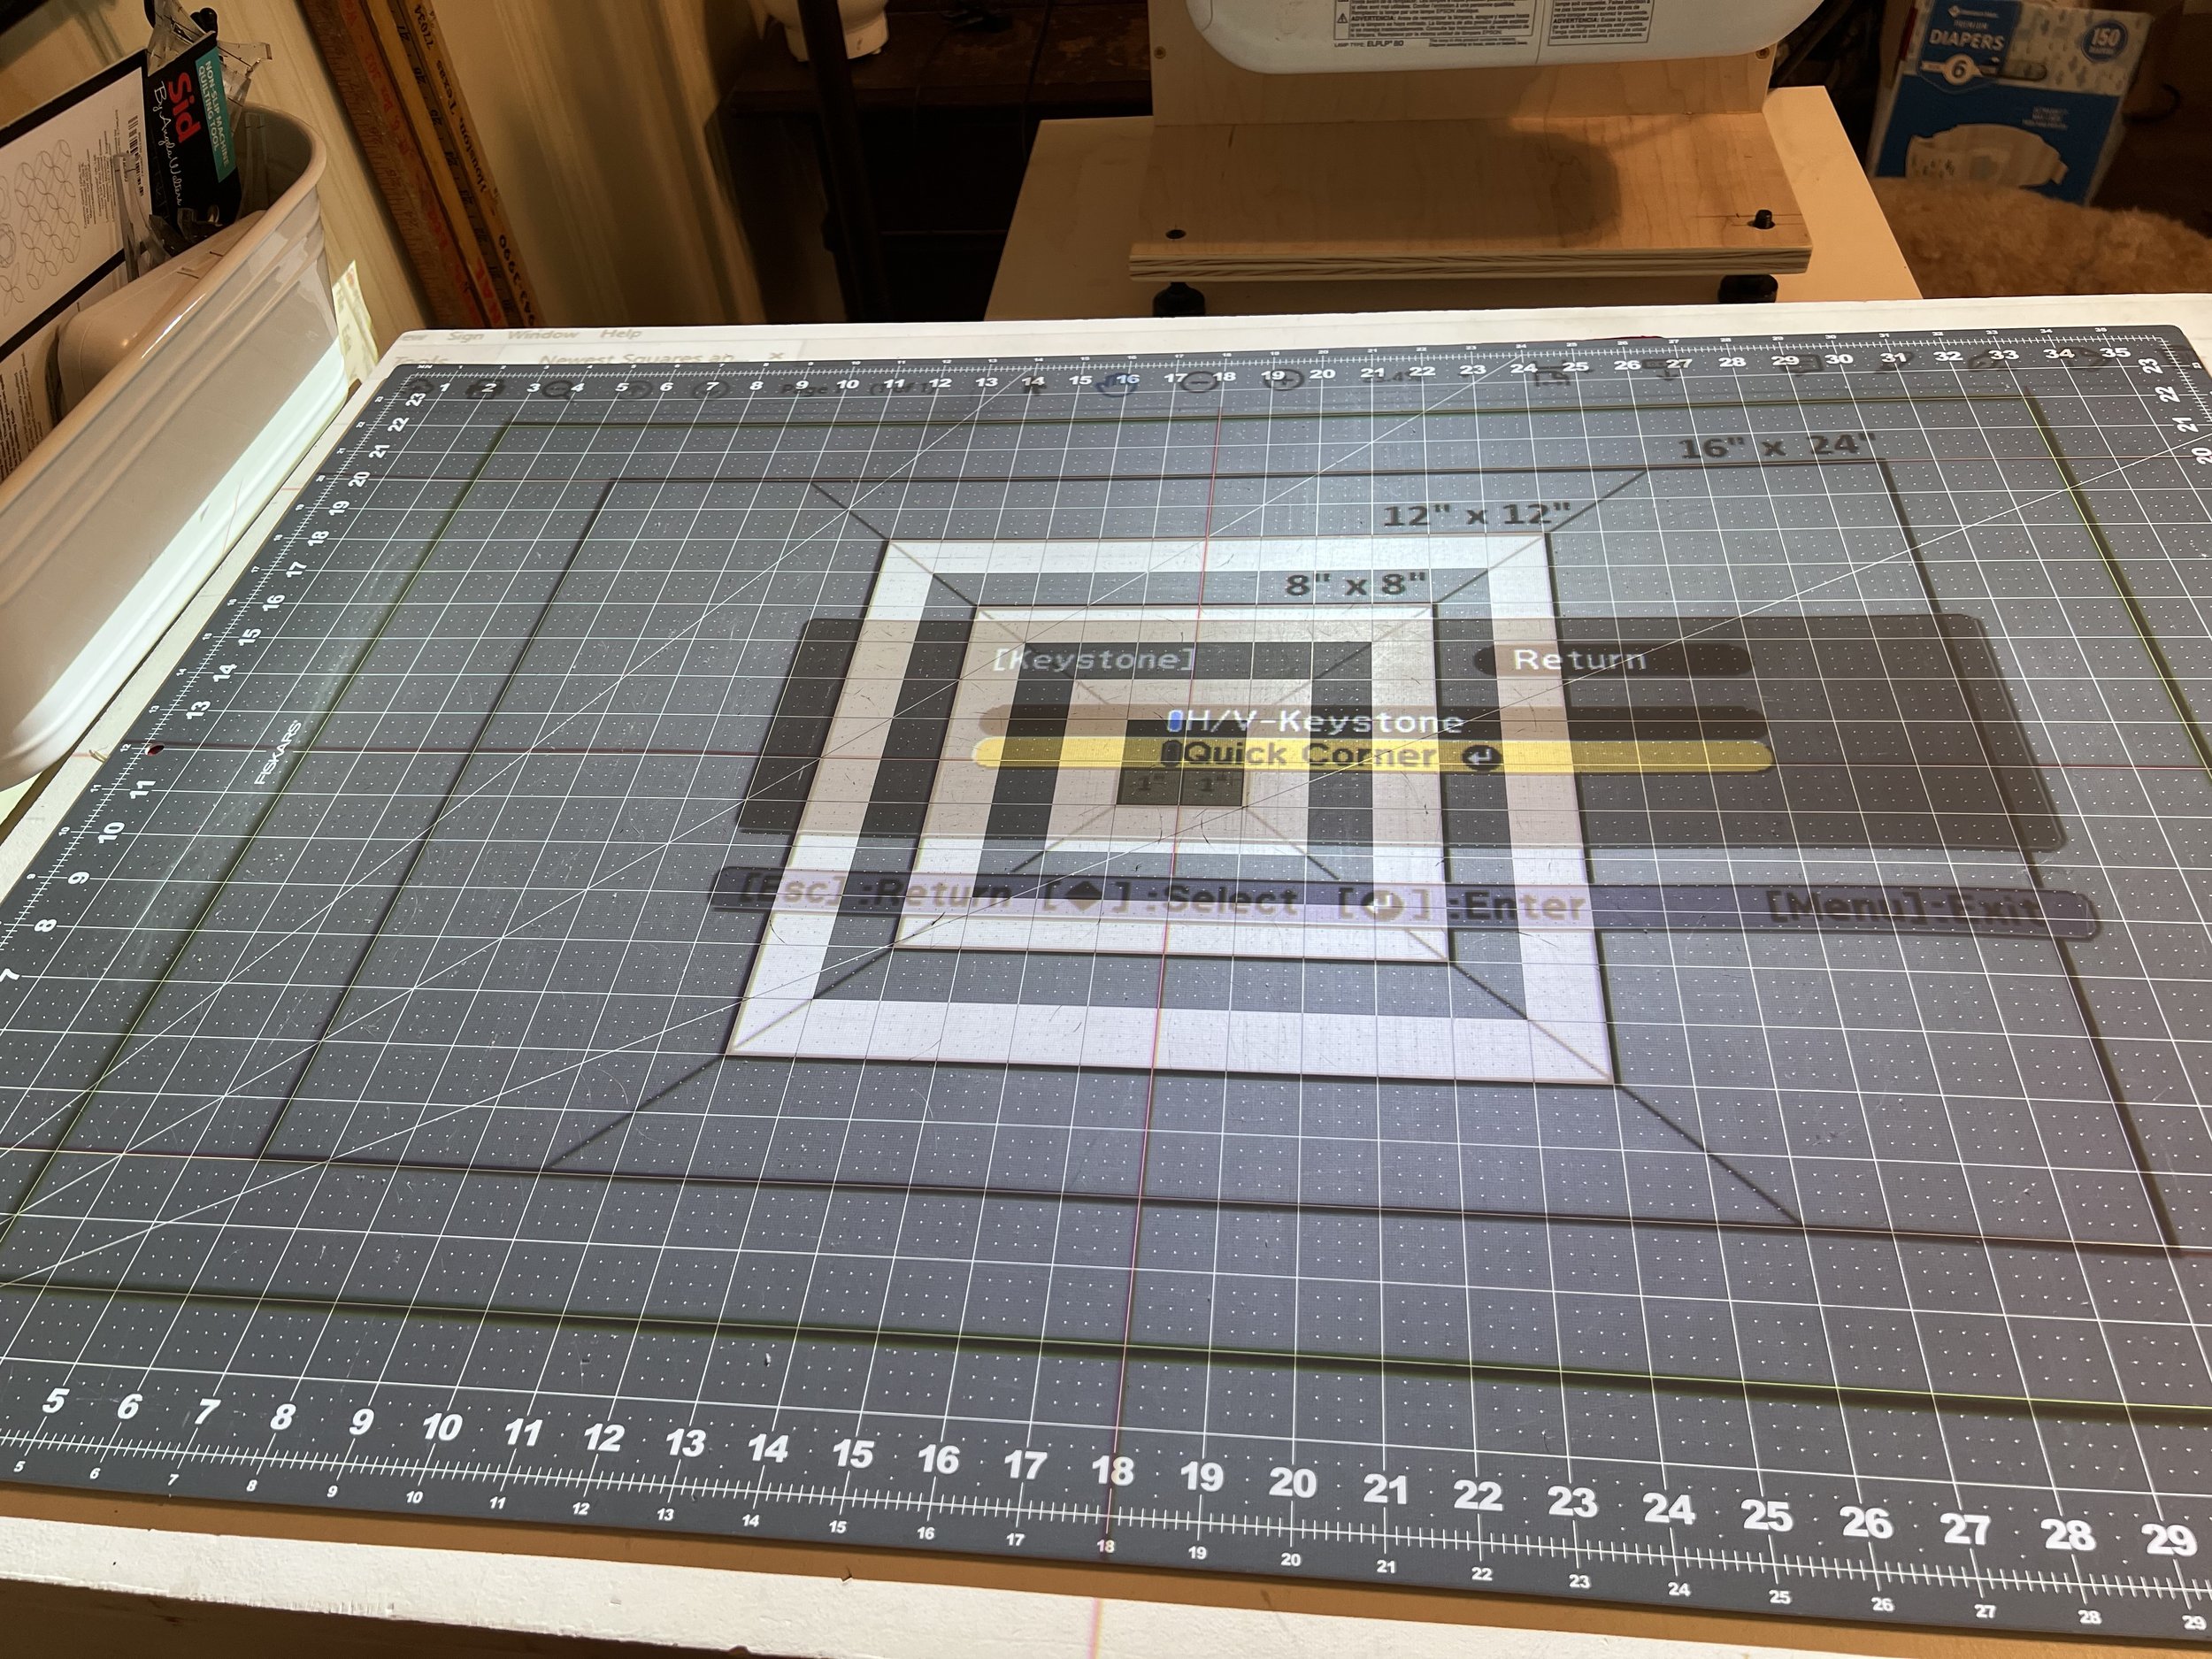
Keystone Setting
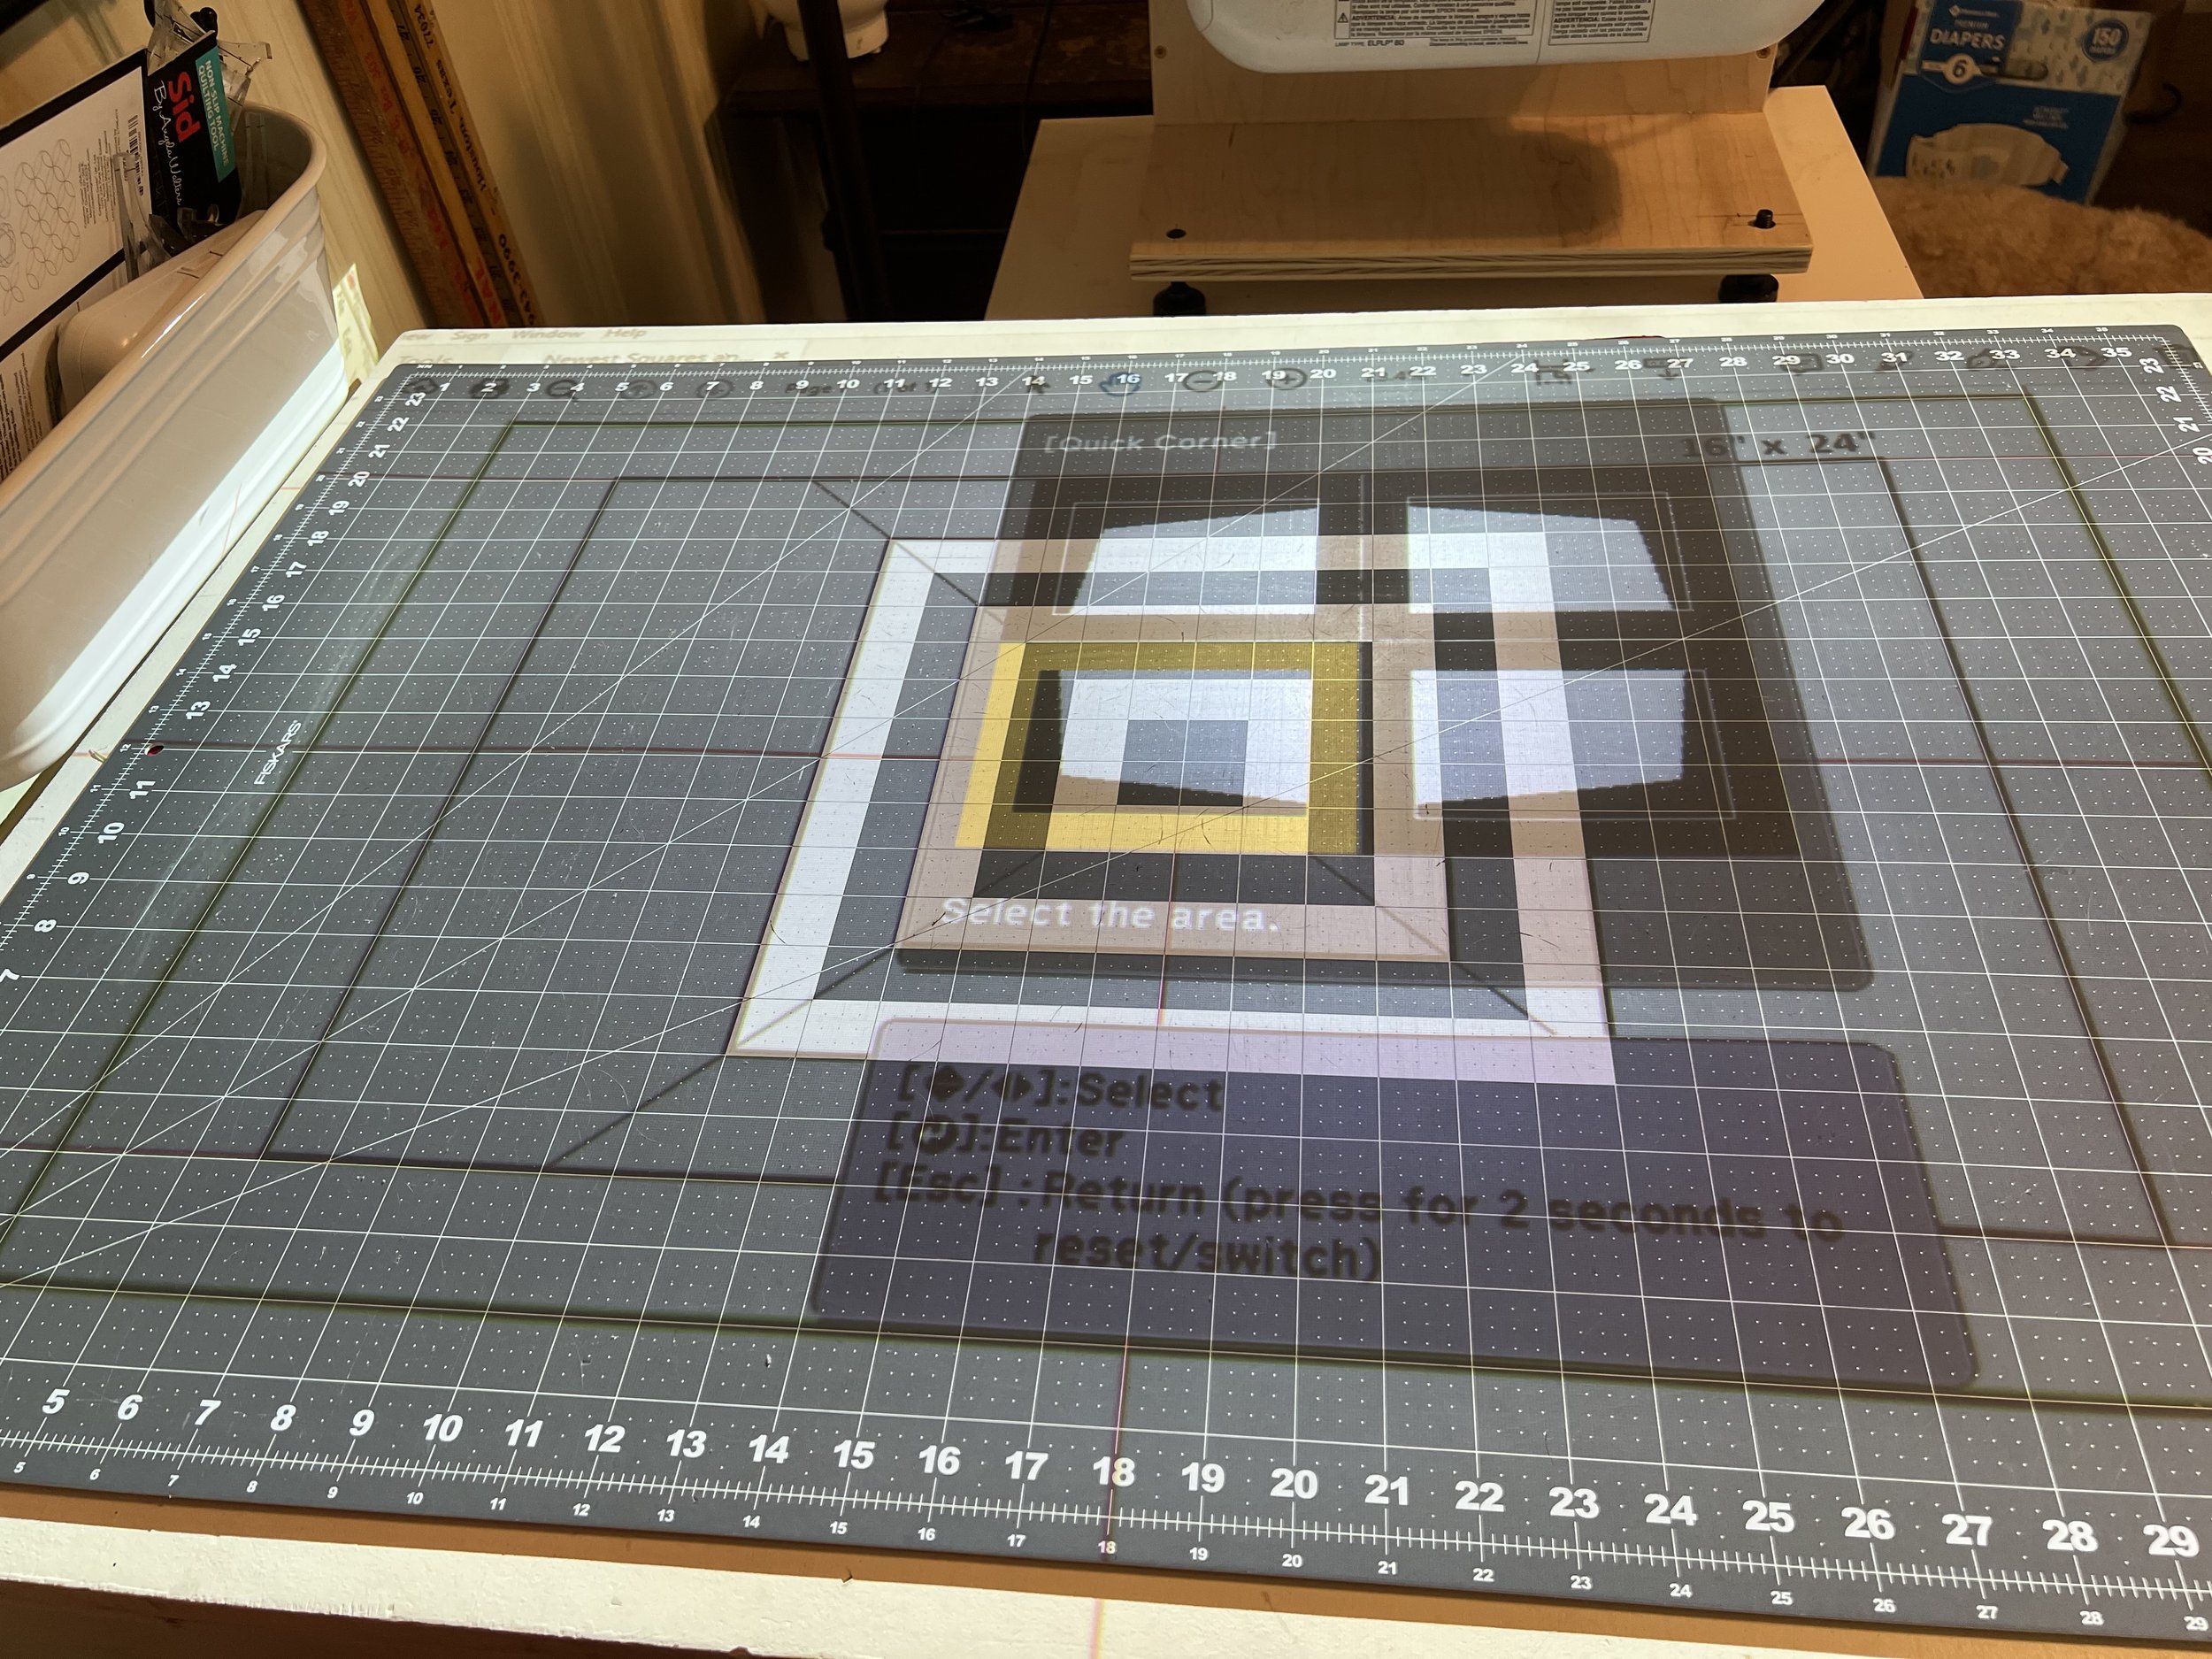
Enter into the Quick Corners and you’ll get this warning:
[Keystone]
If this setting is changed, the image may be distorted.
This is why we save it for a last resort. The less it has to adjust here, the better your image will be. Also, it just won’t allow you to make drastic changes.

Warning!
Click Enter one more time to finally enter the Quick Corner menu. It will highlight the top left corner by default.

Quick Corner Menu
Click enter and then you can use the up and left arrows to slowly change where the top left corner’s point hits.
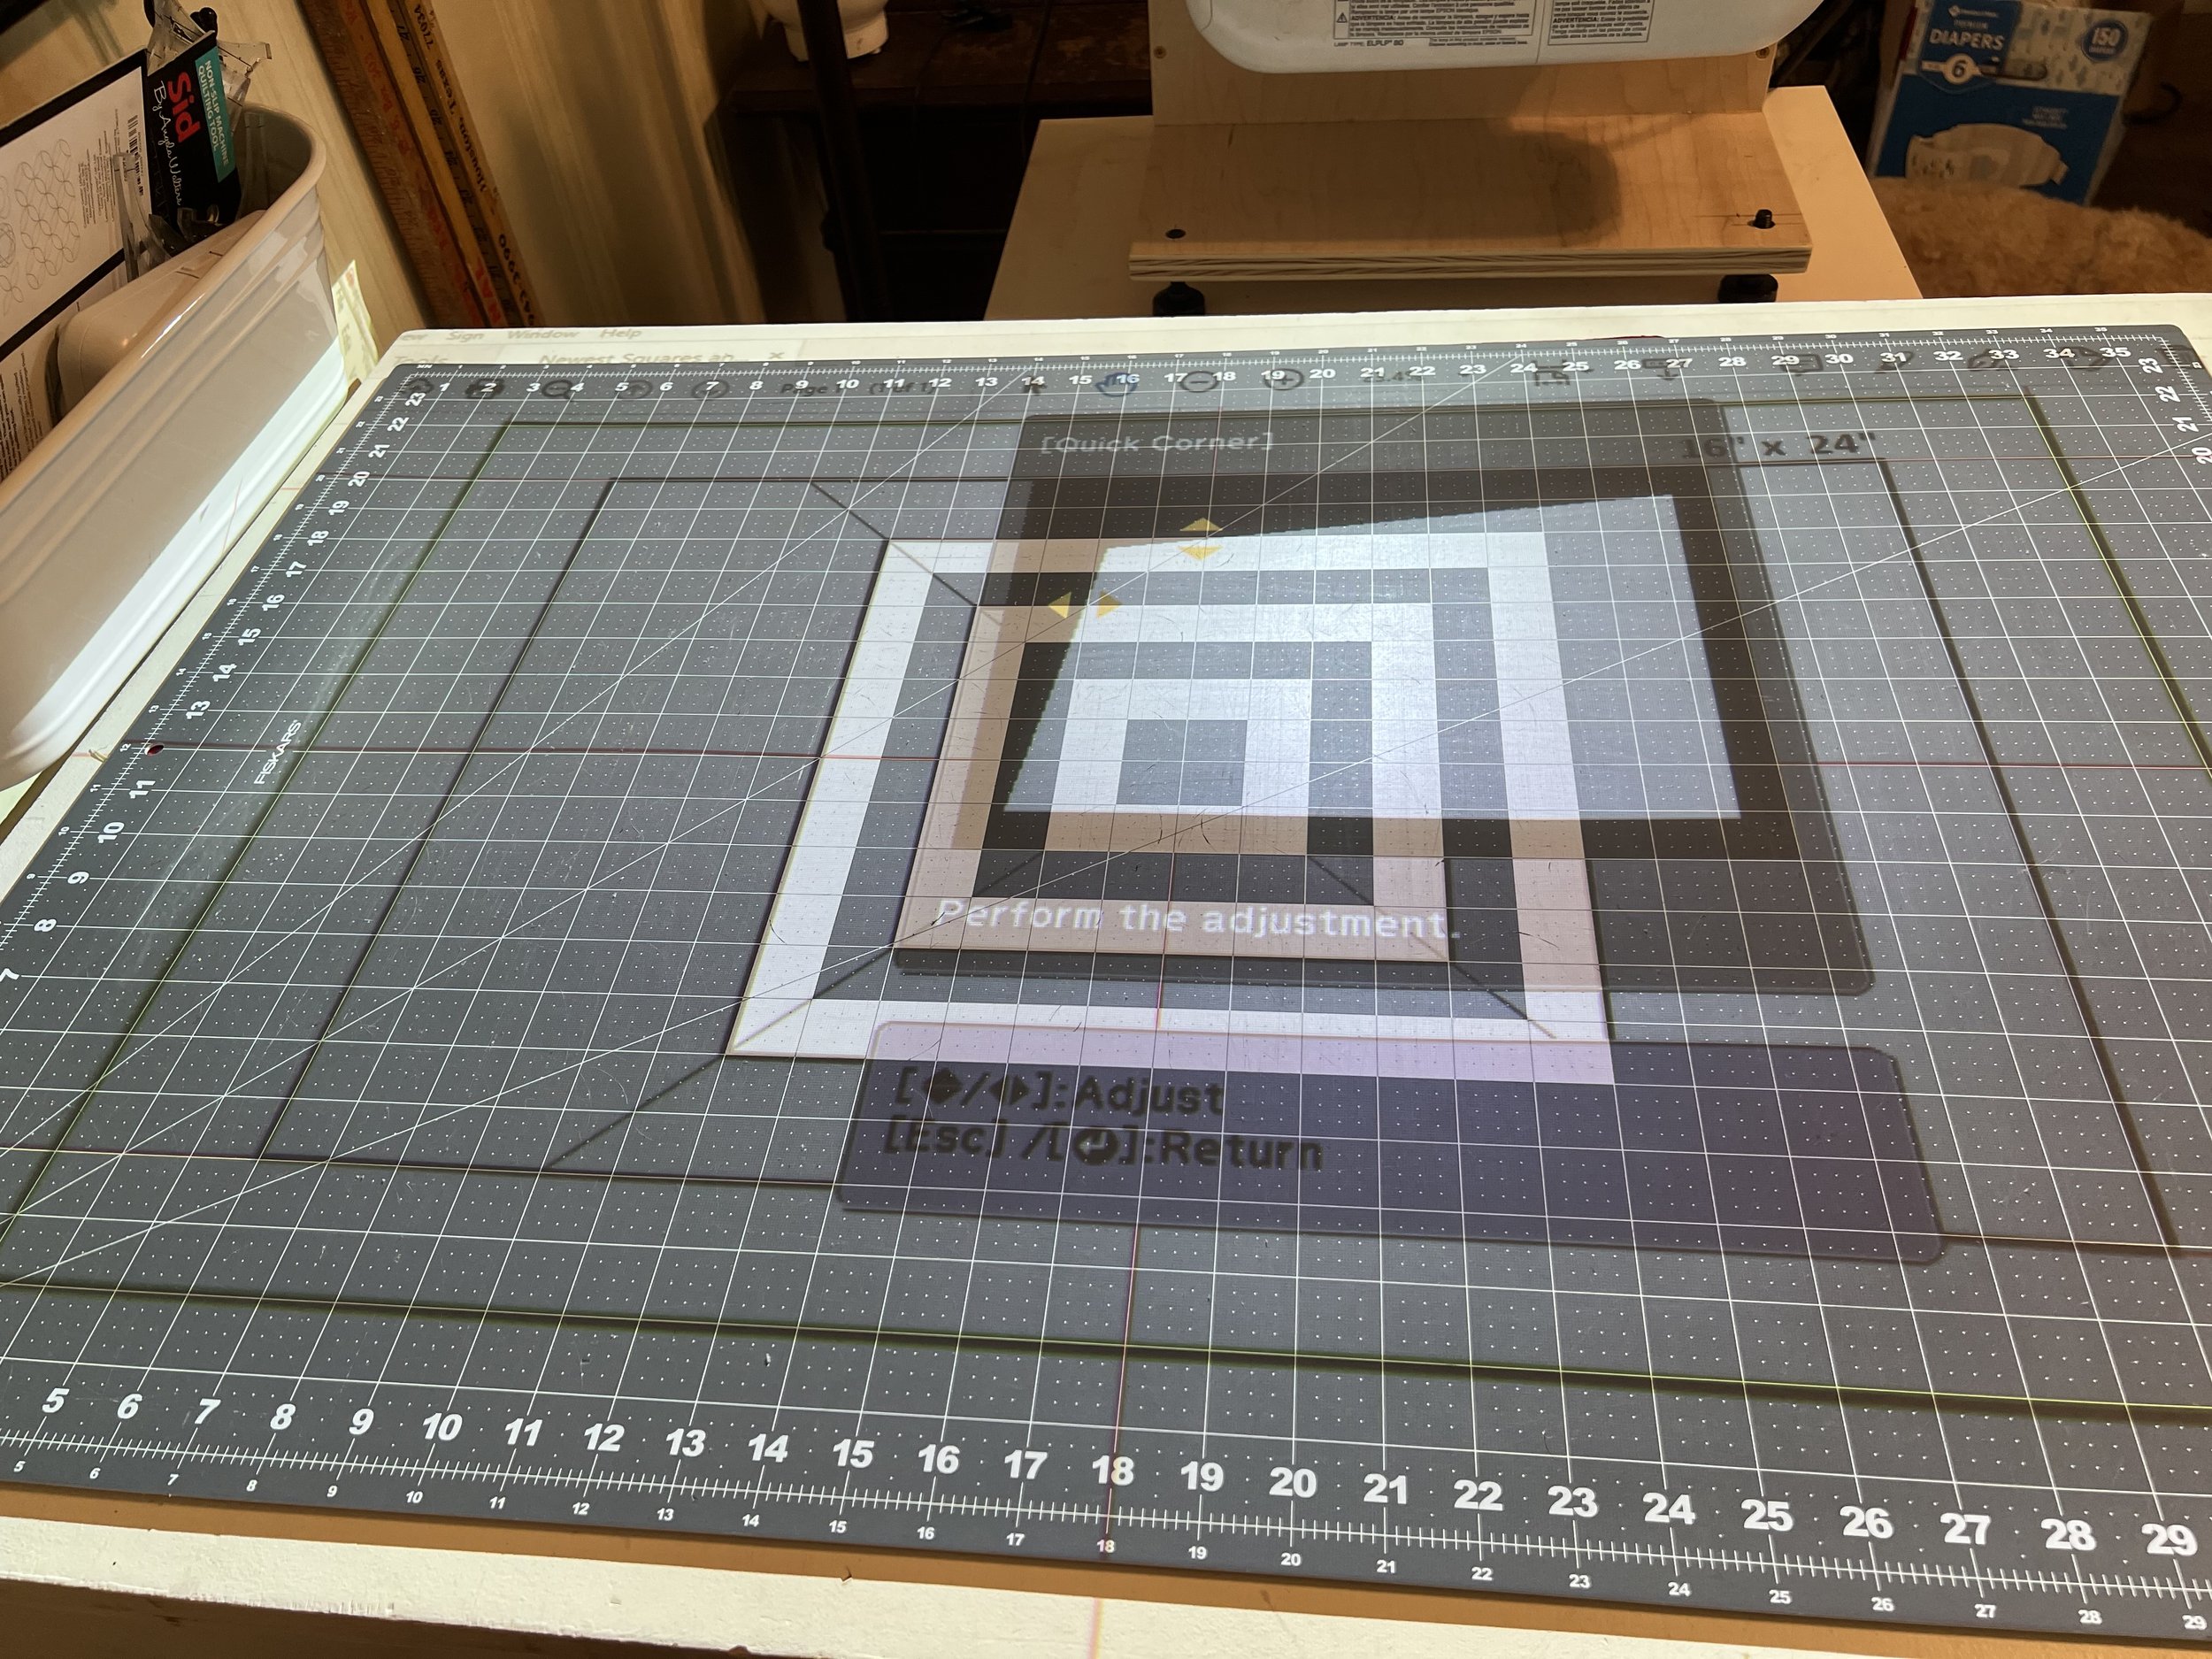
Corner chosen
When you’re happy, click Escape to go back to the Quick Corners menu and move over to the next corner.
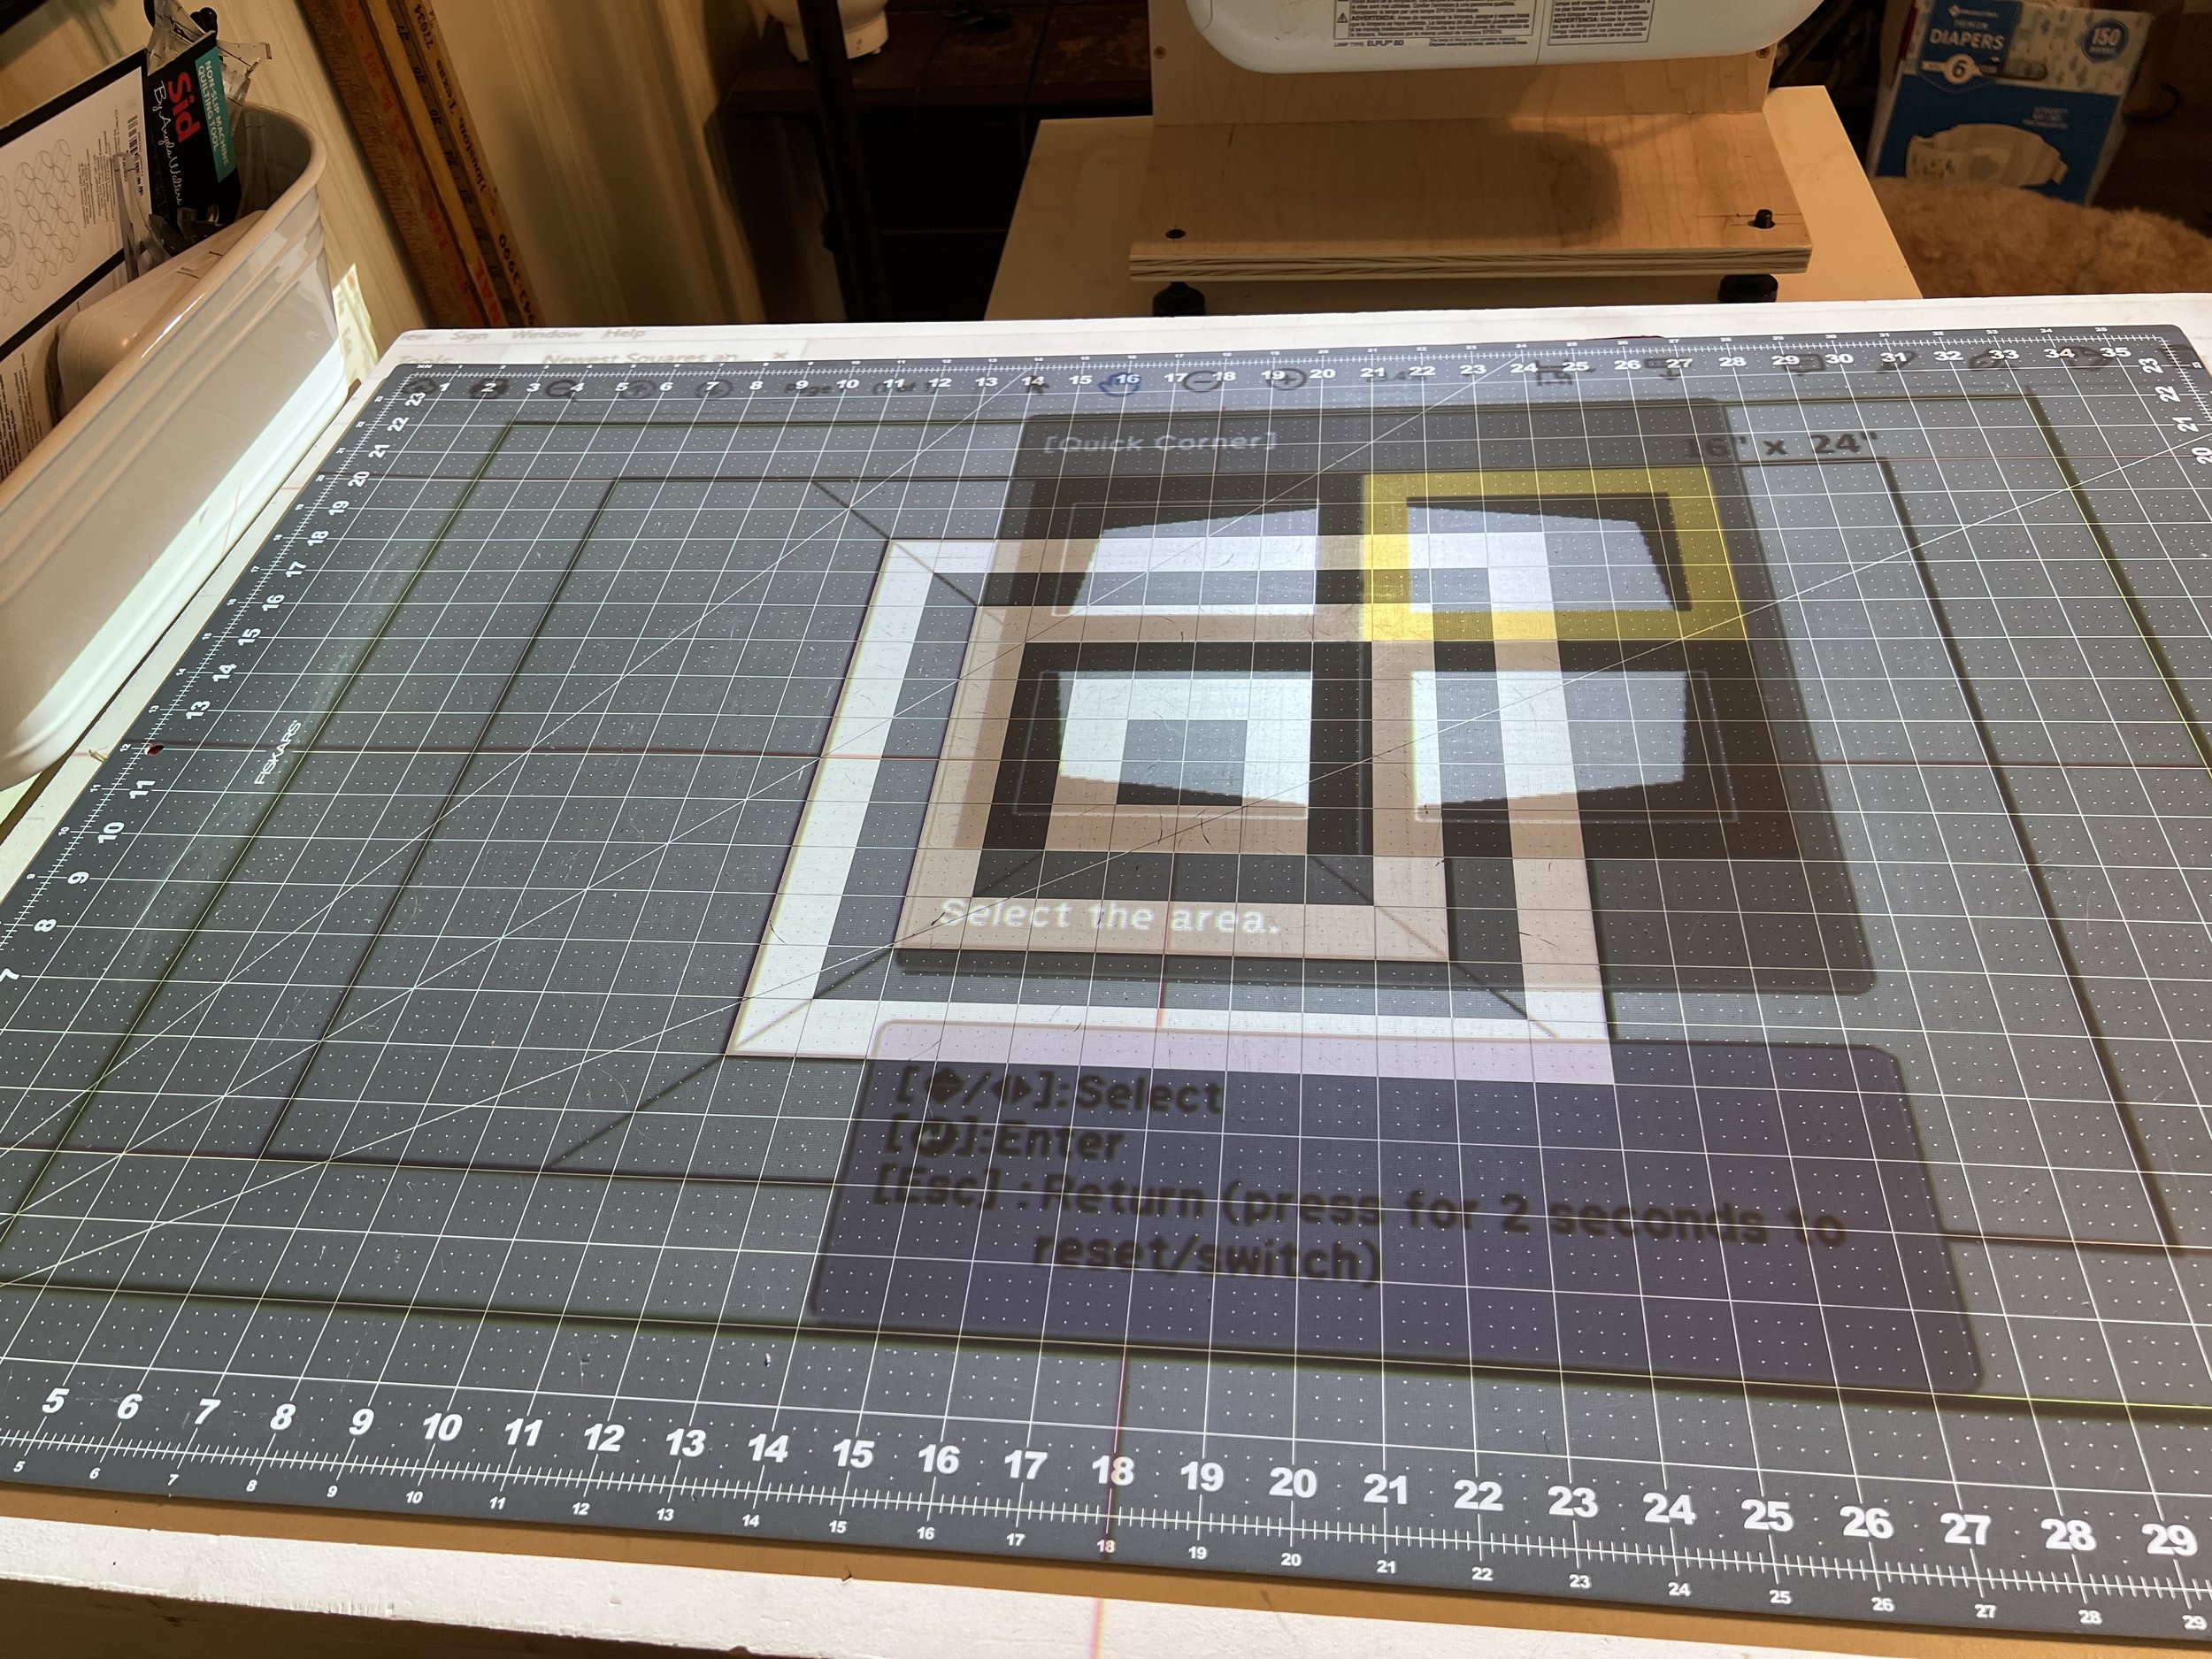
Do each corner
Continue until you’ve moved all the corners to be square and match your mat.

It’s OK if you don’t have to adjust every corner. In my example, I didn’t move the bottom left corner at all!
You can go back to each corner and adjust further if necessary. But once you’re done adjusting, Escape out of all the menus and you’ll be left with a beautifully calibrated image!
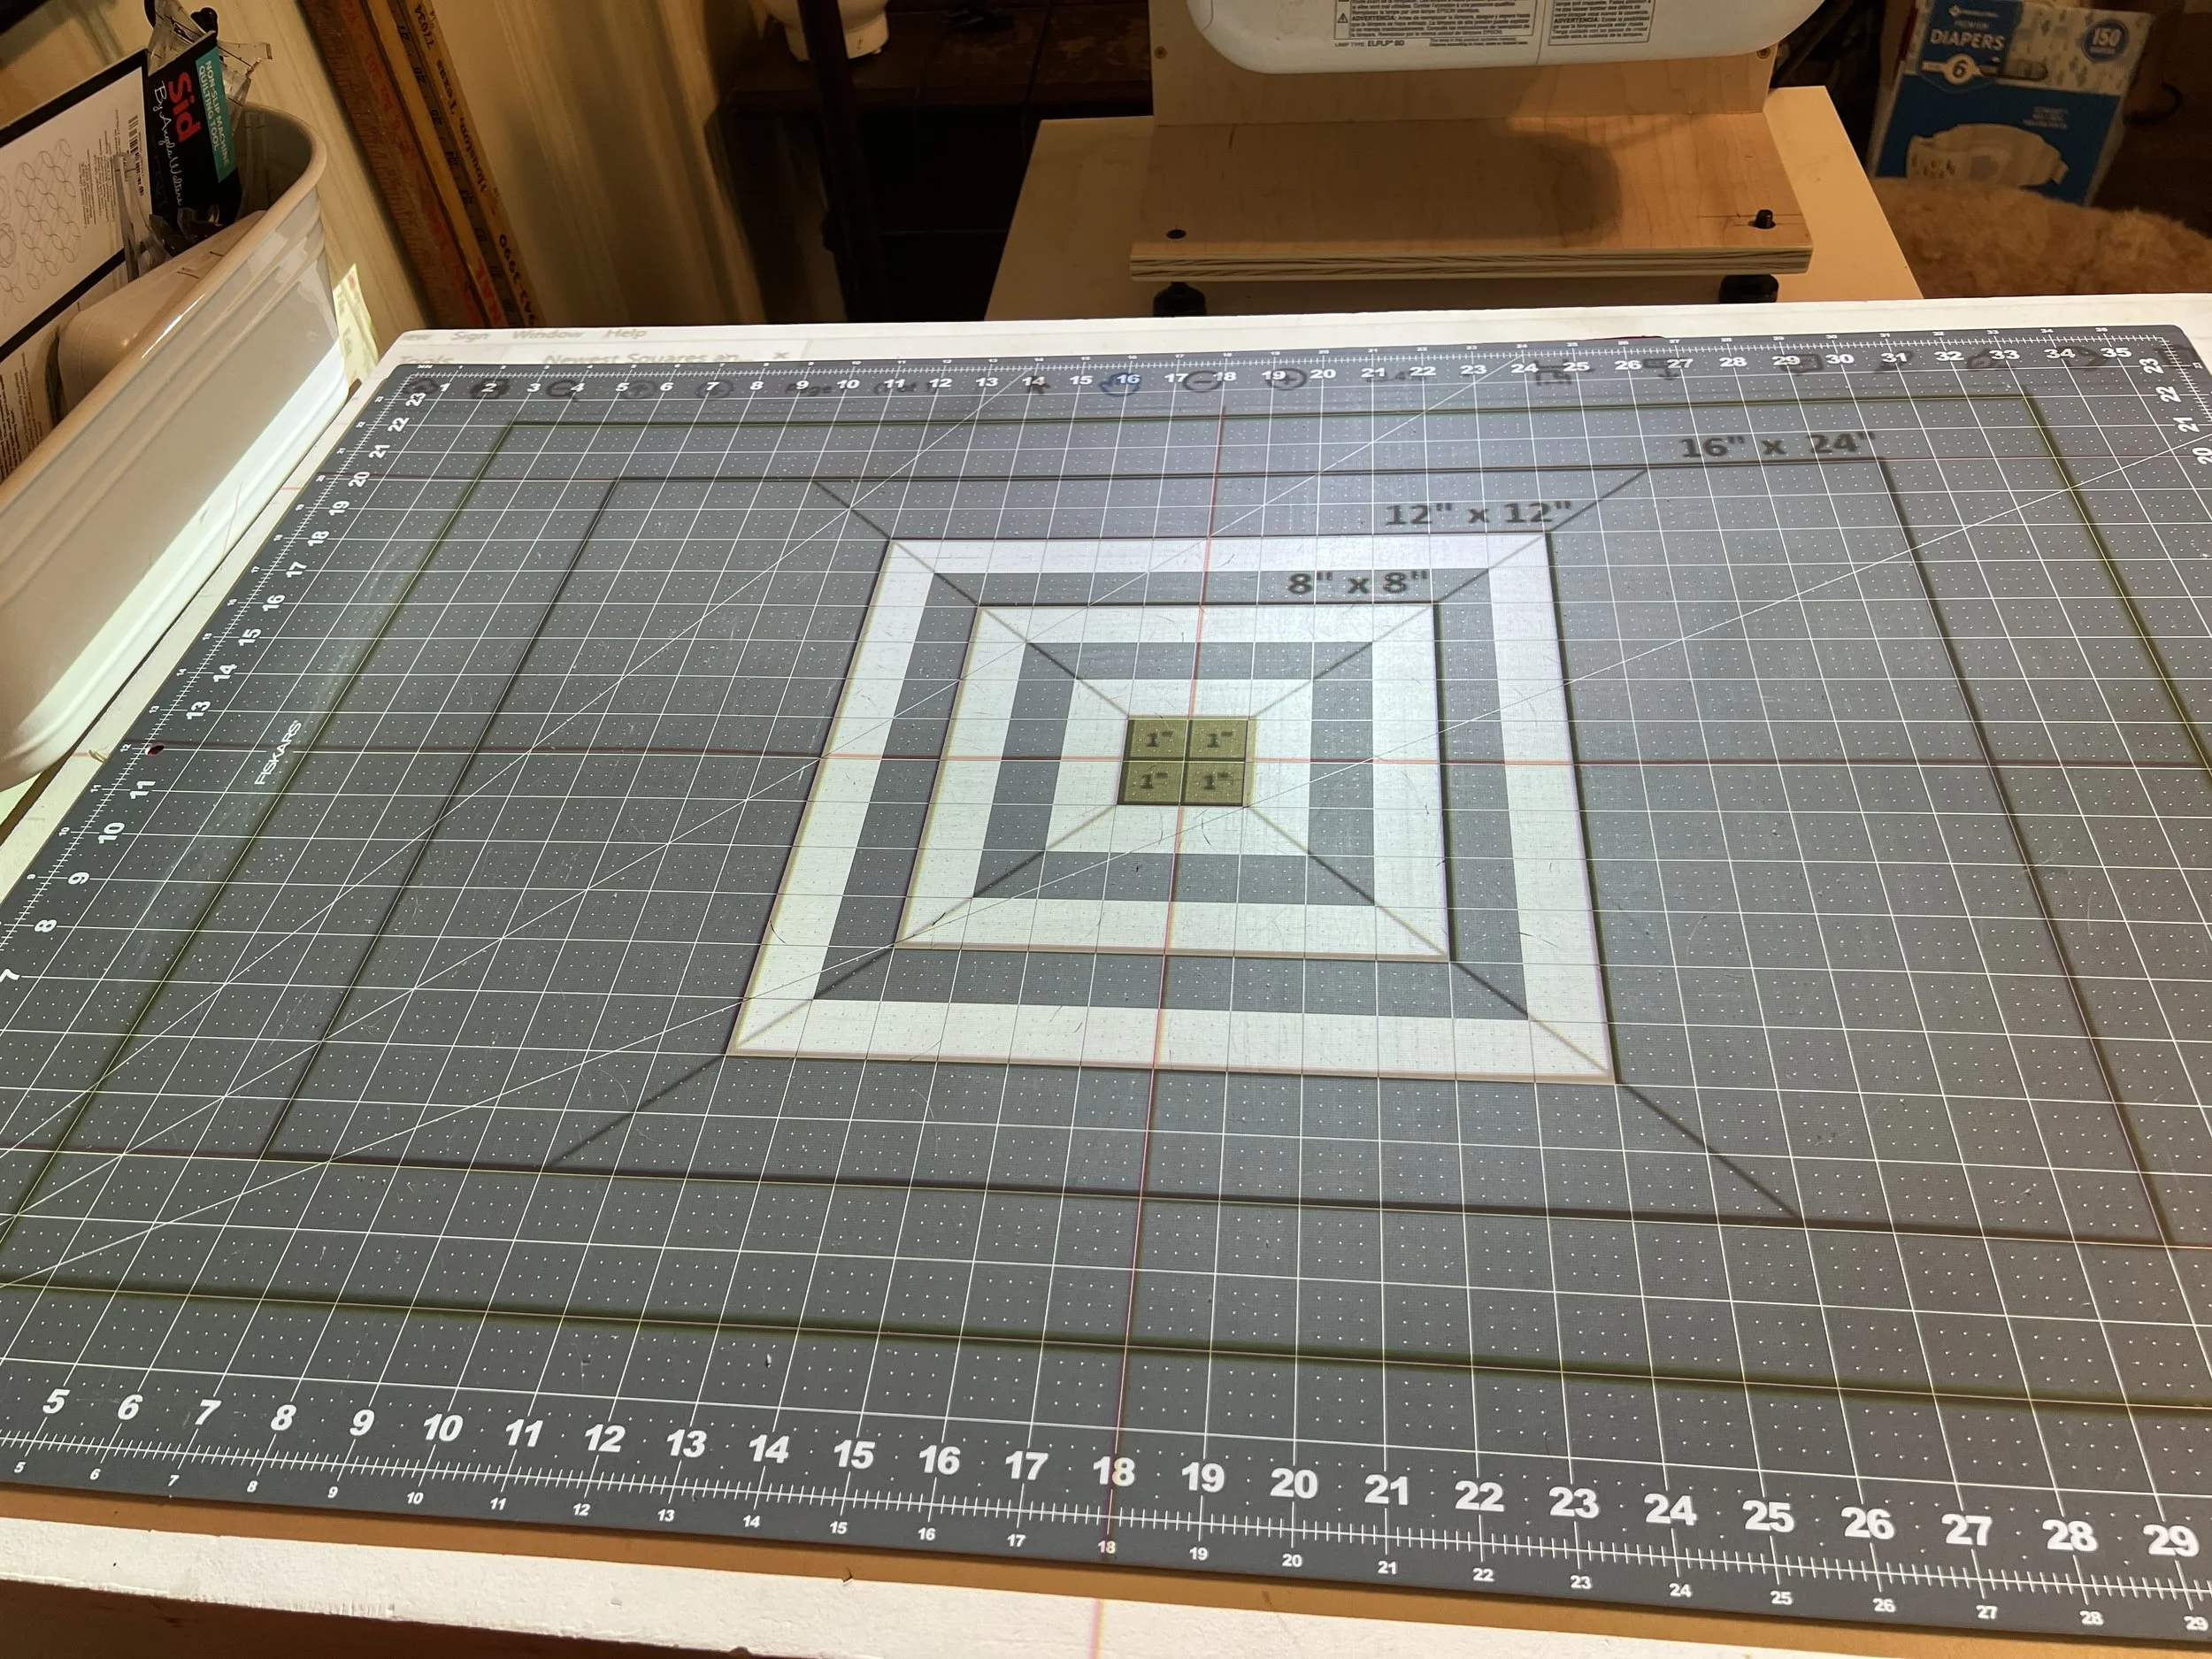
Ta-da!
Remember that the biggest way to set yourself up for success is a flat mat. If you’ve got wrinkles, press them down with your hand as best you can.
And don’t strive for perfection, 1/4” or less off your 16x24” box is 99% accurate and close enough for most sewing!
‘Till next time friends, happy pattern projecting!
Branalyn

Replacing the Bulb on a UST Projector
UST bulb going out? Scared of the prospect of changing it? No need to worry! I take you step by step through the easy process of replacing an Epson UST lamp!
***This post contains affiliate links. They cost you nothing extra but earn me a very small commission. Thank you for supporting me by using those links!***
Is your projector flickering? Or has it maybe lost some of it’s former brightness, clairty, or crispness? It may just be that the bulb is going out!
While this may sound like a scary prospect, when my Epson 595 UST began showing these symptoms, I jumped in and replaced the bulb, and brough y'all along for the ride. The good news it, it’s really not scary at all and was actually very easy to replace the bulb!
If you want to watch along as I change mine, you can find the video here:
If you prefer the written route, I’ll try to cover it all here.
The problem:
It all started with a little flickering that happened after my projector was on for a long time and just progressively got worse. So I decided I probably needed to replace the bulb when I felt a bit sea sick just trying to cut out a pattern! I posted on Instagram and got a great tip from a follower to clean out the air filter. I tried but it wasn’t very dirty to begin with and definitely did not help the flickering problem in the least.
Buying a replacement
So I went back to option 2 and ordered a replacement. In ordering, I came to realize that what I wanted to replace was the “lamp” or, in other words, the entire housing, and not actually the “bulb,” which is the actual light bulb and more involved to change.
I searched on both Amazon and eBay for a replacement lamp, using the brand name and model number of my projector (Epson 595 in my case) in the search along with “replacement lamp.” This netted me a few results, which I carefully looked through and compared both the way they looked, the compatible projectors listed, the price, and the shipping. I found what I thought was the best deal on eBay and purchased.
Once the bulb arrived, I took some time to look at it closely and see how it seemed to work. At this point, I still hadn’t opened up the projector and I wanted to be armed with the information about how it probaby went together. A few days later, I was able to film so I set up and started changing the bulb!
First, remove the old lamp
The first step was to remove the cover off the projector and then remove the old lamp. There was one screw in the cover on the projector and two holding in the lamp itself (below).

Close up of the screws you have to remove to remove the lamp.
It was relatively quick and easy to remove and I took a little time to compare the old and new lamp, noting they were very similar but the old one had a kind of patina on the bulb area.
Second, replace with the new one
Then, once I’d very gently cleaned out the lamp housing with a dry cloth, I inserted the new lamp and screwed it in with the same two screws.
The finishing touches
Next, I replaced the cover and tested it out. I immediately noticed the flickering was gone and, what’s more, it was crisper, clearer, brighter, and overall just better than it had been before! I reset the lamp hours so I’d have an accurate count and was ready to recalibrate a bit since I’d moved it out of position.
Conclusion
The entire process took maybe 45 mintues total-finding a new bulb, replacing it, testing, resetting, recalibrating. It was very simple to do and well worth it for how nice the projection looks now!
While I had things going, I actually recorded a couple more videos, so look for those coming soon!
‘Till next time friends,
Branalyn