Ditto Projector vs DIY Pattern Projecting
Have you heard about the launch of Ditto Patterns? It's made quite a splash in the sewing world but is it really a brand new, "revolutionary" idea as they've claimed? Is it the future of patterns? Is it better than the DIY set ups we've been doing?
Is Ditto really a brand new, "revolutionary" idea as they claim?
***Edited on 2/21/2023 after 10pm to add a section at the end to include my thoughts after watching a live demonstration plus Q&A done on Instagram***
Have you heard about the launch of Ditto Patterns? It's made quite a splash in the sewing world but is it really a brand new, "revolutionary" idea as they've claimed? Is it the future of patterns? Is it better than the DIY set ups we've been doing?
In this blog and related video, I discuss what we know about Ditto, some hearsay that may or may not be true, and some educated guesses (based on what we know, what we've heard, and my knowledge of pattern projecting) about what's in store, list some pros and cons, the cost breakdown of the different options, and my opinions. To be clear, I have NO affiliation with Ditto, Singer, or Joanns and I have NOT seen one in person nor had a chance to test it out.
In the end, I think that, for most people, a DIY set up is still the better option for pattern projecting. However, Ditto is a high end option that may be right for some sewists. Check out the video here or read on to see how I came to this conclusion. If you choose to watch the video, this is a good one to listen to as you do a project or wash dishes but do be sure to check out the description box and the comment section!
First, let’s figure out what Ditto even is so we can adequately compare it to our DIY set ups. (If you’re unfamiliar with the DIY set ups, check out this page for more info.) If you’re already familiar with both Ditto and a DIY set up, feel free to skip down to the sections where I discuss my opinions, cost breakdown, and pros and cons. I also have resources listed at the bottom where you can find all the references I used in making this video/blog.
Stuff we know
Let’s start with things I know from reading on websites belonging to Ditto, Joanns, or Singer, from watching YouTube videos put out by Ditto, reading press releases put out by Ditto, and from reading the responses to questions on their Instagram and Facebook pages. (Again, I’ve got links to everything I used at the bottom of this page.)
Ditto, a joint venture from Singer, Joanns, and Ditto, is a new to the market pattern projecting system. Sold through both Singer authorized dealers and Joanns, it costs $799.00 and comes with a projector, a mount, a 24x36 branded self-healing mat, a rotary cutter, pattern weights, “pattern target stickers,” a cord, and cord covers and is currently only available for pre-order (February 2023) with preorders shipping in early March and available for wide purchase at the end of March.
In all of their marketing, they have claimed to be the first innovation in patterning in 160 years. They are making this claim for two reasons 1) the projecting of patterns directly onto fabric for cutting and 2) the digital customization of their patterns based on you entering your body measurements. (We will revisit this idea in the opinions section.)
On their website, you can purchase Ditto patterns, which allow for the custom measurements, and patterns from other indie designers (Liesl + Co, Madelynne, StyleARC, Straight Stitch Society, Named, and maybe the Big 4), which do not allow for custom measurements. We know this because when asked, they commented “At this time, customizations are only available for Ditto branded patterns.” They were also asked if you can project your own designs and replied “Great question. At launch, Ditto projects the patterns available on Dittopatterns.com. Ditto will continue to evolve and input like this is how we will add new capabilities in the future like design uploads!” On the website, pattern prices seem to range from $7-$17 per pattern, and you can also do a $10/month subscription to have access to all of them. If you subscribe, that means you will lose access to the full catalog when you cancel the subscription but you’ll keep the ones you’ve bought individually. Oddly, even though Ditto patterns are customizable to your measurements, you must choose a size when purchasing a pattern.
The size chart lists the following 17 points for choosing a size:
Height
Neck circumference
Bust circumference
Under Bust circumference
Waist circumference
Hips circumference
Thigh circumference
Knee circumference
Upper arm circumference
Wrist circumference
Shoulder width
Bust height
Front length
Back length
Back width
Belly protuberance
Buttocks
All heights are listed as 5’7”. The next 14 measurements change according to size from size 0 to size 28. To give you an idea of the size range, bust measurements start at 32.5” and go up to 55”, waist 26”-53”, and hips 33 7/8”-57”. “Belly protuberance” has letters A-D listed as you move up in size across the size chart similar to how Bootstrap Patterns has you enter your belly shape for the body double dress form pattern. “Buttocks” has the word “average” for every size and I assume there will be choices such as “flat” or “full” but you cannot yet buy patterns from their website so I’m not sure how that will be entered.
Watching the available videos on their YouTube channel, it appears that you must use their mat to calibrate, which right now is only available in the kit with the whole system and is only available in the 24x36” size. It also appears that calibration is pretty simple because you set up your projector, get it close with physical manipulation, and then take a picture for the app and projector to work together to finish calibration for you.
In the videos, it also looks like you can use your finger with the app to place the pattern pieces anywhere you want by dragging, can use your fingers to rotate them, and it has buttons for both horizontal and vertical mirroring.
Educated guesses
While everything in the last section was verifiably true, in this section I’m going to take things that have been said in those places and pair it with what I know of pattern projecting to make some good guesses about what things mean.
With the way patterns are manipulated and changed, and because Ditto has said you cannot use your own patterns, I think it’s pretty clear that Ditto uses a proprietary software and pattern format so it’s unlikely that we can buy patterns from them and use them in our own way AND the projector cannot be used to do anything other than project their patterns through their app. So you couldn’t use your Ditto projector to do anything other than project patterns purchased on their website and you couldn’t use any patterns purchased on their website for anything other than the Ditto projector.
In reading comments made by and asking several people I would consider experts in the Projectors for Sewing group, no one who really understands pattern projecting was consulted for this. However, I have learned since making the video that Elizabeth Caven was involved in developing Ditto and has also been using a projector for sewing for some time. (More on this in the opinion section.)
As we previously learned, there are 17 measurements on that size chart and the hearsay from the launch is that there are 17 customization points for patterns. I would guess that means that the size chart is the list of customization points. As someone who is very short (4’11”) and comparatively short waisted, I’m concerned there are not enough length measurements to properly size a pattern for your specific height. I would want side waist length, rise, and inseam included at the very least. As someone who is also rather full busted, I also don’t think it’s clear how they plan to implement full or small bust adjustments with the measurement points given.
Based on an FCC report found online and their YouTube videos, it looks like the way they handle pieces too big for the projection size (which seems to be limited to 24x36), is to have them pre-sliced and you must work with the pieces as they have them already cut. While you can place multiple small pieces on your fabric at once, pre-sliced pieces cannot be included with them and no pieces can be cut unless they fit fully within the 24x36 box. It seems like this would make pattern tetrising fairly difficult but it also seems like a pretty simple solution.
Hearsay
And moving on to the last section of things we know, well…these are things we think we know. All of this is based on comments and stories from people who were at the Ditto launch and is frankly hearsay. Some of it may not be true but I did see it in several different places and it stands to reason that it may be true based on the things we know.
It seems as if it is all cloud based so you won’t actually download and store any pattern that you buy through them. While this does make it easy for you to find your patterns within the app, it also could limit you to only working when wifi is available and would mean you are relying on their servers to be working in order to use your patterns.
In the same vein, I heard that you’ll make your account with your sizing and any pattern you buy will be customized for your sizing only. It seems that if this is true, you’d have to re-purchase the pattern if you want to use it for a person who is a different size than you (say if you make a dress for both yourself and your sister but you aren’t the same size).
People have been told that there are 17 customization points, which fits in with the size chart as previously discussed.
And this is less hearsay and more a bit of a shot in the dark based on the videos I’ve watched but it looks like you can place the pattern pieces where you want and they have mirroring built in but you can’t unfold pieces yet and they seem to be all cut on fold. The opinions on cutting on the fold vary greatly in the pattern projecting world but many people are strongly against it!
Others’ opinions
I’ve read over and over from others in various comment sections that Ditto looks good in a space. That seems to be a definite selling point for a lot of people. It certainly seems like Ditto is aiming to be a high-end projecting solution at their price point and I think that the high-end look definitely fits with that image. People are also saying it looks very simple to set up and use.
However, there are a lot of people feeling a bit of sticker shock with that $800 price tag and quite a lot of them are hating on the proprietary nature of the system. I saw a ton of comparisons to Cricut, especially in the early years of Cricut, and none of them really seemed favorable.
My opinions
In response to Ditto’s marketing claim that they are the first pattern innovation in 160 years, in my opinion, the digitization of pattern making changed patterning over a decade ago with the advent of pdf patterns and indie designers and is a MUCH bigger innovation. In addition, this digitization of patterns led to the projectors for sewing movement, which started in 2019 and I’ve personally been using a projector for over 3 years now. Several pattern companies already exist that allow you to customize patterns to your measurements. Ditto has not innovated either of these ideas and it’s quite a stretch for them to claim they are the first innovation in 160 years as projecting patterns isn’t new and neither is customizing patterns. Apostrophe patterns, for example, allows you to buy a basic pattern (such as leggings or a tshirt) and then enter your measurements to get a fully customized pattern. You can also enter measurements for other people and use the pattern over and over for as many people as you like.
Them hitting “160 years” in so much of their marketing bothers me because I feel like it takes away from what companies like Apostrophe have been doing, and away from people who have been projector sewing for years now. I’m especially upset that Missy Pore isn’t getting the credit for actually starting this revolution. The way that Ditto’s press release speaks about DIY set ups feels a bit insulting. I get they are selling it but I really love the way we’ve collaborated to make such a wonderful thing and it bothers me to see it denigrated. And really takes away from the people who have put SO MUCH into PFS. I also found out after this video was complete that the person, Elizabeth Caven, who applied for the patents for Ditto also filed a patent in 2017 for something similar. That something never went anywhere it seems until Ditto came along. 2017 is before the founding of the group Projectors for Sewing. Missy Pore states in her interview with me that she had heard the idea for using a projector to project patterns but had searched fruitlessly to find something already created, which is what led her to DIY a solution and share it with the world. I do not know if there is any connection there but I do still believe Missy Pore (along with Sasha Sewist and countless other people in the Projectors for Sewing Facebook group) deserve credit for making pattern projecting what it is today!
Ditto says you have access to their whole pattern library if you subscribe and, if you drop your subscription, will still keep access to the ones you’ve purchased. That makes sense but many of us in the sewing world remember when Craftsy was bought by Blueprint and then bought back by Craftsy. One of Craftsy’s selling points was that you could keep your class “forever” but “forever” turns out to be only as long as the company is in business. If Ditto is all cloud based, then “forever” with Ditto will also only mean as long as Ditto is in business. To be clear, I don’t wish for Ditto to go out of business, but I’m a little worried about having my entire pattern library and ability to project patterns wrapped up in their proprietary cloud based world when “forever” could end anytime their business model changes or ends.
Many online are comparing Ditto to Cricut and I see the similarities with proprietary software, etc. There is room to grow as Cricut did, it’s now less proprietary and has more options, you don’t have to have a subscription, etc. But joining Ditto right now still seems like a bit of a risk to me for the reasons previously discussed.
I also have to wonder, for the non-Ditto patterns offered on their website, how in the world can you use them if you don’t fit a straight size?! With a DIY set up, we have loads of options for on-the-fly adjustments, making adjustments within Adobe (yes, the free version we project with), or using a vector software to make digital pattern adjustments. With Ditto, none of those seem like they will be possible. So if you don’t fit into the straight size of a pattern, how can you use their system?
As far as calibration is concerned, it looks incredibly easy if everything goes to plan. But I know as someone who has calibrated and helped calibrate a lot of projectors that having a fully flat surface is imperative for a good calibration and sometimes we have to take a “finished is better than perfect” attitude. (See more about close enough calibration here.) So how does calibration work in Ditto with less than ideal circumstances? Are you able to fine tune it or adjust manually? Or does it just tell you it can’t calibrate and then you've got an $800 piece of equipment that you can’t use? If your proprietary mat that is necessary for calibration gets bent or warped from the heat of an iron, can you still calibrate? If not, can you buy a new mat on its own? What will that cost? Will they make other size mats available at some point? While 24x36 is certainly the most popular size mat in the Projectors for Sewing group, many of us are now enjoying much bigger mats after getting a projector and fitting even more of a pattern on our mat at once.
In a video, Ditto shows cutting with scissors but I don’t think that’s realistic for projecting. When you project, lifting the fabric, even enough for the scissor blades to fit underneath, distorts the projection. Notice that they only show a short, straight seam where the user is cutting away from herself at a 90 degree angle and then uses a rotary cutter for the curves. While Ditto includes both a mat and rotary cutter in the box so you will have everything you need to use a rotary cutter instead of scissors, it does seem to be a bit misleading on their part to say you can cut with scissors.
Most often, when I bring up pattern projecting to people who aren’t familiar with it, I see responses that say “I could never do that because I adjust my patterns too much” or “I could never afford that.” While Ditto is bringing pattern projecting mainstream, which is great, it also kind of reinforces those preconceived notions people have. Projectors don’t have to be $800 to work for patterns. They don’t even have to be half that! Ditto being so expensive I’m afraid will reinforce that idea that projectors are always expensive. I also think them hitting their pattern adjustments so hard means that people will believe it’s difficult to adjust patterns when using a projector, which isn’t the case at all. Hopefully, people will hear the idea and search for other, less expensive options and discover the wide world of pattern projecting rather than immediately dismiss the idea based on Ditto’s cost or the notion that they can only adjust patterns if they pay for Ditto.
I feel pretty certain that I am not their target audience. And I don’t think their target audience is as big as they think it is. Sewists are by nature DIYers. We are the kind of people who show up to craft shows and know we can make that ourselves. Sometimes, we do buy it because we want to support that business or really think the concept is great or for the shear convenience of it being done for you. But when It comes to convenience, I think doing it yourself is more convenient in the long run because it will work out best for your space and give you the most flexibility. I also think most people are more likely to be drawn to the lower cost of DIYing a solution versus buying the whole Ditto system.
Which brings us to…
Problems Ditto is attempting to solve
I’ve certainly not been a part of the development of Ditto, but it seems to me as if Ditto looked at the DIY pattern projecting set ups and saw three issues and then attempted to solve those. And I think they accomplished that, for the most part, but, in doing so, introduced a few new issues.
It seems like Ditto noticed the people who want a quick answer of “buy this exact projector” and not wanting to have to figure out which would be best for their situation or to DIY a set up. And then Ditto created a solution of a one-size-fits-most projector for their set up. As long as you fit into the parameters they set (7.5 to 10 foot ceiling height, flat ceilings), then their projector should work for you. But it leaves anyone outside of those parameters out of options and doesn’t give any flexibility for projection size, etc. that a DIY set up will give.
Ditto also seemed to notice that people get hung up on calibration. Not to dismiss the many people who do have issues with calibration, but I certainly feel like there are a lot of people who see the Projectors for Sewing Facebook group and don’t realize how many people quickly and easily calibrated and never had to post asking for help. All they see is the people who do need help and assume calibration is going to be awful. This creates what I dubbed in the video “calibration dread.” People put it off and are scared to try when, many, many times, calibration is actually fairly simple. It’s a matter of having a flat surface to project onto, having your projector completely perpendicular to your flat surface, and doing a bit of adjusting. There are loads of resources to help you with this and, for many people, calibration is a one time thing that opens up so many doors for your sewing! For those that will move their projector often and do it again and again, it is something that definitely gets easier with practice. So, yes, Ditto saw the problem of calibration dread and solved it, but again we don’t know for sure how well that calibration really works and I don’t view calibration as a insurmountable problem.
The third issue with pattern projecting that Ditto seemed to want to solve is the issue of “how do I do pattern adjustments now?” that seems to occur to all of us as we think about pattern projecting. As it turns out, we have lots of great options for doing this with the DIY method of pattern projecting as I previously discussed, plus we can use any of the companies that already offer custom sized patterns. Ditto, again, seems to have solved this issue so long as you use their pattern brand but I’m not sure it is such an insurmountable problem to begin with.
How those problems can be solved without Ditto
If you found yourself as a person who agreed with Ditto about the problems pattern projecting can present, maybe you are Ditto’s target audience but I want to make sure I’ve covered the ways DIYing your set up can solve those same issues so you can make a decision with as much information as possible.
A good way to be sure you’ll have a set up that works is to use a tried and true set up from the Projectors for Sewing Facebook group. There are some recommended projectors and you can see how others who have similar spaces as you have set up their projectors. I also have a resource on my website with a graphic that can help you decide which type of projector will work best for your space and then guide you into setting it up and calibrating. Projectors for Sewing remains the best place to find information on which projectors work best and creative solutions for lounging projectors. There are non-permanent solutions if that is part of your problem, including using a tension rod just like Ditto does.
Calibration dread is definitely real but for many people, calibration isn’t as bad as people fear it will be. Whether you’re using Ditto or a DIY set up, the biggest key to an easy calibration will be starting with a completely flat surface.
Apostrophe Patterns is one example of an indie pattern company that will customize your patterns to your measurements and you can download and own the pattern as a PDF to print, project, or whatever you’d like. There’s a free resource at the bottom of the references that also will allow you to do this and there may be other companies that exist. There are also many ways to adjust patterns digitally. I have a playlist showing several options here.
Cost breakdowns
We know that Ditto costs $800 for their all-inclusive set up plus whatever you spend on patterns and/or a pattern subscription. But what does it cost for a DIY set up? Aren’t projectors super expensive? Well…unfortunately, the answer is “it depends.” While I think most set ups can be achieved for less than half what Ditto costs, costs do vary based on what you choose.
With a DIY set up, assuming you already own a mat, rotary cutter, and pattern library, you can expect to spend anywhere from about $100-200, maybe up to 300, on your projector and mount. Even with the cost of a 24x36 mat and rotary cutter, you’re still paying half the cost of Ditto and you can use the patterns you already own.
Pros and Cons
To wrap up this post, I’m going to list 3 pros and cons for both Ditto and a DIY set up. While I have concluded that Ditto is not the solution for me and I much prefer a DIY set up, maybe these pros and cons weigh differently for you and you end up with a Ditto. I’d love to hear what you decide, especially if you decide to get a Ditto and can answer a few of the questions that we don’t have answers for yet!
Ditto
P-All in one solution-you buy the box that Ditto comes in and the only other thing you need is a device to run the app.
P-Taking pattern projecting mainstream-Ditto has opened the conversation surrounding pattern projecting to an even wider audience, which is awesome!
P-Easier for mobile users-One thing I haven’t spoken about much yet is that Ditto does look extremely easy for mobile users to use a pattern projector. While it is certainly possible to use a phone or tablet to project with a DIY set up, it is less convenient than using a computer.
C-Expense-Ditto has quite a sticker shock price of $800 and, right now especially, that price is hard to swallow.
C-Proprietary-The all in one solution comes with the side effect of using proprietary software. You cannot use any other patterns with your Ditto projector.
C-Limited-In that same vein, Ditto is limited in what you can do with it. You aren’t able to use your Ditto projector to do anything other than project patterns. You aren’t able to projector other patterns. If you fall outside the usefulness of the tension rod set up, (it works on flat ceilings with a height of 7.5-10 feet according to their website so if you have a drop ceiling, if you have a particularly low or high ceiling, if you have plaster ceilings or tile ceilings that cannot take pressure) this option likely won't work for you. As far as we know, you are limited to a 24x36 inch mat and projection size.
DIY Set up
P-Infinitely more customizable-You can customize for your budget, your patterns, choose your own mat size and projection size based on what kind of projector you choose, you can hack and mash patterns, you can make sure whatever you use will work best in your space, and more.
P-Flexibility-You can use your own pattern library and/or design patterns for yourself. You can use the projector for anything you’d like-not just projecting patterns-and if you decide you don’t like pattern projecting, you can easily resell it for someone to use for another purpose.
P-lngenuity-You can use your own ingenuity to get your best set up but you can also take advantage of the ingenuity of many fellow pattern projector sewists who have innovated such things as PDF Stitcher and Projector View software, created mounts that work great for our purposes, etc.
C-Research-One bad side to the pure flexibility and customization of the DIY set up is that you first have to do your research before buying. It’s not a simple “buy this one thing” answer. But, all of the research others have done for you definitely shortens the time you spend researching!
C-Calibration dread-DIYing the set up and the calibration dread really does stop people from using their projector and that is really unfortunate. No one has a Ditto yet but I do think people are less likely to let their Ditto sit in a box for months before setting it up!
C-Mobile use-Mobile users can and do pattern project with DIY set ups but it can be a bit more complicated and I do think the Ditto app looks much more simple to use than the solutions we have come up with to DIY with a mobile set up.
Links to all the things I referenced in the video/blog
https://www.dittopatterns.com/how-ditto-works/
https://www.dittopatterns.com/brands/
https://www.dittopatterns.com/projector-instruction-manual.html
https://www.dittopatterns.com/tutorials/
https://www.trendhunter.com/trends/ditto-sewing
https://fcc.report/FCC-ID/2AYJ8-DITTO/5500039.pdf
https://www.bakercityherald.com/ae/entertainment/video_992c5b88-78f6-5c96-bff9-ca0f97a02a07.html
Ditto's Facebook, Instagram, and YouTube pages
Others' stories on Instagram, especially about the launch party/demonstration
Comments in the Projectors for Sewing Facebook group (www.Facebook.com/groups/projectorsforsewing)
Apostrophe Patterns https://apostrophepatterns.com/pages/my-projects
Free Customizable Patterns https://freesewing.org/designs/
Thoughts after watching a live demonstration/Q&A on Instagram
Ditto and one of their ambassadors That’sSewMonica had a live on Instagram where both she and a Ditto representative showed a demonstration of Ditto and answered questions. I didn’t catch most of it live but went back and re-watched, taking notes. Honestly, I don’t feel like we know much more now than we did before the live, but here’s what I gleaned. Definitely go watch it for yourself and see if something different stands out to you!
Representing Ditto was Maya, who said she’s spent the last year designing patterns for Ditto. From what she said, it seems that Ditto has really focused on having a huge pattern library at launch.
Both Maya and Monica said that Ditto uses a tension spring and that it “stays in place perfectly.” While a tension rod is a great option for set up, it does have limitations I brought up previously. You must fit into their range of 7.5-10ft ceilings and you have to be able to put pressure against your ceiling, ruling out anyone with dropped ceilings, tile ceilings, plaster ceilings, and it may cause issues if you live on a pier and beam foundation that has some flex in it (this is pretty common in my area for older homes because we have clay soil that shifts often and may be less common in other areas).
I found it interesting that they both felt the need to dim the lights, at nighttime, in order to show the projection. Occasionally, I will do that for filming purposes but I project with ambient daylight from my huge windows and don’t typically turn off the overhead lights when projecting. Mileage varies depending on projector, however.
When asked about the mat, they said you can use another mat for cutting BUT you’re limited to a 24x36 workspace regardless and the proprietary mat is necessary for calibration. They did not answer what would happen if something happened to that mat or if it wasn’t flat. When asked about having a flat surface, they gave an answer about needing a level surface but did not speak at all to the question of having a flat surface. These are not the same thing in the pattern projecting world. A level surface is nice but we can adjust our projectors to be level TO our surface rather than according to a level. What is more necessary is a flat surface without ridges or dips in it. That question about how Ditto will handle less than ideal situations or not-flat surfaces remains to be answered.
The mystery of the “pattern target stickers” was answered and it is, as suspected, for using when you do fabric shifting. Monica spoke about how innovative the idea is but it is the same exact method we’ve been using for years-Ditto places a marker automatically on your screen instead of you doing it with the comment tool on Adobe and you place stickers on your fabric to mark it and then you shift both the fabric and the projection to line them back up and continue cutting.
When asked to list the benefits of Ditto, Maya’s response certainly encapsulated the reasons projector sewing is superior to paper patterns (see my video here where I expound on that) but none of them really answered why Ditto might be superior to a DIY set up. One thing they did mention more in passing is how easy Ditto is to transport. I definitely give them points for that one. I *can* take my UST anywhere I want but it is rather bulky and heavy.
In several places throughout the live, they did reinforce that Ditto is a closed system-your patterns save to your Ditto account and don’t download, Ditto patterns only work within their projector system, only patterns sold on the website work with the projector, you cannot trace paper patterns into the system or add PDF patterns you already own, and Maya made a statement that sounded like they intend for it to stay a proprietary system. They did state they’d be willing to speak to indy designers about adding them to the library but my understanding is that you’d then have to rebuy any patterns you already own and that they intend to add a feature where you basically build your own designs from presets in the system but that it wouldn’t be live as of the release. However, in one answer they contradicted this saying there would be an option to print patterns purchased from the website, which implies you could save them on your computer and project them with your own DIY set up.
Maya said you’d save money by using the Ditto system over a DIY set up because of the pattern subscription. You’d have to make up at least $400 worth of patterns, minus what you spend on the subscription and replacing patterns you already own, for that to begin to be true. She also called a DIY set up “homegrown” and inaccurate. We always aim for at least 99% accuracy with our “homegrown” projector set ups. I sincerely doubt there is a noticeable difference between that and Ditto but we would need a side by side comparison.
They hit the 17 points of measurement and customization several times, mentioned there will sometimes be options for inseam length, and said several of their measurements were the “nitty gritty.” As someone who has used a truly customized pattern company before, I don’t think they have nearly enough measurements to call any of it “nitty gritty.” They also said they were working to add upper bust measurements in order to do FBAs (and I assume SBAs). When asked about sway back adjustments, there was no clear answer given.
Another thing they said they would consider adding is a feature to unfold pattern pieces so you can cut on the flat.
When asked what you could do if you didn’t have a smartphone, tablet, or wifi, Maya stated that you had to have a device with a camera to complete calibration and wifi is an integral part of the system.
It sounded to me, based on comments and stated answers, that Ditto is either currently available or will be available on 3/1 to demo at Singer authorized dealers and will be available to demo at Joanns on 3/31. I am not fully confident I understood this correctly. I also understood them to say you can download the app on 3/1 and use the website with all of it’s functions then but you cannot test using their patterns without the projector, which leads us back to the closed system and Ditto patterns only being able to be used with the Ditto projector.
While a few things did get clarified and another pro to Ditto (ease of transportation) was raised, nothing I saw in this live leads me to change my overall opinions about Ditto. Monica said several times that Ditto is “for sewists, by sewists” but I am still left feeling like they missed a whole group of sewists who could’ve given them some really important feedback prior to launching their projector.

Amazon Projector & Basic Niche Mount
Need help setting up your Amazon (or mini) projector for sewing? I have tips, tricks, and how-tos for you inside!
Unboxing & Set Up
***Please note that many links in this post will be affiliate links. While they cost you nothing extra, they do provide a bit of income for me. Income that helps keep me making videos and writing posts, so thank you for supporting me in that way!
Today’s post/video is all about the “Amazon” projectors! Choosing them, mounting them, calibrating them, all the things.
Before we get into the nitty gritty, I need to say that I’m using a Windows 10 computer, the free version of Adobe Reader, a Turewell H3 projector, and a Basic Niche mount for this video. I will try to be as broad as possible in my instructions and phrasing, but any specifics will refer to these parameters.
Let’s jump in!
What is an “Amazon projector?”
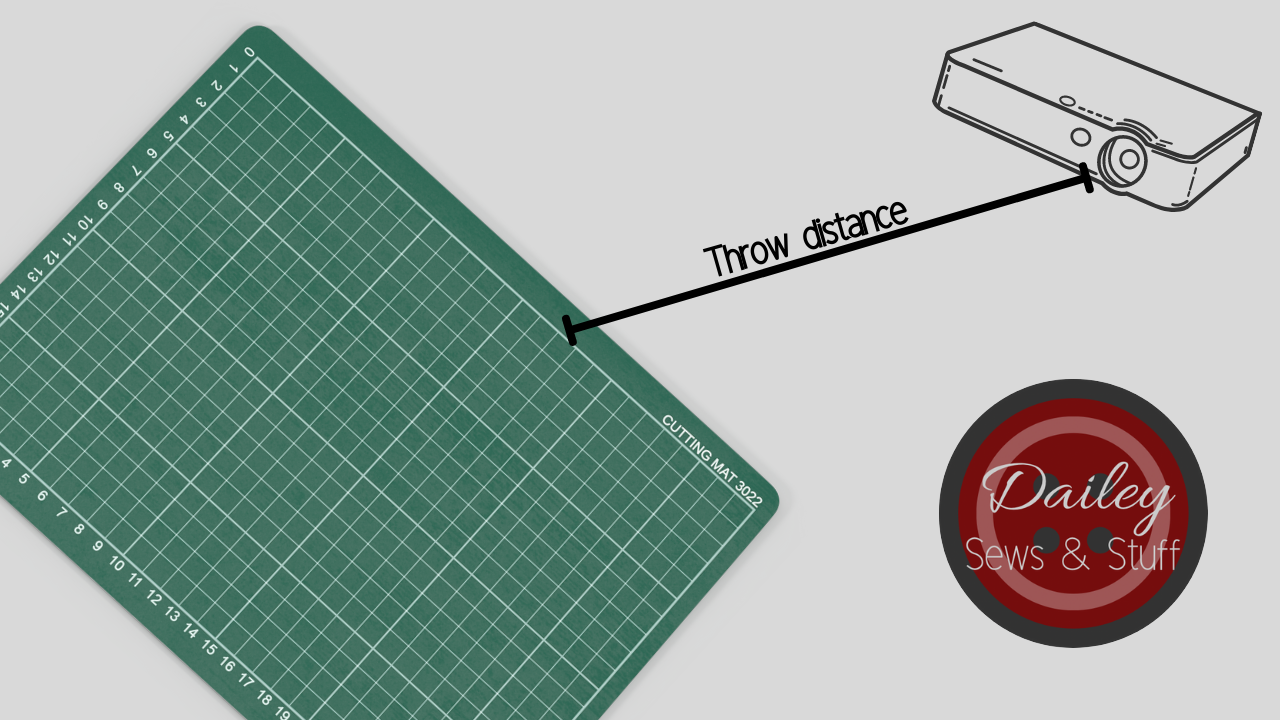
We have three basic categories of projectors. These are not “projectors for sewing” terms as much as general projector terms. There are Ultra Short Throws (USTs), which, as you can guess from the name, need very little distance for throwing a good sized projection. For our purposes, these are generally placed with the lens less than 2 feet from the cutting surface. There are also Short Throw projectors (ST), which need more space than USTs but less than usual to create a decent sized projection. For our purposes, these usually need between 2 and 4 feet to give us a great sized projection. And then there are Long Throw projectors, sometimes called Regular Throw projectors. As implied, these need a larger distance from lens to cutting surface in order to get a good sized, focused image. These generally need to be at least 6 feet from the cutting surface, which generally puts them out of range for our purposes. Once you take into account the foot or so of distance from your ceiling to the lens, in a typical American home, you’d have to be cutting on the floor to get the kind of minimum projection size that might work for us. (Side note: Many people have used mirrors to give them more distance between lens and cutting surface with a lot of math but a lot of success!) But a Long Throw just isn’t really ideal for our purposes.
However, a subset of projectors kind of walks the line between Short Throw and Long Throw that do often work for our purposes! These have been termed several things in the Projectors for Sewing group but, personally, I’ve settled on calling them the “Amazon Projectors”. Since usually these projectors are bought from Amazon, the name has seemed most appropriate to me. These projectors do often need at least 5 feet from lens to cutting surface and they tend to be much smaller (hence the other most common term, “mini projectors”) so the distance between the ceiling and the lens is less. With 8 foot ceilings and less than a foot eaten up by the size of the projector, you may just get a low table in. You can also compromise with a taller table and smaller projection size. Or maybe cut on the floor. Or you may have a room with taller than average ceilings, giving you even more options.
Why might you want an Amazon projector?
Newness, Returnability, etc.
Ultra Short Throws and Short Throws are very expensive new so are typically bought used for our purposes. While most of us have had very good experiences buying used, and eBay and other places do have buyer protection policies in place, not everyone is comfortable buying a used electronic. Buying new, usually from Amazon, makes some people more comfortable with buying an electronic, because returning it is usually much simpler. In addition, someone not sure if projector sewing is right for them might really appreciate the no-questions return policy Amazon generally has. It’s also much easier to go on Amazon and buy something right this second than to watch eBay to find a good deal on a used projector.
Weight and Size
Because Amazon projectors are quite small and very lightweight, they lend themselves very well to portable set ups or mounting in unconventional ways and locations. See my previous post on The Trouble with Mounts for a few ideas about unconventional mounts. The group Projectors for sewing is absolutely invaluable on this topic!
Mount and Forget-ableness
If you’re not looking for a portable set up, mounting an Amazon projector to the ceiling can be a really great way to mount the projector and just forget about it. You don’t lose any ability to walk around your cutting table. It’s up out of the way and out of sight until you need it.
For that matter, we have a Projectors for sewing member who purpose-makes mounts for Amazon projectors! Basic Niche is a great, cost effective option for getting your Amazon projector mounted easily, correctly, and without having to force a mount to work in a way it’s just not designed to work.
Wireless connections
While we can add devices to Short and Ultra Short Throws, some Amazon projectors come ready to connect wirelessly to your computer, phone, or tablet. If you’re working from a mobile device, this may be the easiest connection for you.
It can’t all be good…
You’re right. There are some absolute cons when it comes to Amazon projectors.
If sustainability is important to you, you’re buying a new product that won’t biodegrade well when you could be giving new life to an old projector.
Connecting wirelessly can reduce the size of your projection.
Often, Amazon projectors do not have the lumens to work well in bright environments.
You canNOT just buy any old projector on Amazon. You have to buy one with the proper resolution, which can be difficult information to find. The group Projectors for sewing is, once again, invaluable for listing known working and not working models.
You must mount these, unlike USTs. Mounting them will mean dealing with cords from your ceiling or wall.
These are often off-brand or no-name companies that do not have support after you purchase. Manuals as well as replacement parts are difficult to impossible to find online.
What about cost?
The costs are pretty much a wash, in my opinion.
You can find Amazon projectors from $50ish up to $150ish. Mounts range from $10 up to $50.
Short Throws used on eBay can be found for as little as $50 but are often closer to $100. They require mounts that can range from $15 on up. Watch carefully for shipping costs.
Ultra Short Throws generally cost at least $75 and don’t necessarily need a mount. Watch for shipping costs.
Amazon projectors aren’t necessarily the cheapest, but they certainly can be. The used market for STs and USTs can be unpredictable and costs have seemed to rise since projector sewing became more popular. However, there are still good deals to be had if you decide one of the STs or USTs is the right projector for you.
I’ve decided to go for an Amazon projector…now what?
Check the group Projectors for sewing to figure out exactly which one to buy. There are a couple posts saved in the announcements to check out that will help you buy one of the ones we know works well. Add that one to your cart.
Determine how you’ll connect to your computer or mobile device.
If you’re choosing a corded connection, determine what cord you’ll need. Buy one of an appropriate length to reach from projector to computer (often one comes in the package but it’s often too short, 10 foot, 15 foot, 25 foot). Make sure both the projector and computer can use that cord. If not, buy whatever converter you may need if you’re changing from one port to another. The most likely cord will be HDMI. Your computer should have that or a VGA (HDMI to VGA converter). Your mobile device may have a converter (lightning port, USB C) available.
If you’re choosing a wireless connection and the projector comes wifi ready, you’re all set! If you’re choosing wireless and need to purchase something like a Chromecast, add that to your cart as well.
Choose a mount and buy that, too, if necessary. I won’t list all of the possible options here but I’ll link again to the Basic Niche mounts because these are hands down the best choice if you’re mounting to the ceiling. For temporary set ups or the more creative ones, more power to you! But I can’t list every possible combination of what you may need. This is where the Projectors for sewing group or my own group Dailey Sews & Stuff Friends can really help you out!
Start looking through the calibration information found in Sasha’s guide here and definitely download the calibration grid she made (Imperial, Metric).
Open your stuff as soon as it comes and get to testing and calibrating!
Step 1: Open the box!
Don’t wait around forever with the projector staring at you, mocking you from it’s box. Open it up and test it out, even if you can’t mount it right away. You’ll want to make sure everything is working as it should, you’ve got all your connections correct, and you don’t need to buy anything else.
Step 2: Make sure it works
Point it at a cleared wall space, connect to the power, and turn it on! Make sure everything is working, get familiar with the projector, and play around with the settings. Don’t forget to reset everything once you’re done playing around!
Step 3: Connect to your computer
First, make sure all your connections are functioning. You can really just projector your desktop screen if you’d like but it may be super helpful to project the calibration grid at this point. I can’t specify exactly how to do this because it will depend on the connection you choose.
Step 4: Determine your offset and throw distance
This is also the time to see where the projection actually comes out of the lens. I’m stealing my own graphic from the Short Throw post here but this explains the basic concept of “offset.” Most Amazon projectors have little to no offset but you’ll want to be sure before mounting!

Since most often with an Amazon projector you’re planning to mount it “as high as possible,” place your projector the same distance from your wall that it will be from your cutting table when mounted. See how big a projection is possible and make sure you’re OK with that before you get to mounting. If it’s too small, see if you can find a solution such as a mirror set up, cutting on a lower table or the floor, coming to terms with fabric shifting, or maybe deciding to return and go with another projector. In some cases, you may be able to add some height to your throw (some have gone so far as to cut a hole in their ceiling to mount higher!
If you’re someone with vaulted ceilings or some other very tall ceiling, you may use this step instead to figure out exactly how far up you’ll need to mount your projector. Here’s another graphic stolen from the Short Throw post:
Step 5: Mount the projector
In order to make the next step easy, make sure your projector is pointed straight down at your mat when your mount it. It should be completely perpendicular to the mat. Any tilting here is likely to cause the calibration step to be more difficult than it has to be.
For this step, using the offset and throw distance information, figure out exactly where you’ll mount it. Since these projectors are fairly light, my suggestion is to attach it to the mount, hold it up to your ceiling, figure out exactly where you want it mounted, and mark the ceiling with a pencil.
Then remove the projector from the mount and secure the mount to the ceiling (see this post about secure mounting).
Reattach the projector, connect to power and your computer, and project your calibration grid! (This is found in Sasha’s guide here , Imperial grid, and Metric.)
The video features my using the Basic Niche mount and I really cannot recommend it enough. Most mounts we have used are just being made to work in a way they aren’t designed to work. Projector mounts are not made to project vertically down. That’s why a mount purpose built for projector sewing is so awesome!
Step 6: Calibrate
Everyone is terrified of this stage but you’re most likely making it to be way worse than it actually will be!
Before we even begin to mess with the computer, let’s make sure we’re set up for success. Is your mat totally flat? Is it level? Is the projector completely perpendicular to the mat? If you said “no” to any of these, take the time now to adjust those things. If all three are a “yes,” this step will be easy!
You’ll need the calibration grid (Imperial, Metric) to do this step. You may also want to look at Dan Oen’s graphic here about keystones so you can understand the relationship between the projector position and what the projected image will look like.

It can also help to have your projection Full Screen. First, follow these steps in this Quick Tip video to get your settings correct. Then, use Control L to make Adobe full screen.
The Goal
The ultimate goal of calibration is to have a square image (meaning the corners are 90 degrees) and to have the 16x25” box be within 1/4” all the way around. I go into calibration goals more in depth here.
The graphic above really shows the importance of a square image. And if the 16x24” box is within 1/4” all the way around, you’ll also have a correctly sized image.
So, connect to your computer, open the calibration grid (Imperial, Metric), and let’s tackle this step!
Part A: Keystones
Begin by putting your zoom at about 33% (use Control+Y if in full screen). This isn’t likely to be your final zoom, but it’s a good place to start. Compare the image on your mat to the keystone graphic above. Looking at the biggest box you can see in your projected image, does it look like the center image or one of the outer images?
If it looks like the center image, yay! Move on to the zoom.
If it looks like an outer image, adjust your mount to get your image square. The Basic Niche mounts come with leveling screws that allow you to minutely adjust each corner of your projector to get it square. Turn the screw tighter to raise the corner and make the image in that corresponding corner bigger or loosen it to lower the corner and make the corresponding corner smaller.
Part B: Zoom
Now, if you’re in full screen, use Control+Y to open the zoom window. adjust the zoom percentage up or down until the 1” boxes are fairly close to correct.
Then ignore all of the small boxes and look at the 16x24” box. Begin adjusting up or down until this box is as close to perfect as possible. You can use decimals to adjust by tenths (33.7 for instance) to get a more exact zoom fit. Once your 16x24” box is as perfect as you can get, then you can look at the smaller boxes. Like magic, they all should be lined up, too!
If you’re noticing any keystones at this point, go back and repeat the keystone steps and then the zoom steps until you’re confident your calibration is close enough to use!
Step 7: Test it out
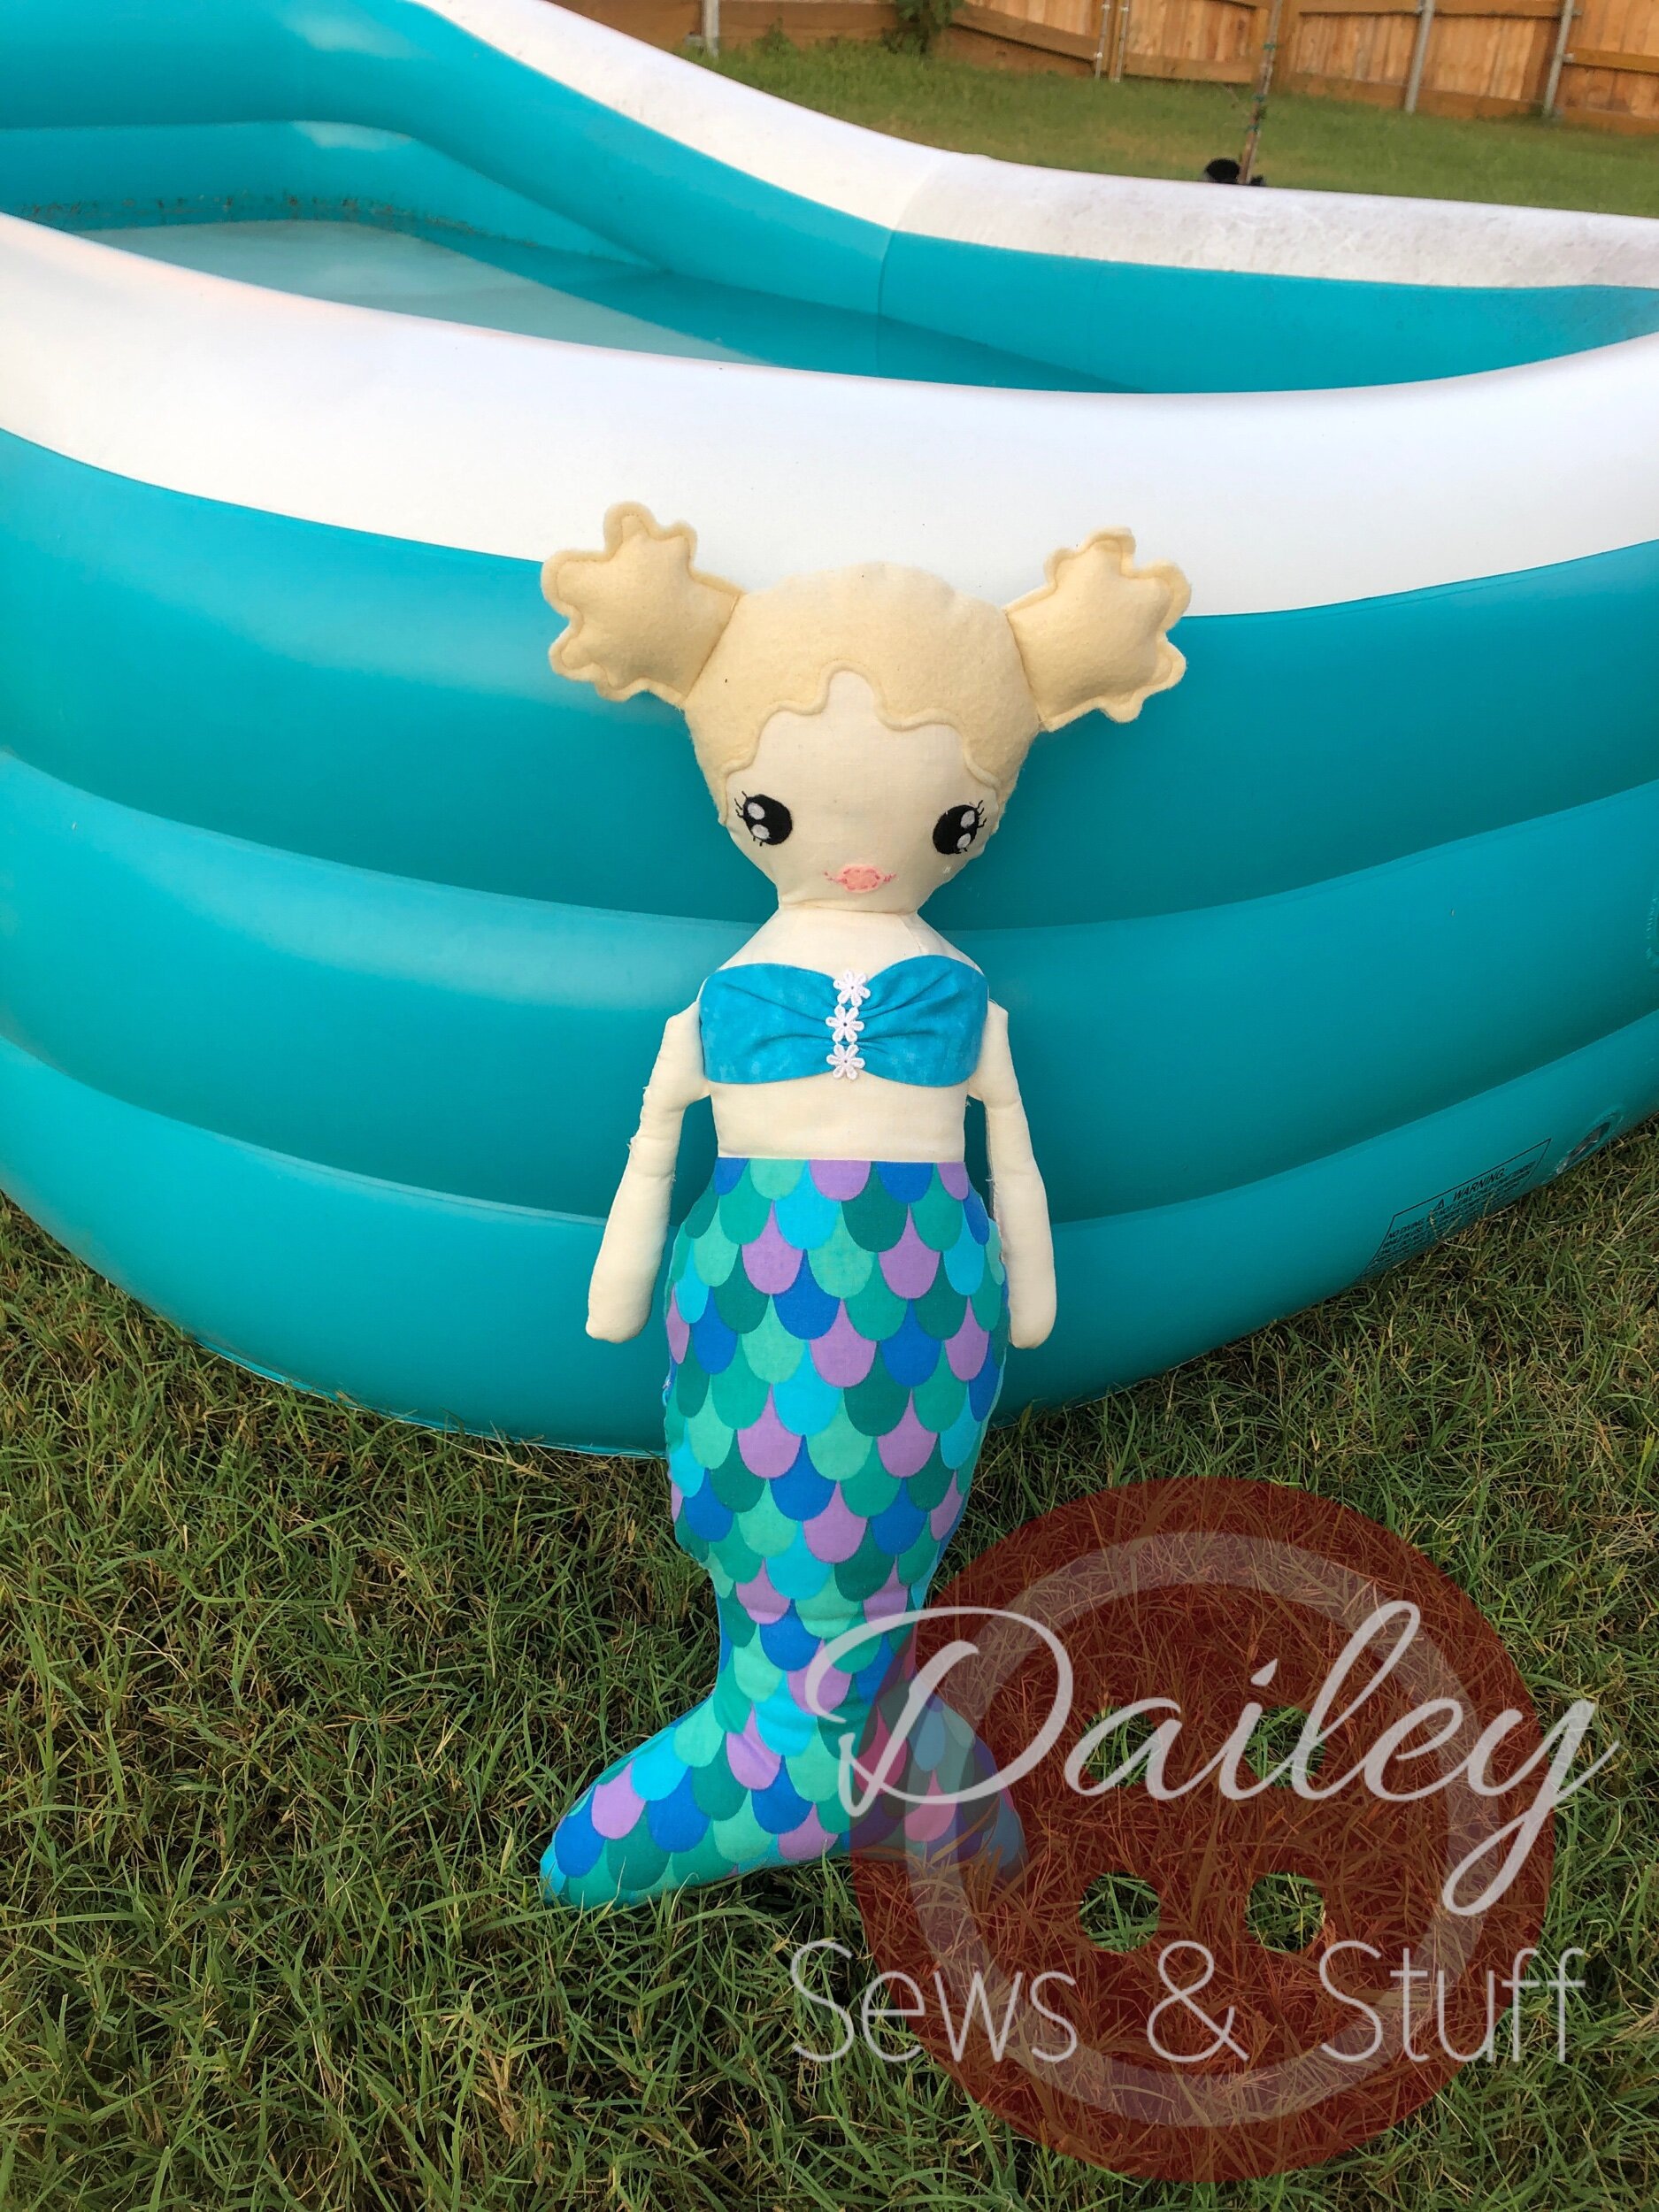
Last but certainly not least, let’s try this new toy out! Load a projector file pattern and start cutting! Louise at Rag Rascal is a new doll designer with excellent projector patterns if you’re looking for a project to try! Her FREE mermaid doll, Shelley, is soon to be released as of this writing and I really enjoyed making them for my girls!

Step 8: Learn more!
First, be sure you’ve joined the projectors for sewing group (want to see how it all began? Watch this!)
Wanting assurance that your calibration is good enough to use? Watch this video.
Want to learn how to use Adobe most effectively for projecting? Check out this playlist.
Want to know how to use PDF Stitcher to make your Letter or A4 patterns into a projector file? Or to enhance your A0 or projector files even more? Check out this playlist.
Want to digitally alter your patterns before cutting? Try this one.
Want some quick tips that will make projecting that much easier? Try this playlist.
New videos are being added to my channel so be sure to subscribe here.
You can also follow me on IG or Facebook and join my Facebook group!